
Hello!!
I’m so very excited to share the client condo makeover I’ve been working on – it really turned out lovely! As I said, this project expanded beyond the kitchen cabinets I was working on, to the bathroom vanities as well. And as I sit here thinking about it, it’s really a “working with what you have” type of makeover, thus the “Love the One You’re With” title. 🙂
Sure, we all drool over the perfect kitchen and bathroom, but realistically, it takes some serious bucks to make those dreams a reality. So, when you don’t have the Benjamins to create the Pinterest perfect spaces you want, what do you do? You love the one you’re with, right?
I think this condo makeover is proof positive that you don’t have to break the bank to make a space fresh and pretty.
I’m going to start with one of the bathrooms, as it turned out to be my favorite room out of all of them.
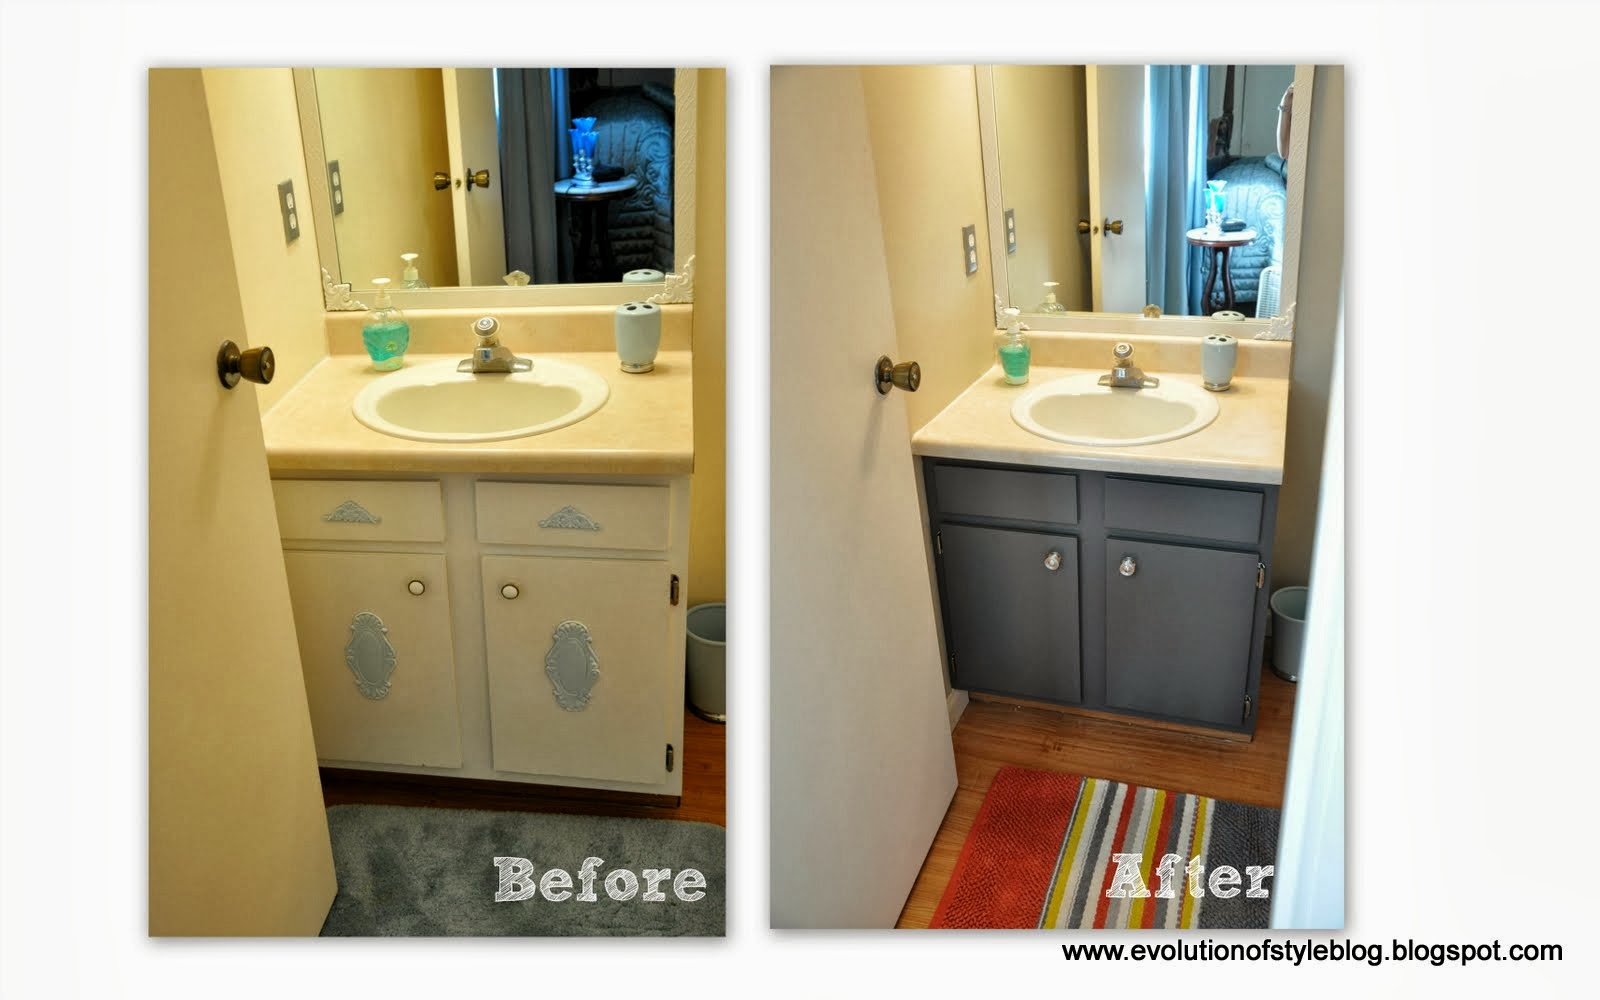
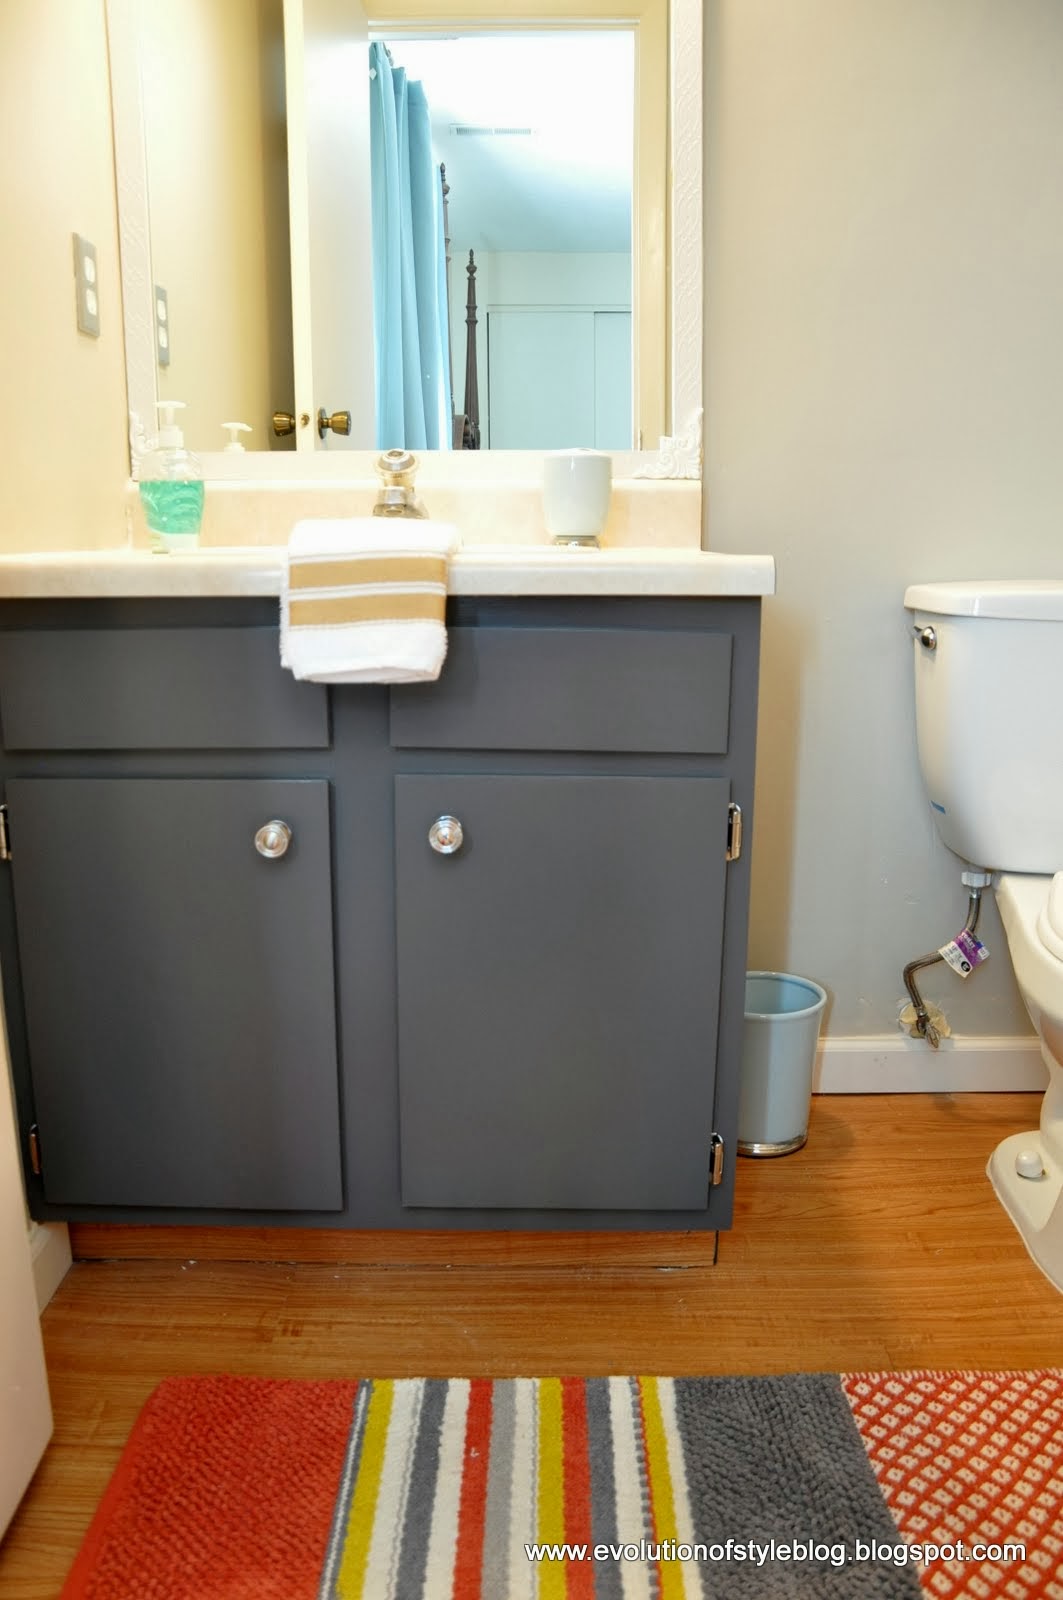
Ironically, I picked out the paint before I stumbled upon this perfectly coordinating rug. The cabinet paint color is “Gray” by Benjamin Moore. I have to give a big shout out to Cyndy at The Creativity Exchange, because she is such a great color resource! Her post about great gray cabinet colors was key in choosing this fab color. This gray does not disappoint! I already have plans for using this color somewhere in my home – it’s gorgeous.
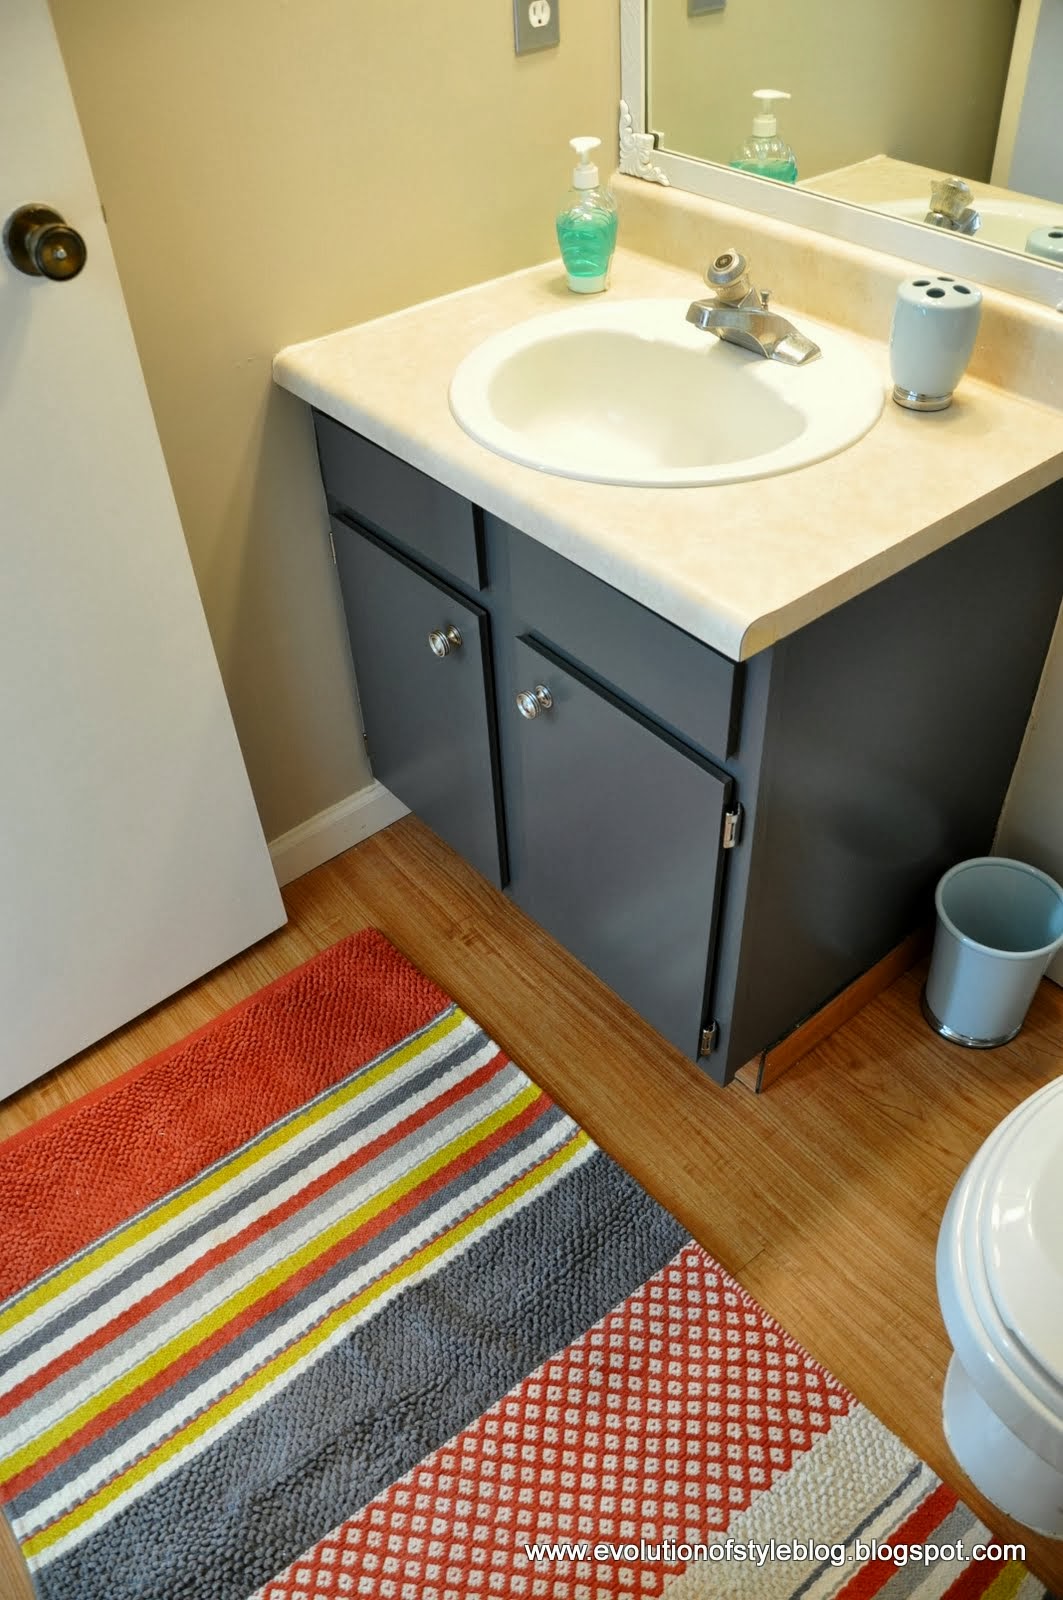
Did I mention I found the rug at Target on clearance? Ironically, I had actually bought it for myself a couple of months back, but had to return it because the bathroom door in my husband’s office was so low that the rug would get smushed every time you opened or closed it. It was a happy reunion to find it again and put it to use.
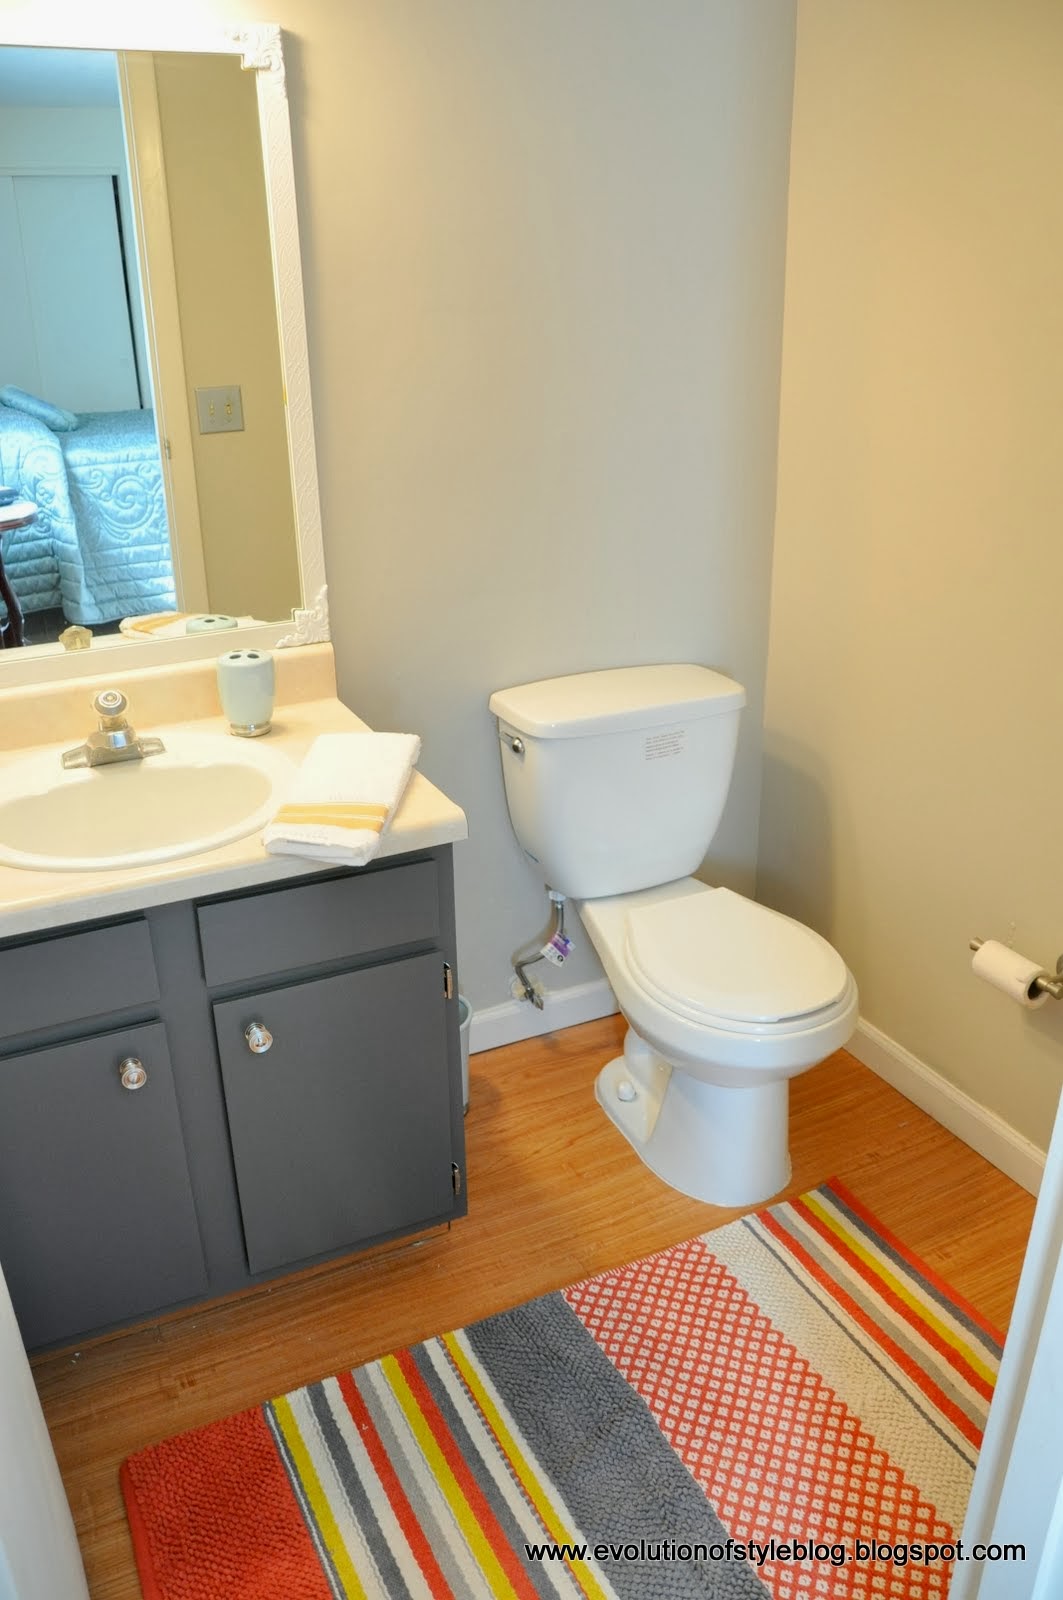
I couldn’t resist painting the walls in order to finish off the space. They’re painted in Revere Pewter by Benjamin Moore (leftover from the kitchen). And the cabinet pulls are from Lowe’s.
So, let’s break it down:
Wall paint (leftover from kitchen), so I’m not really counting this as an extra cost
Cabinet paint – Gray, by Benjamin Moore (Advance) – $45
Rug – Target – $14.98
Towel – Target – $9.99 for a pack of four, originally purchased for the kitchen, which again, I don’t really count as incremental cost for this space (so I’m not counting it).
Cabinet hardware – Lowes – $7.94
Total: $67.92

It’s just a matter of putting in a little bit of elbow grease to freshen up a space in your home. This bathroom just makes me happy now, compared to where it began.
Linking up:
My Uncommon Slice of Suburbia – Tuesday Treasures
Savvy Southern Style – Wow Us Wednesday
Thrifty Décor Chick – October Before and After Party
Remodelaholic – Remodelaholic’s Anonymous Party


8 Comments
Cassie @ Primitive & Proper
September 23, 2013 at 12:31 pmpaint is a powerful thing! love the new color!
A Vintage Vine
September 23, 2013 at 1:05 pmLove that rug! So funny how it works perfect with the paint, which is a great color, very versatile…..in the future she could just change the rug for a whole new look….Great job on your design work!
Lisa @ Shine Your Light
September 23, 2013 at 9:49 pmMuch better! So updated with the power of paint!
Malcolm Kay
September 25, 2013 at 6:41 amI really loved your blog, but it appears that you have put a lot more work into it. Your bathroom really looking good in Patio Pavers .I hope that it eventually proves easier for you the reader to follow the postings and comments.
Ryann Hoyer
September 25, 2013 at 2:20 pmYou're pretty good at playing with colors, Jenny! By adding a colorful rug and repainting the cabinet, you've made a wonderful bathroom. This is proof that renovating doesn't have to be expensive all the time. What's important is that you've incorporated your style at the room. Thanks for sharing! 🙂
#YanceyCompany.com
Suzanne Dyck
October 14, 2013 at 8:29 pmI don't think this makeover would have worked this well if you didn't paint the walls with this shade. Being a professional in this field, I’m sure you know the importance of a complementing background. Great job! Suzanne@CertaPro Painters
Kim Stroup
March 28, 2016 at 3:03 pmHi Jenny,
Curious to know how you removed the embellishments from the vanity. I had added one to my daughter’s old solid wood IKEA dresser with wood glue and wanted to remove it when I repurposed it for my new baby grandson’s changing table. I tried to slip a putty knife under it, but was afraid I would tear the wood up underneath, so I left it. It works ok for now, but in the future I may want to remove it.
This is also the project I told you about in another post (Painter in My Pocket) where I ended up using (lots of) cans of spray paint because I couldn’t get the viscosity of my paint correct for my HVLP. I have since done a lot of research on sprayers (including yours, drool) and found out some interesting info. 1) Graco does not sell my model any longer 2) latex paint is on the high end of the spectrum for needing more power to push the paint through (forget the terminology) 3) there are a lot of new choices out there for sprayers and one of the most important things I will look for is ‘no need to thin paint’, which in turn will mean it has the power to push latex.
Looking forward to more installments in your Painter in My Pocket series, Kim
Jenny
March 28, 2016 at 6:52 pmIf memory serves, I was able to pop off the wood embellishments pretty easily with a putty knife. A great way to change things up and give it a fresh look!