
I wrote this “How to Paint Your Kitchen Cabinets (like a pro)” tutorial after painting my own kitchen cabinets almost 10 years ago. I have since quit my corporate job and started a small business painting cabinets and furniture, and have painted hundreds of kitchens, so this tutorial has become somewhat of a living document, based upon loads of research, experience and practice. I try to keep it updated with new products, tips and techniques, since I am continuously learning as I continue to grow my business and hone my own skills.
If you’re interested in reading about this project in process, you can read about it here and here. You can see my kitchen reveal here and the full evolution of the kitchen in photos here.
If you’re interested in ONLINE VIDEO TRAINING, and want to take things at your own pace, with a pro at your side through the process, click here.
If you’re in the Dayton/Cincinnati area, and want a quote for painting your cabinets, contact me.
********************************************************
Do you want to know how to paint oak cabinets?
More tips and tricks for tackling oak cabinets, including how to hide the grain, and some great go-to paint colors! Check out my post on how to paint oak cabinets for all of the details! Here are some of my favorite oak cabinet transformations from my portfolio:
- A builder grade kitchen turned custom
- Painted cabinets in an oak kitchen redo
- A client kitchen redo with an island reinvented
Do you have questions about prep?
Are you concerned about prepping your cabinets? Are they unfinished or previously painted? Check out this post on 5 Cabinet Painting Problems Solved.
Are you looking for the right tools to get the job done?
The more projects I do, the more tools and products I find. Here is my latest list of great tools to get the job done more efficiently and with a great finished look. Five Favorite Tools for Painting Cabinets and Furniture.
Do you have questions about using a paint sprayer to paint your cabinets?
Check out this post from my “Painter in Your Pocket” series as your guide.
*********************************************************
*This post contains affiliate links*
I apologize in advance on the length of this post, but I wanted to make sure I covered everything in one fell swoop. That said, I’m sure I forgot something, so feel free to ask any questions you may have.
I have put together a FREE COMPREHENSIVE SUPPLY LIST for you, and you can link to it here, click on the image below, or you can shop here for everything you need.
I did a great deal of planning and research before tackling this project, and continue to develop and learn now that I’m painting cabinets for clients, so I hope you’re able to learn from my obsessive-compulsive tendencies.
First things first. These are some of the most important things to know and consider before taking on a project like this.
1. Unless you have hired help (or a household that will take on all of your responsibilities while working on this), the rest of your house will suffer during this process.
Ok, maybe I’m being a bit dramatic here, but this was my personal experience. However, I should preface this by also mentioning that I worked full-time (outside of the home), when I painted my cabinets, and spent just about every non-working moment on this project in order to get it done. So, for me, this meant that my typical laundry “pile” turned into a laundry “mountain”. The entire house was a wreck, and the hubby and kids had to fend for themselves for the 2-3 weeks that I spent focused on painting. My kids may or may not have eaten cereal out of the box for dinner several nights in a row.
2. Invest in help from the experts.
I had three big questions in researching this project:
- How do I best prep my cabinets for painting?
- What kind of primer should I use when painting my cabinets?
- What kind of paint do I use to paint my cabinets?
- How do a I choose a paint color?
I ended up finding some cabinet door samples that I liked, and had them color matched for my kitchen.
Here are the samples I used and had color matched for the island and the kitchen cabinets.
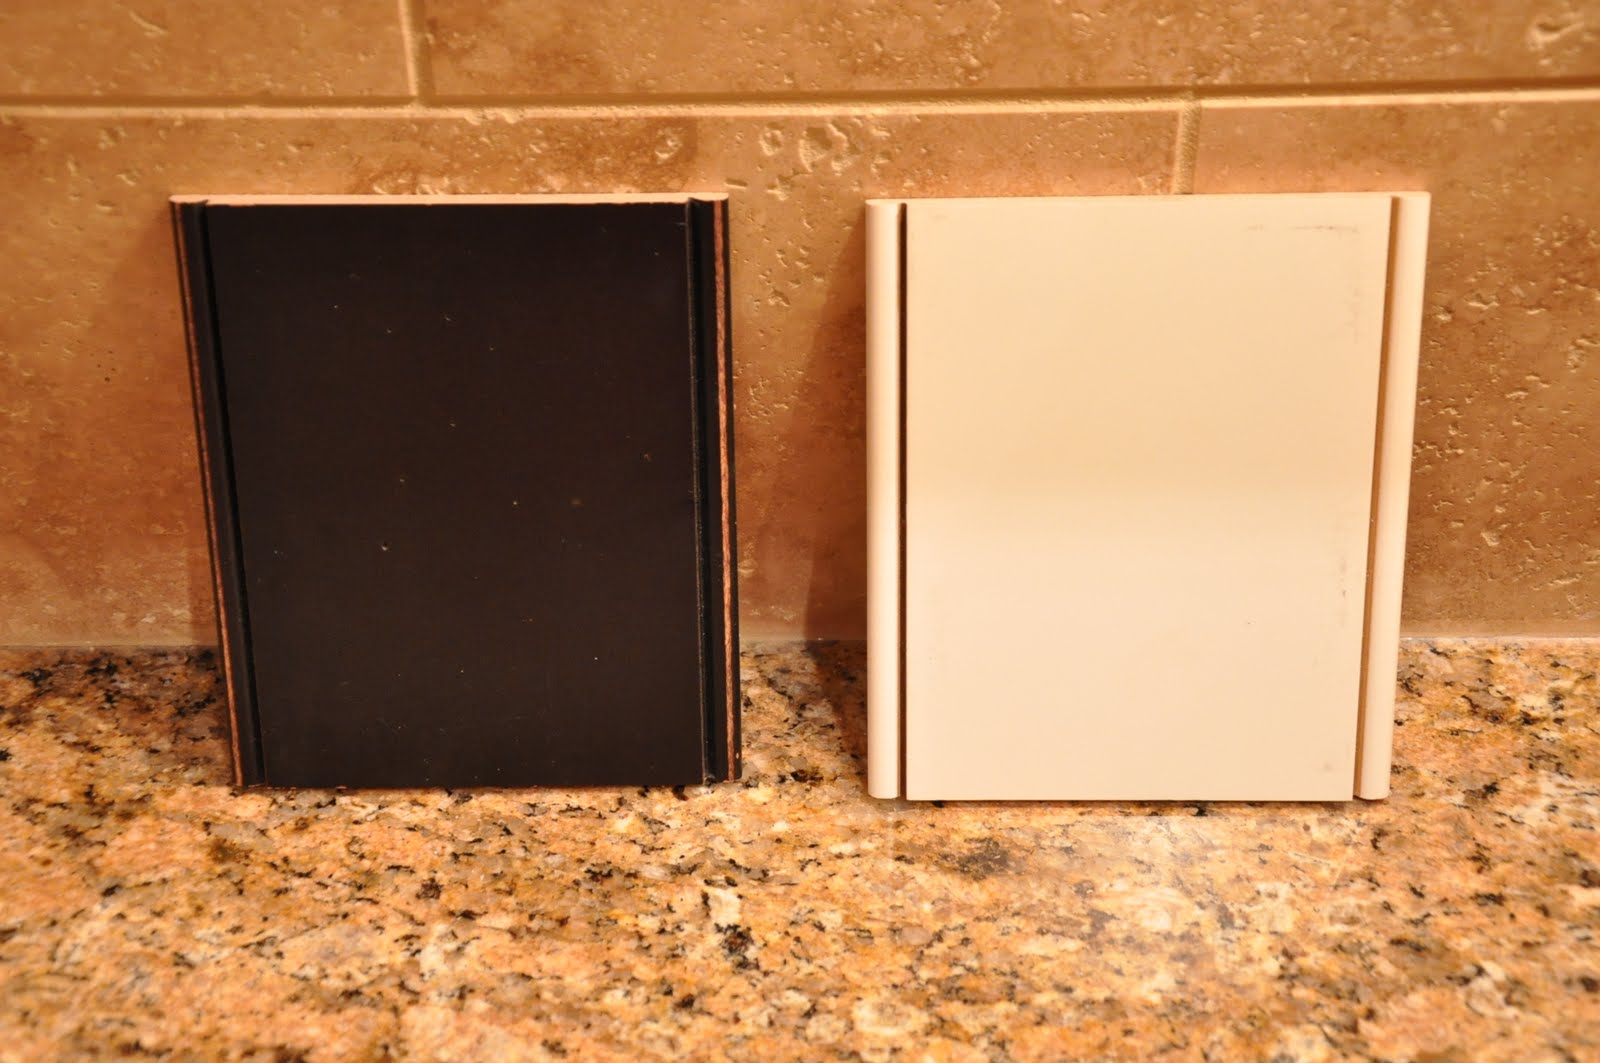
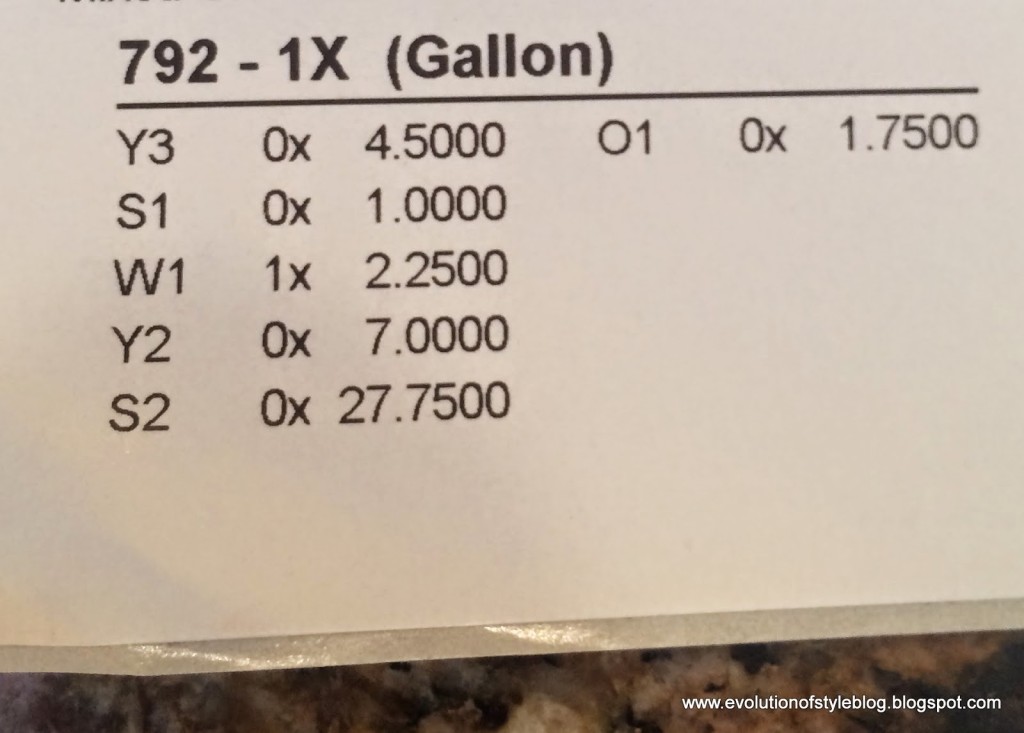
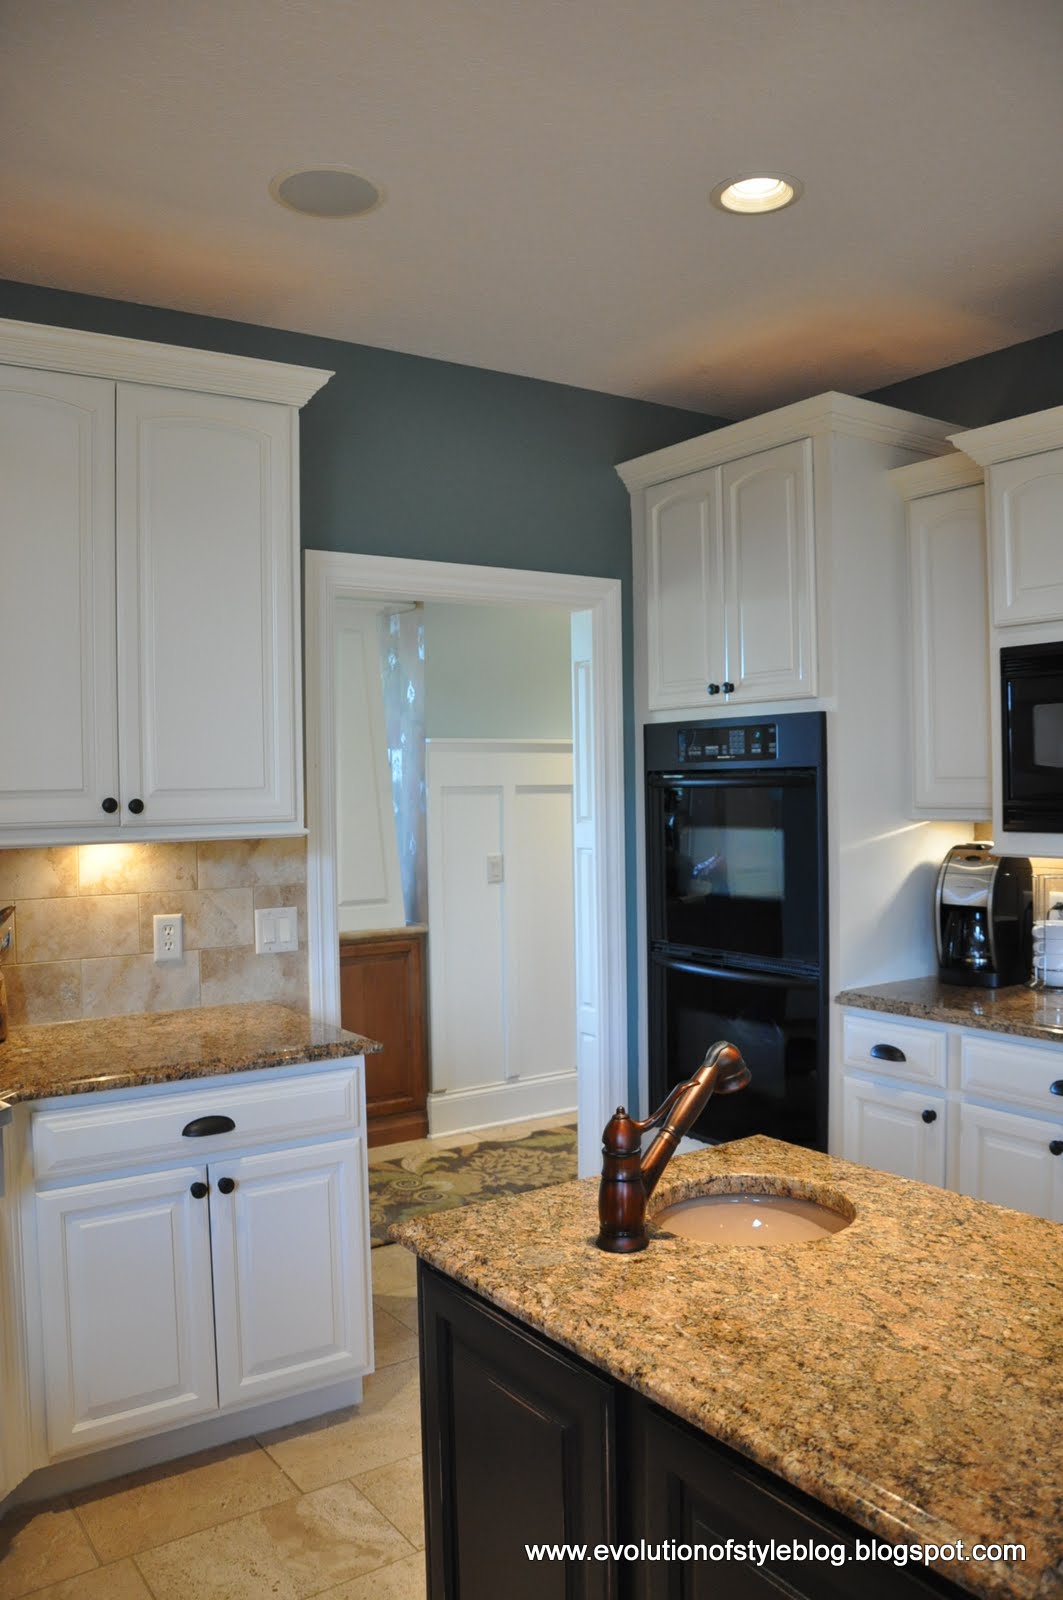
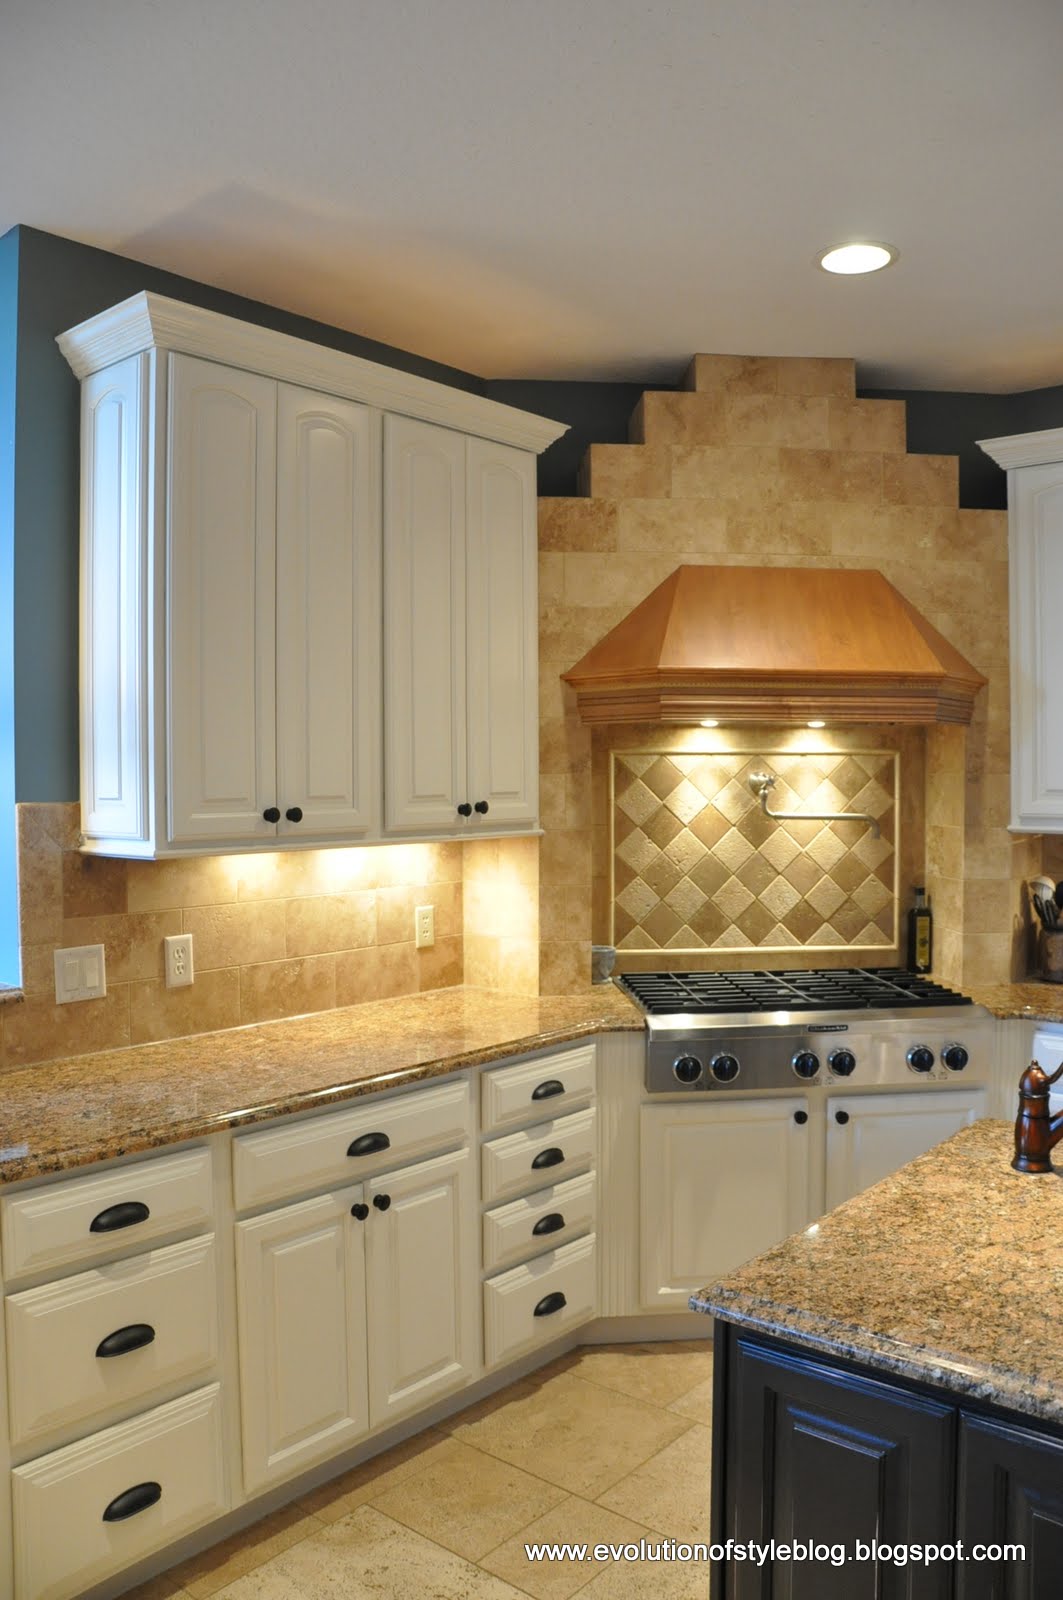
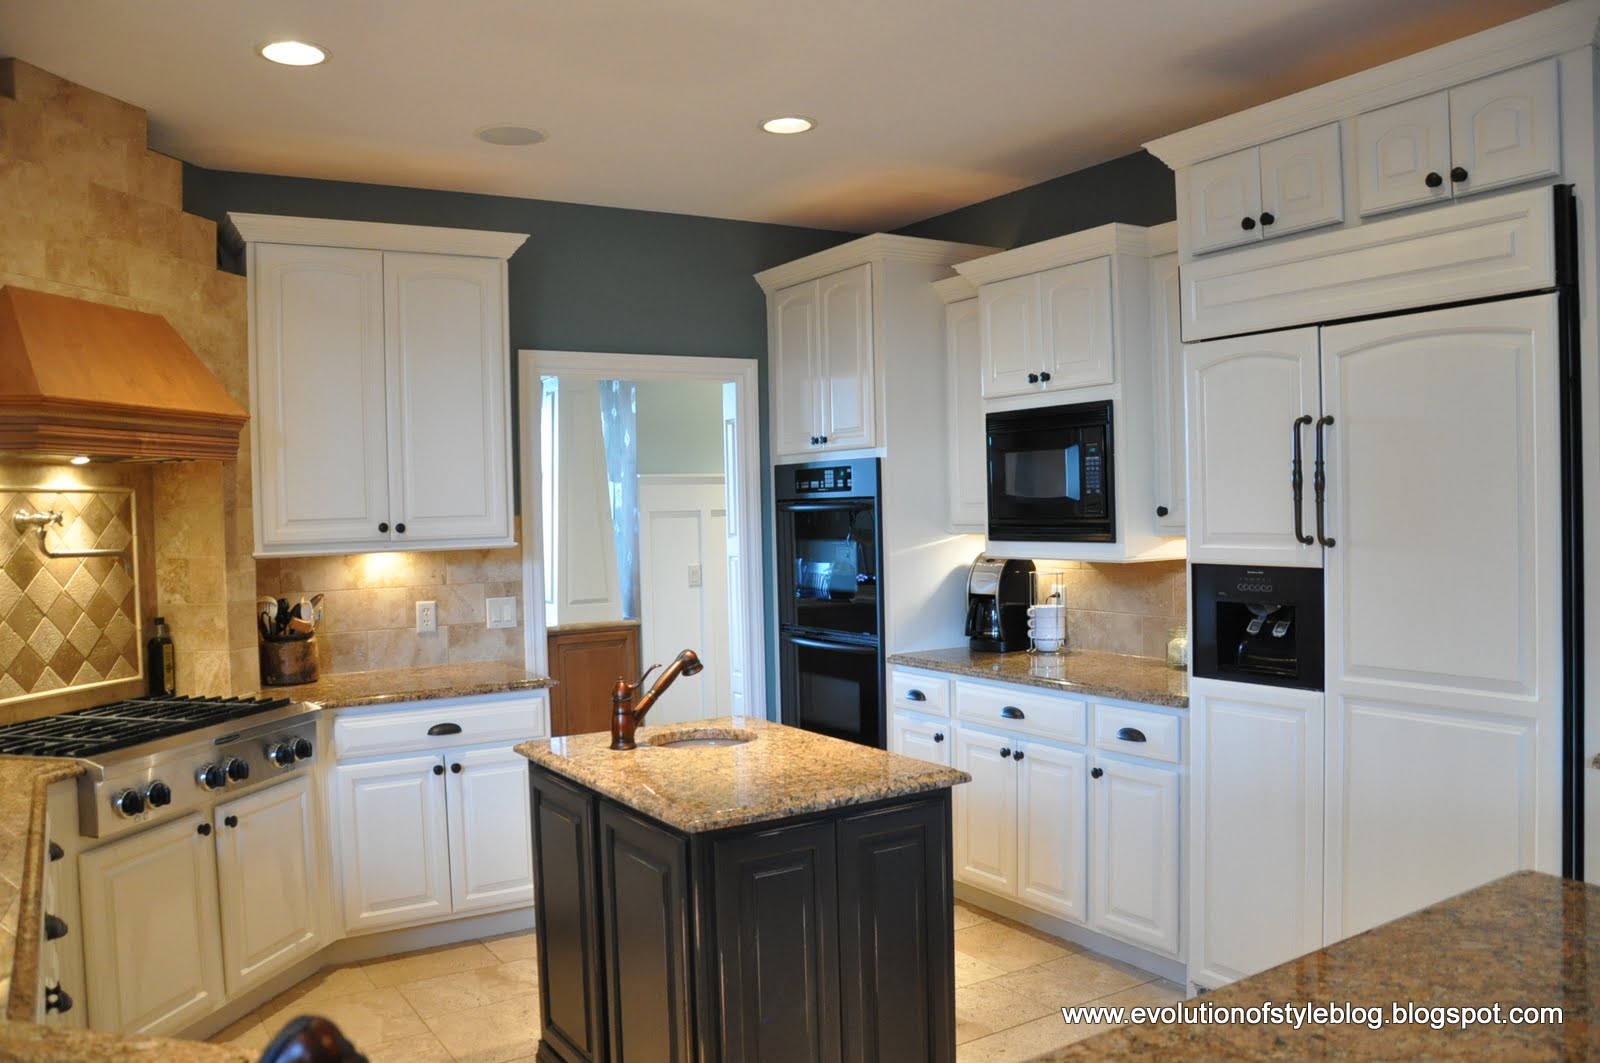
What color did you paint your cabinets?
I have gotten a lot of questions about the color that I used on my cabinets. As I mention above, I had the cabinet samples above color matched for my kitchen paint colors. Below is the formula for the white I used on a bulk of my cabinets. This is a formula for Benjamin Moore paint, and I used their Advance paint product for my cabinets. Don’t use this formula for other paint manufacturers.
If you are looking for help choosing a white paint color for your cabinets, check out my favorite white cabinet colors here.
3. What is the best method to get the job done and make it look professional?
I know there are a lot of opinions and methods out there, but after painting the kitchen island, (using a sprayer for the doors, and hand painting the frame), I knew that painting the cabinets with a brush would not produce the look that I wanted, since I have a lot of raised panels and detail work.
However, if you don’t have a lot of raised panels on your end cabinets, I say paint your frames with a brush/roller. I still recommend spraying your doors and drawers, but there is some wiggle room with the frames. Just make sure you use a high quality brush like this one, and mohair rollers. Using high quality tools will give you a high quality finish and help to minimize brush strokes.


The clincher for me was seeing a video of someone painting kitchen cabinets with an HVLP sprayer. HVLP = High Volume, Low Pressure. It is a dream for a project like this since you have so much control over the spray in terms of volume and area. You can dial it down to a targeted, narrow spray for corners and small areas, or you can open it up to give you a much broader spray as well.
However, these paint guns can be expensive, since they hook up to a turbine (which I now have and use for client kitchens). But, I did some (more) research, and found one that I could hook up to our air compressor (ours is a 6 gallon 150psi, which was more than enough power) for a fraction of the cost. Enter the Wagner HVLP Conversion Gun. This is the gun that I used when I painted my own cabinets, and the results were nothing less than flawless.

If you don’t have an air compressor, you can go with a gun like this Graco TrueCoat Plus II paint sprayer. Thrifty Decor Chick used this to finish off her cabinets after my house call when I had the opportunity to walk her through the process. She loved this sprayer, and if you saw her kitchen, you’ll see that it got the job done beautifully.

So, let’s get to the details. How did I prep my cabinets? What type of paint did I use? What finish did I choose?
Paint Prep
Before we dive in too deeply on paint prep, let me first say that this is not a step where you want to take short cuts. I know a lot of paints claim that they are “no prep”, but if you’re investing the time to do this kind of DIY project, and you want a professional finish, you need to put in the work. I can’t tell you how many times I’ve cleaned cabinet doors and then sanded them, only to reveal all sorts of gunk that I never would have noticed otherwise. Since my cabinets didn’t have a glossy finish on the to begin with, I cleaned them Krud Kutter Gloss-Off, which is a great all-in-one cleaner AND deglosser and then gave them a light sanding. I have since invested in a nice orbital sander and dust extractor and use it for client jobs, but I will say that my light sanding has held up nicely in my own kitchen.
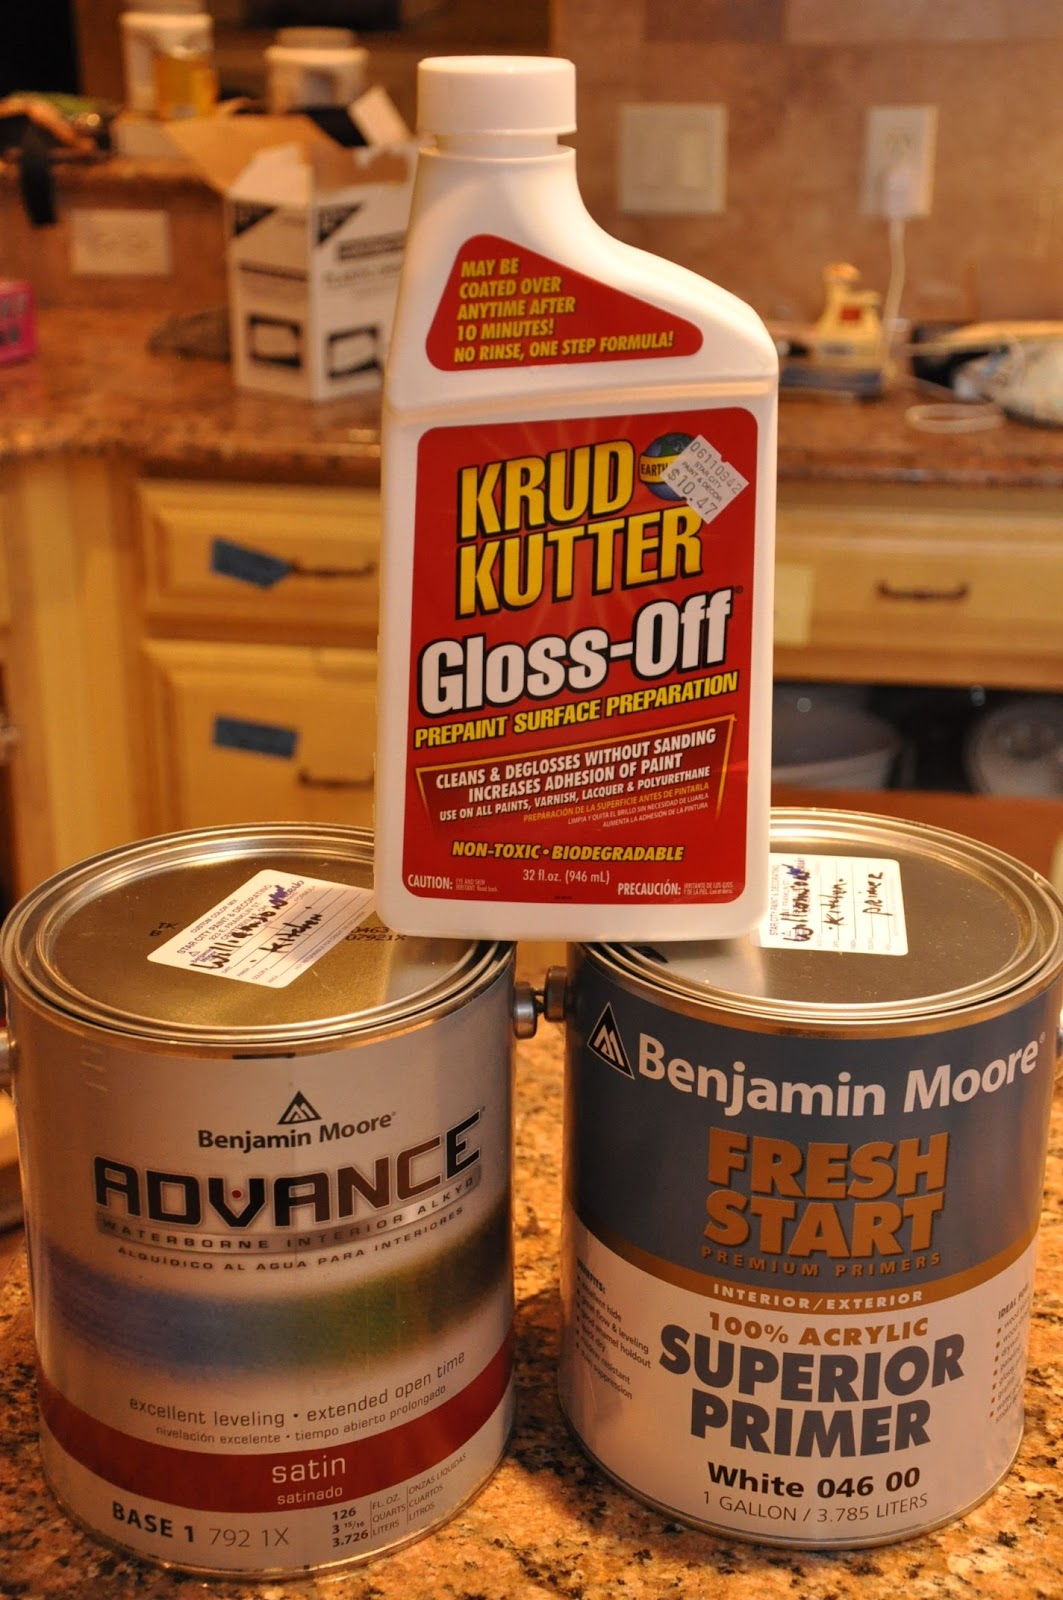
You can see the primer and paint that I used here as well. Benjamin Moore’s Fresh Start Primer and their fantastic Advance paint. Again, I’m going on the advice of the experts here (he recommended a different primer for glossy surfaces, but I can’t remember what). I cannot say enough good things about this Advance paint. Oh. my. goodness. The paint store guy/expert said, “It’s revolutionary.” He said that it’s basically an oil-based paint that acts like a latex (even though it is a latex paint). You get all of the good points of an oil-based paint, with none of the negative. It hardens like an oil, wears like an oil, but cleans up like a latex and it doesn’t smell like an oil! See? Revolutionary.
For a more detailed breakdown on prep, you can check out this post from my “Painter in Your Pocket” series that is exclusively dedicated to prep work.
I have experimented with a multitude of primers over the past few years, and while Fresh Start has held up nicely on my own cabinets, I am also a big fan of SealGrip by Porter Paints. It’s awesome for oak cabinets too, in that it keeps the oak grain from bleeding through the paint, and it’s water-based, which I love. Plus, it really holds up when cabinets need to be transported for clients. But as of lately, I have switched to using Zinsser BIN shellac-based primer. It sticks to EVERYTHING.
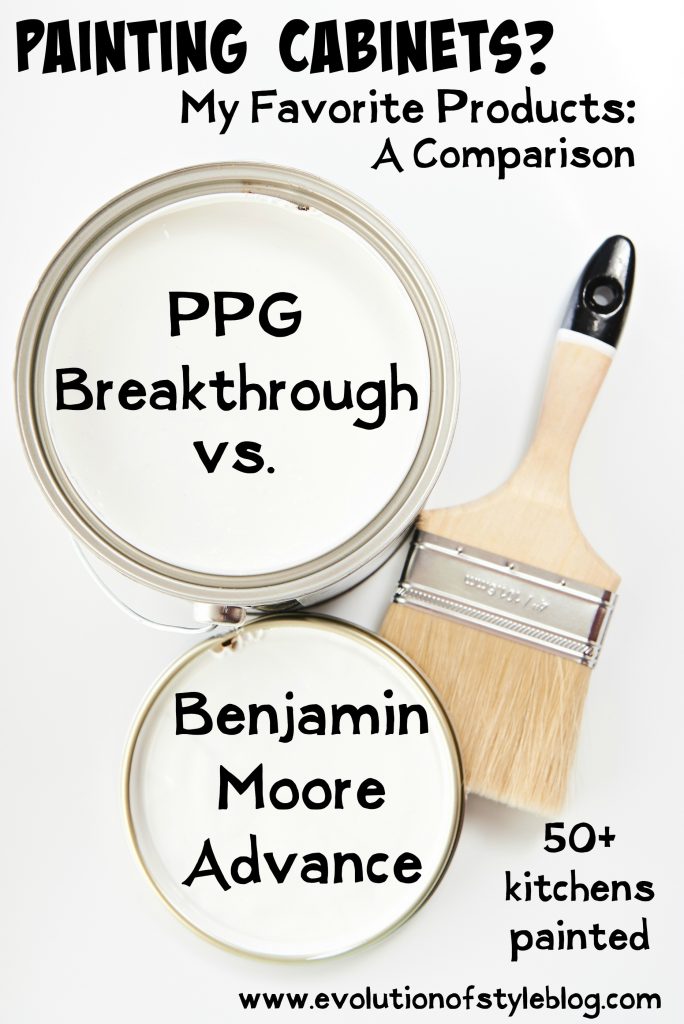
If you’d like to look at other paint options, I shared a comparison of two great products that I love. They’re both solid products, with pros and cons associated with each. It all depends upon your priorities and preferences.
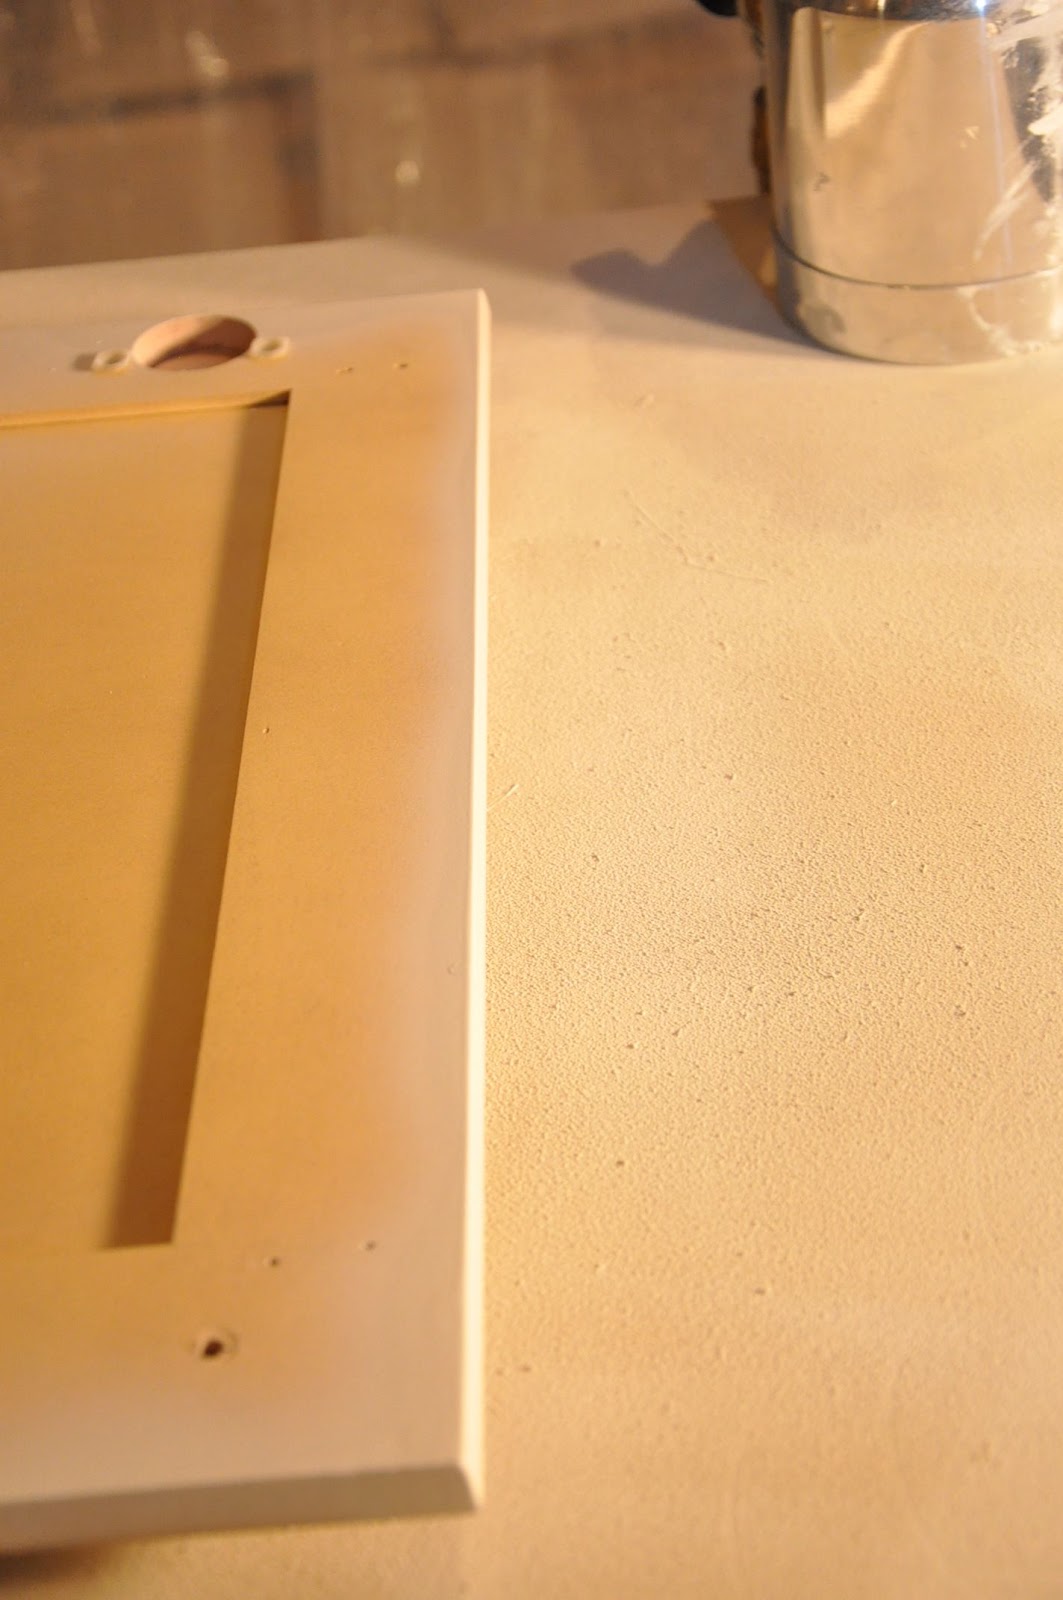
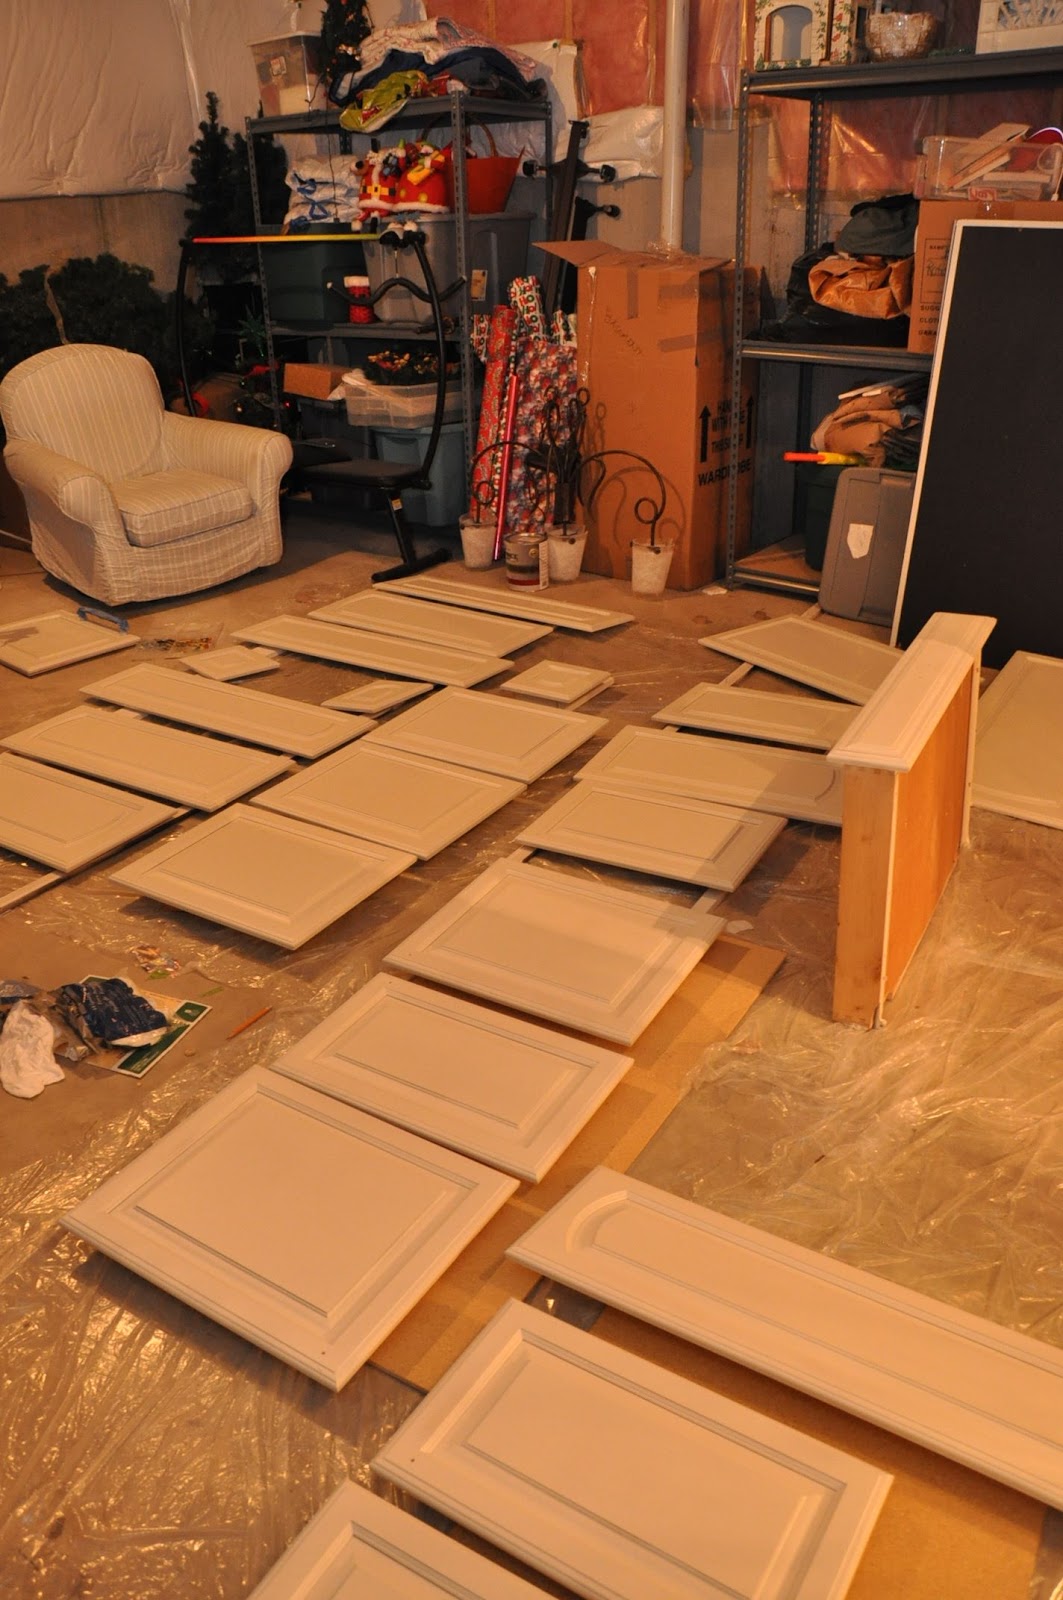
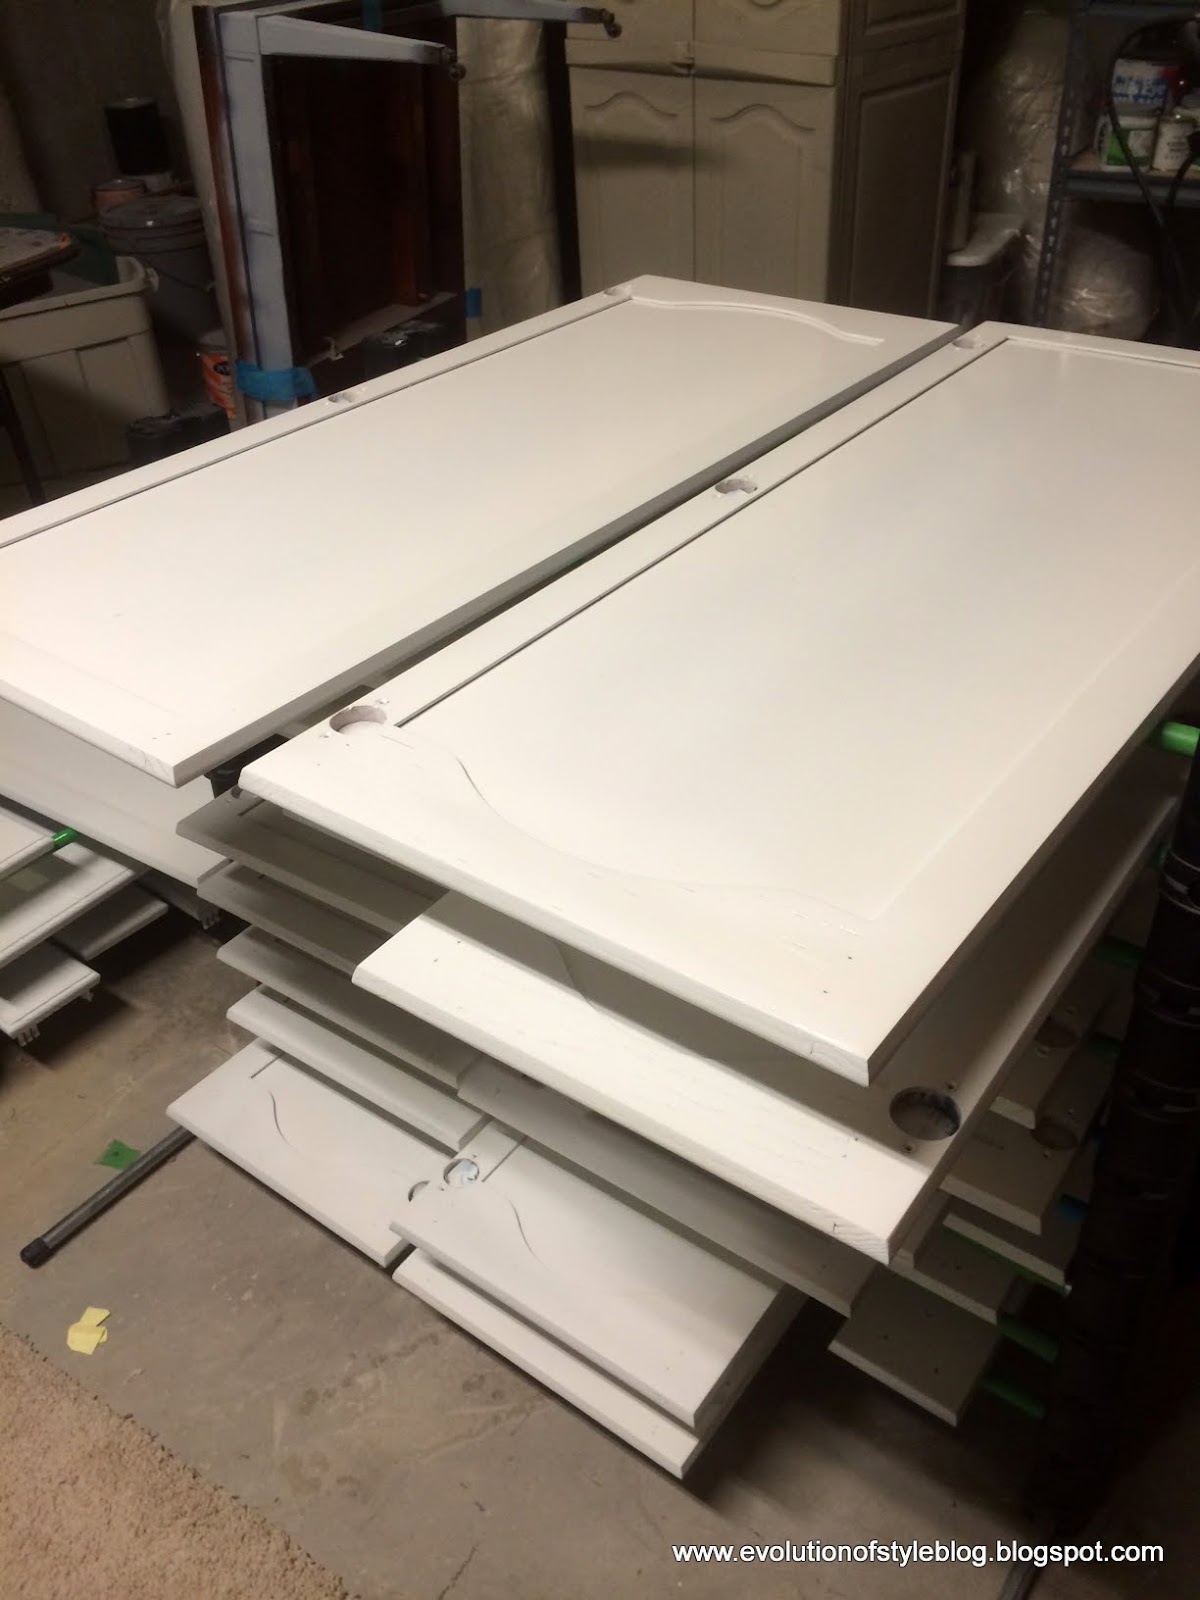
But, before you can get moving with your actual priming/painting, you need to remove your cabinet doors and drawers. I highly recommend putting together some sort of numbering system so that you don’t lose track of what goes where. While it all seems to make sense when you’re planning, trust me that you will be glad you did this when your paint-weary brain goes to put the doors and drawers back.
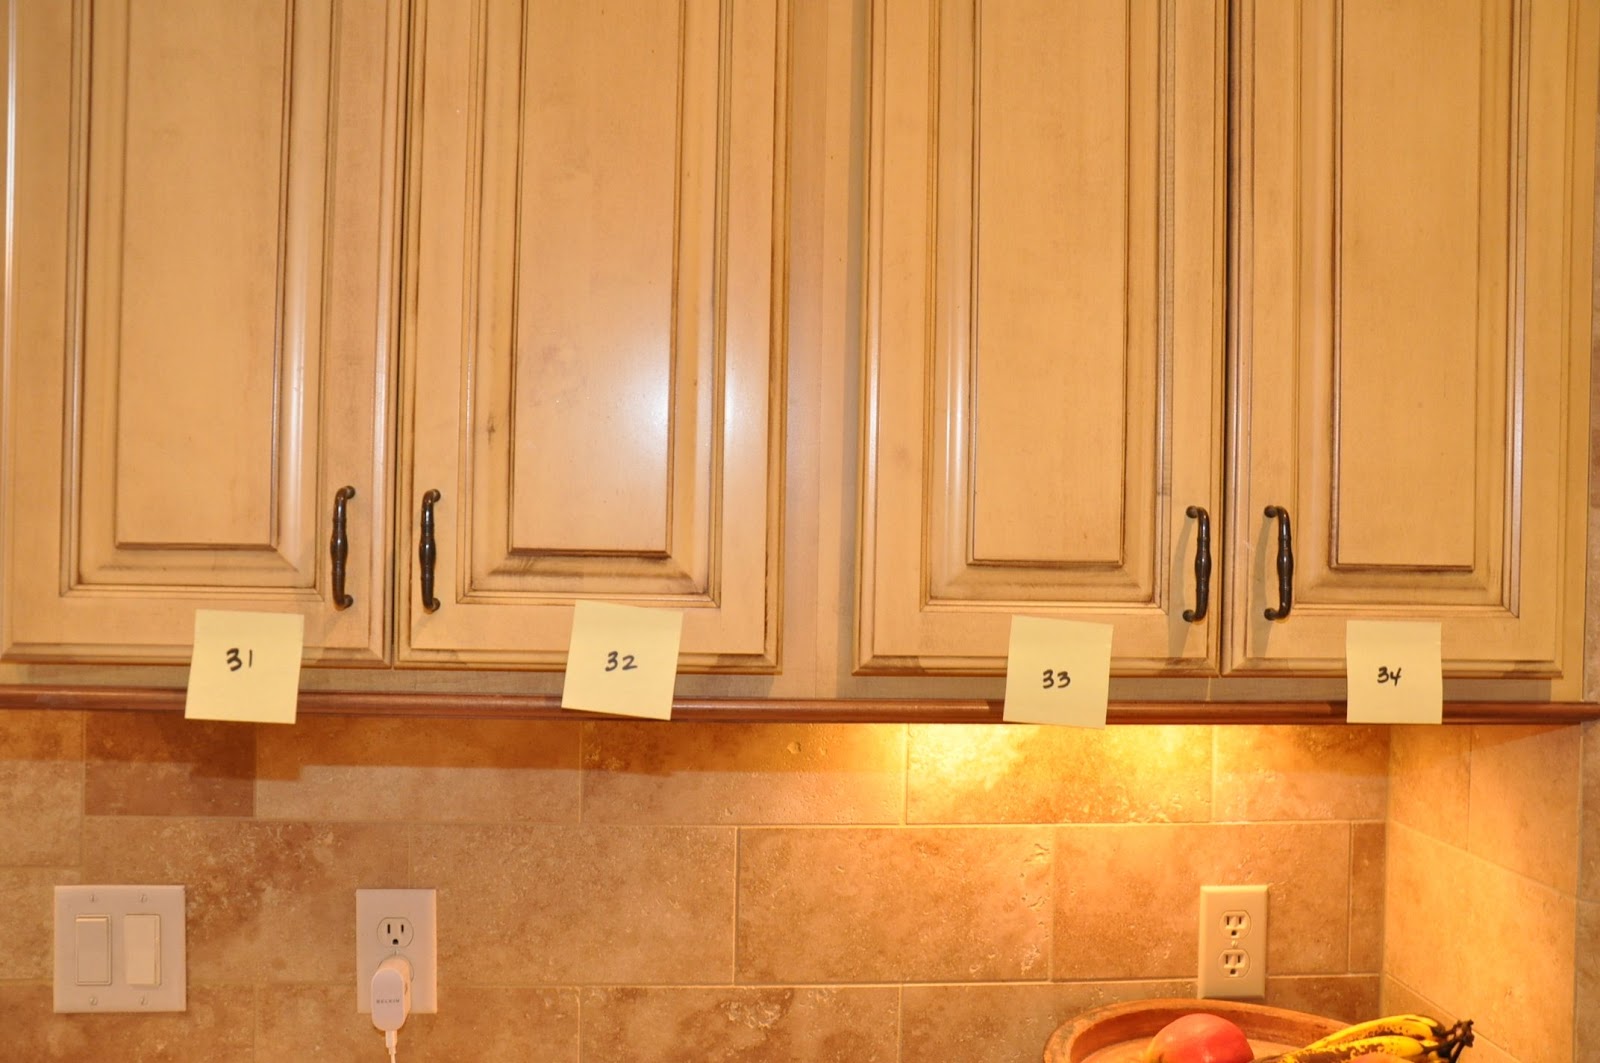
TIP: I started out my labeling like this, but the best way is to take a piece of painter’s tape and number your cabinet doors and the corresponding frame so that it’s easy to match them up when you reinstall. Put the hinges in a Ziplock bag, and store them in the corresponding cabinet/drawer space. Take the time to number your doors and drawers, because things can get ugly really fast when reinstalling your doors/drawers if you don’t.
Below, my cabinet coding translates to – Right of stove, cabinet #28, right bottom (RB). Believe me, when you’re exhausted and swimming in a Sea of Cabinets that need to be put back in their proper place, you’ll be thankful for this little extra help.
This is especially important if you currently don’t have knobs on your doors, and you’re planning on adding them. Label the door so that you know whether it’s a right or left sided cabinet so you make sure to drill your holes in the correct spot. Just trust me on this.

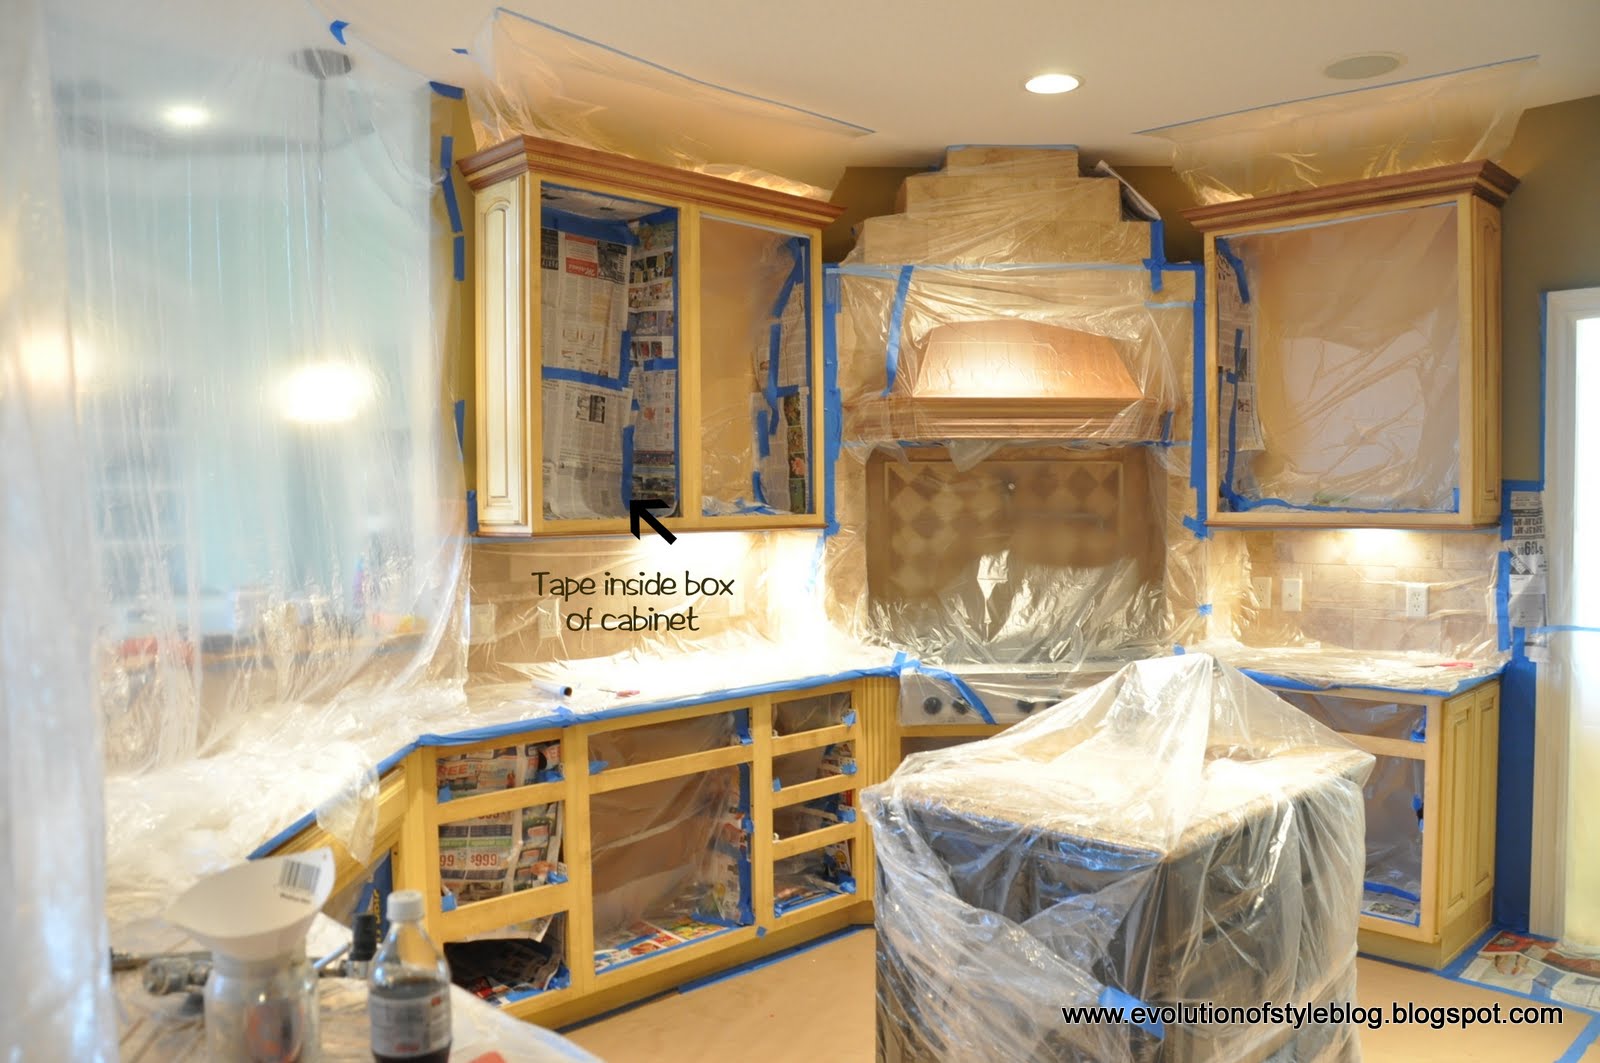
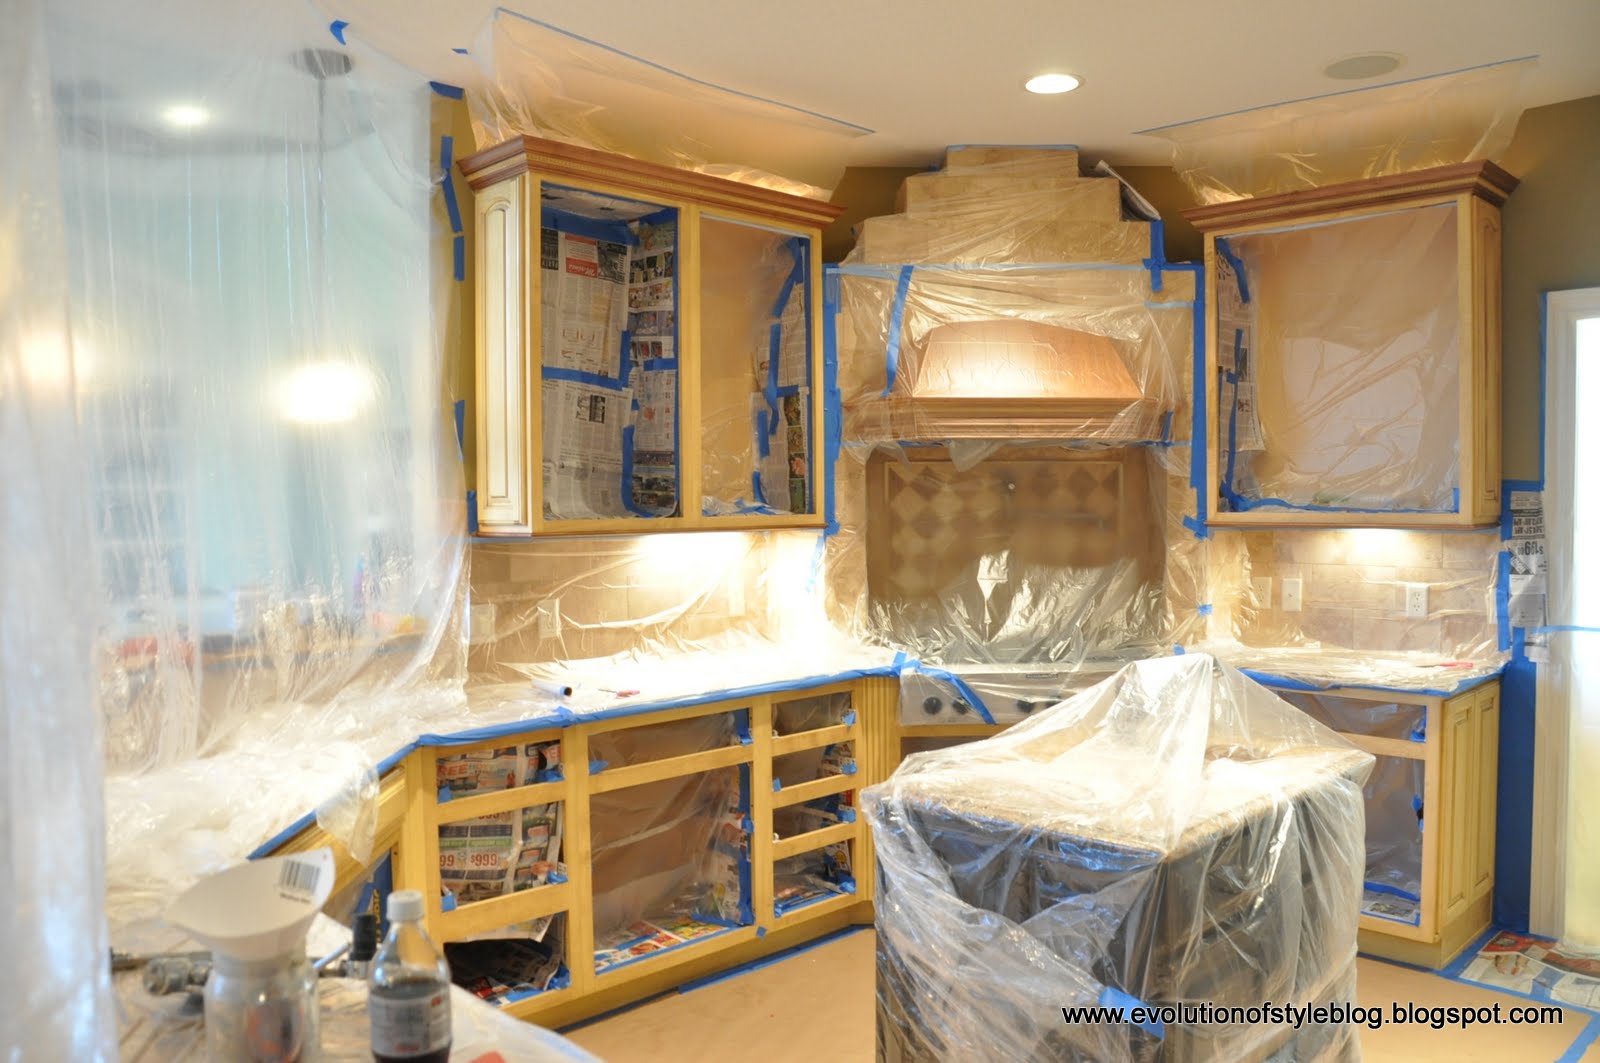
You will also need to tape off the insides of the cabinets, the countertops, floor, even some of the ceiling. If you’re planning on painting the walls, do it after you paint the cabinets – you’ll save some time and trouble in taping off the walls in addition to everything else. This was, by far, my least favorite part of this project. Taping off the insides of cabinet frames is harder than it sounds. But, I can offer you some advice that I learned along the way.
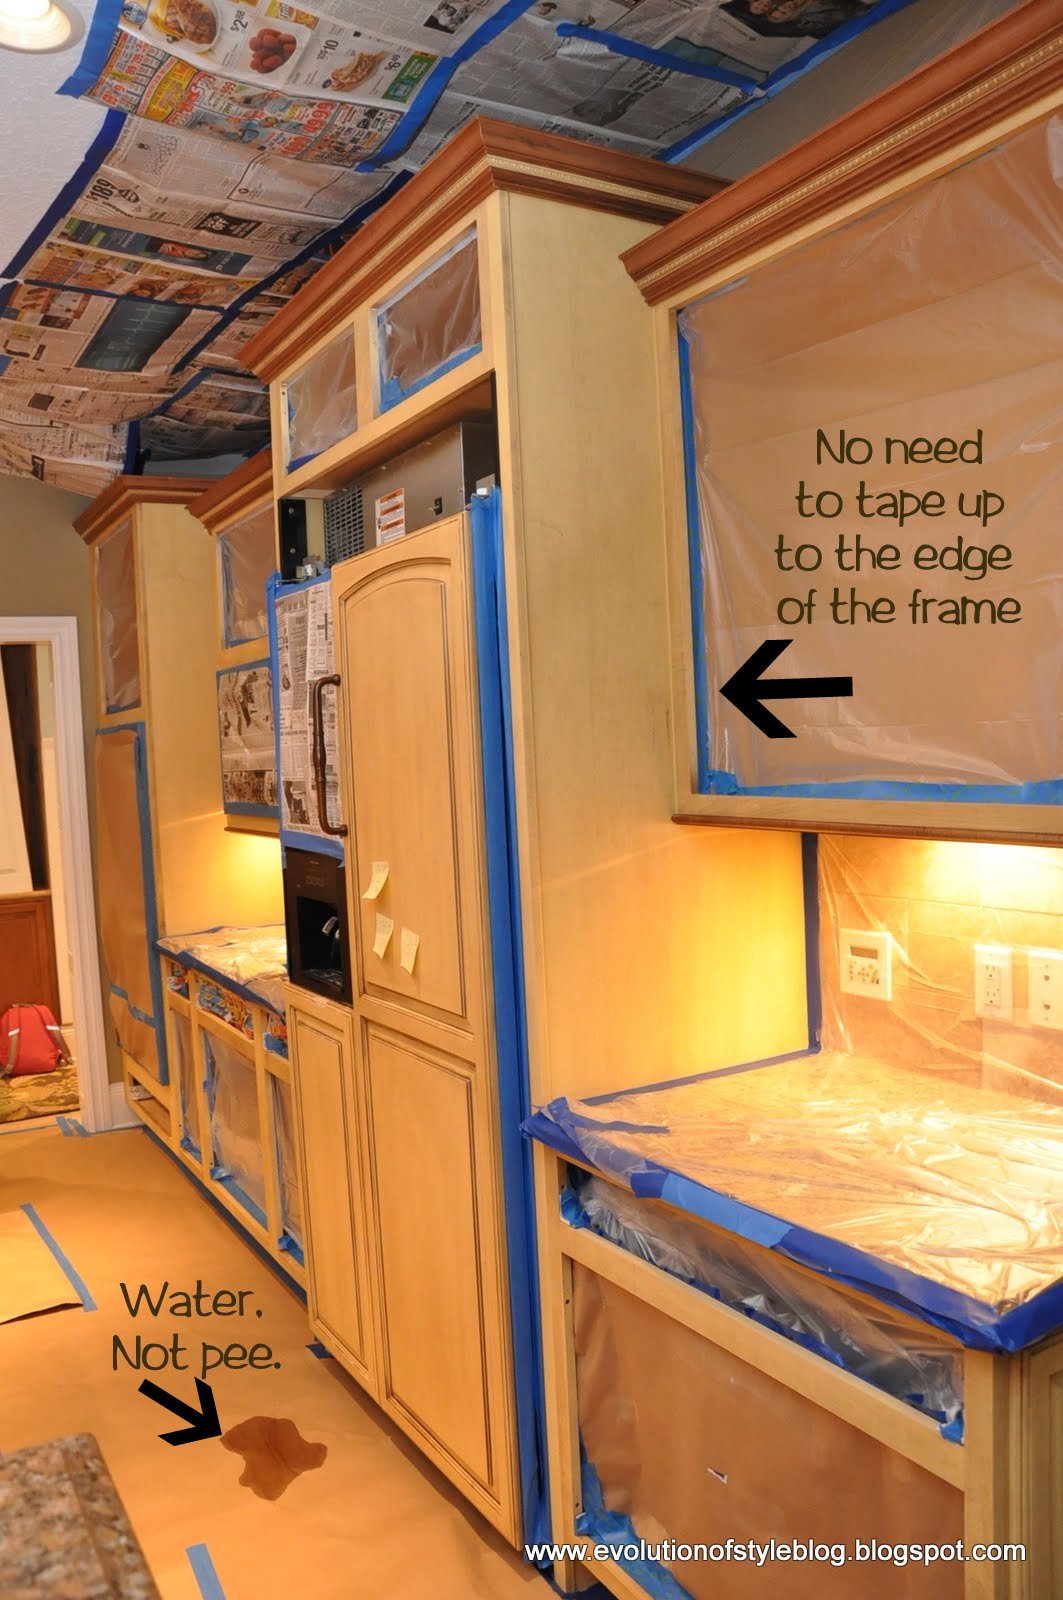
TIP: Tape off the bottom, sides and top of the frame first (newspaper works well for this), and then tape off the back of the inside frame.
You can see what I mean here:
Versus here where I was trying to tape off right at the edge of the inside frames. Don’t ask me why it took me so long to figure this out, but it was a maddening process. (And don’t mind the water spot on the contractor paper – it’s from the water dispenser in the fridge. I swear.)
You will need to go all Dexter-like and tape off any open areas in your kitchen to avoid spray particles from floating through your house.
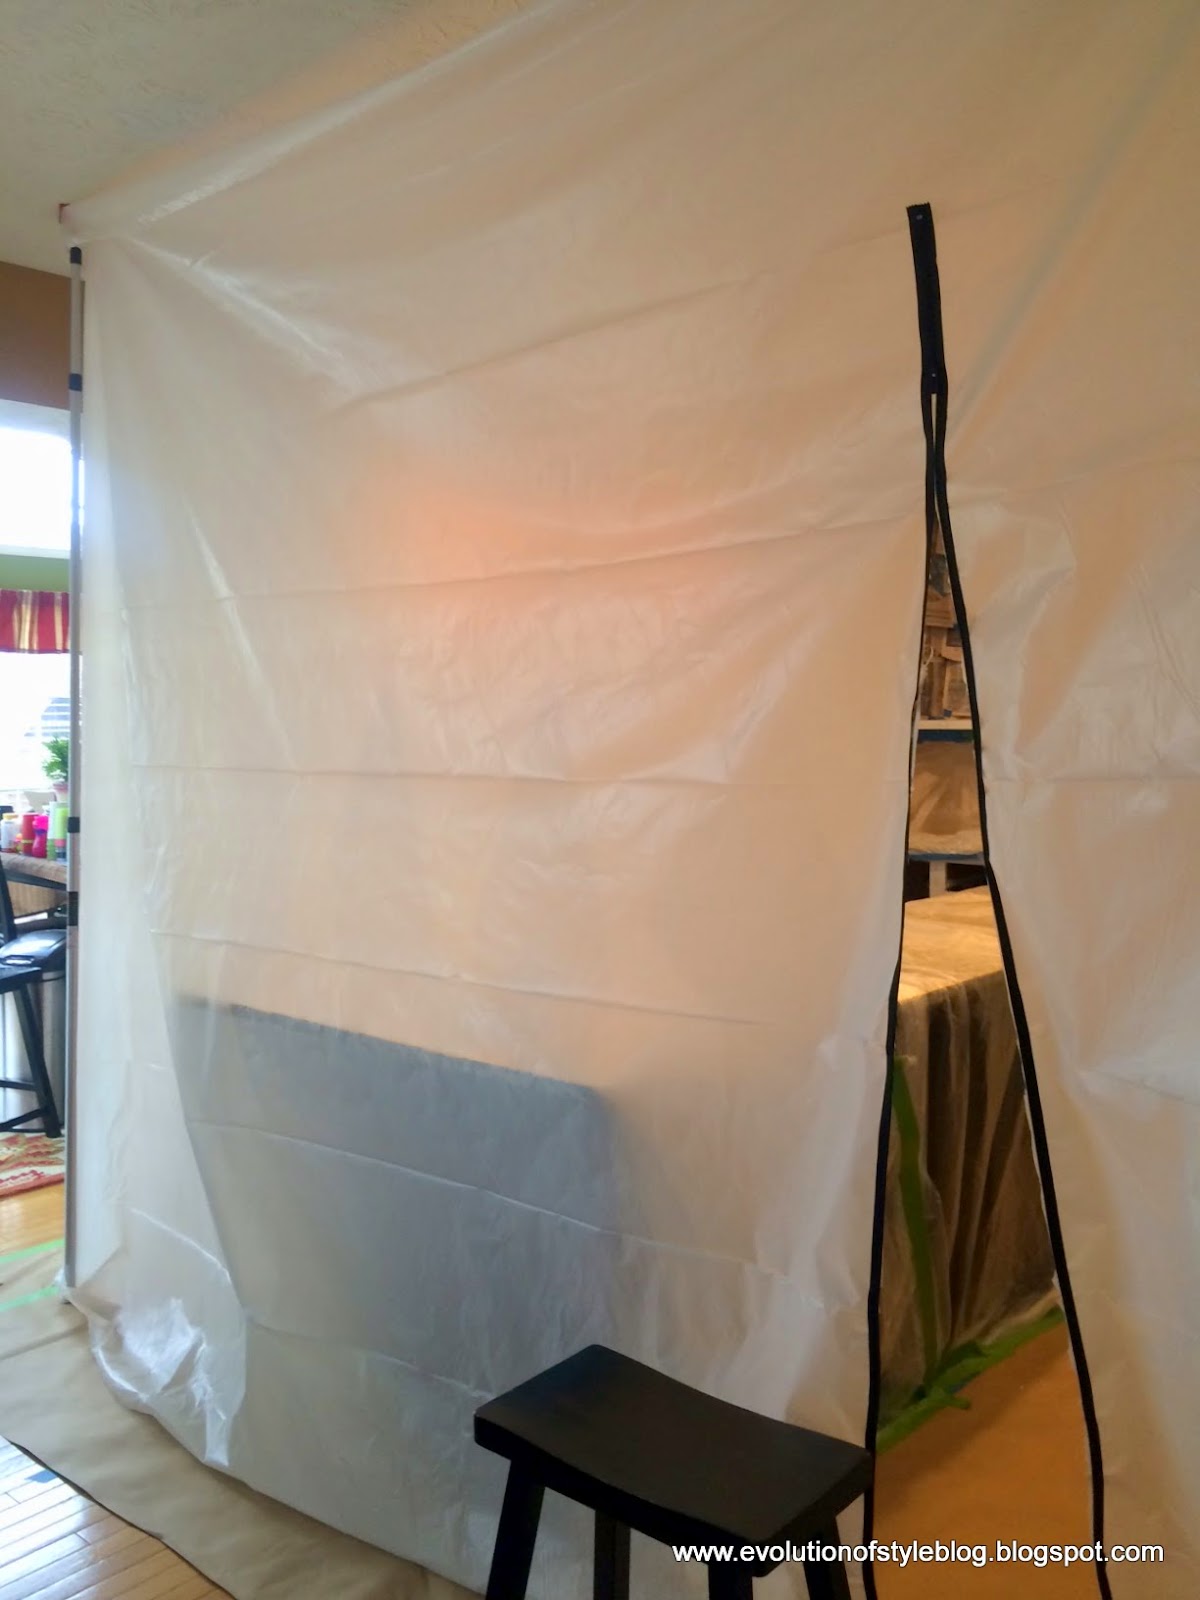
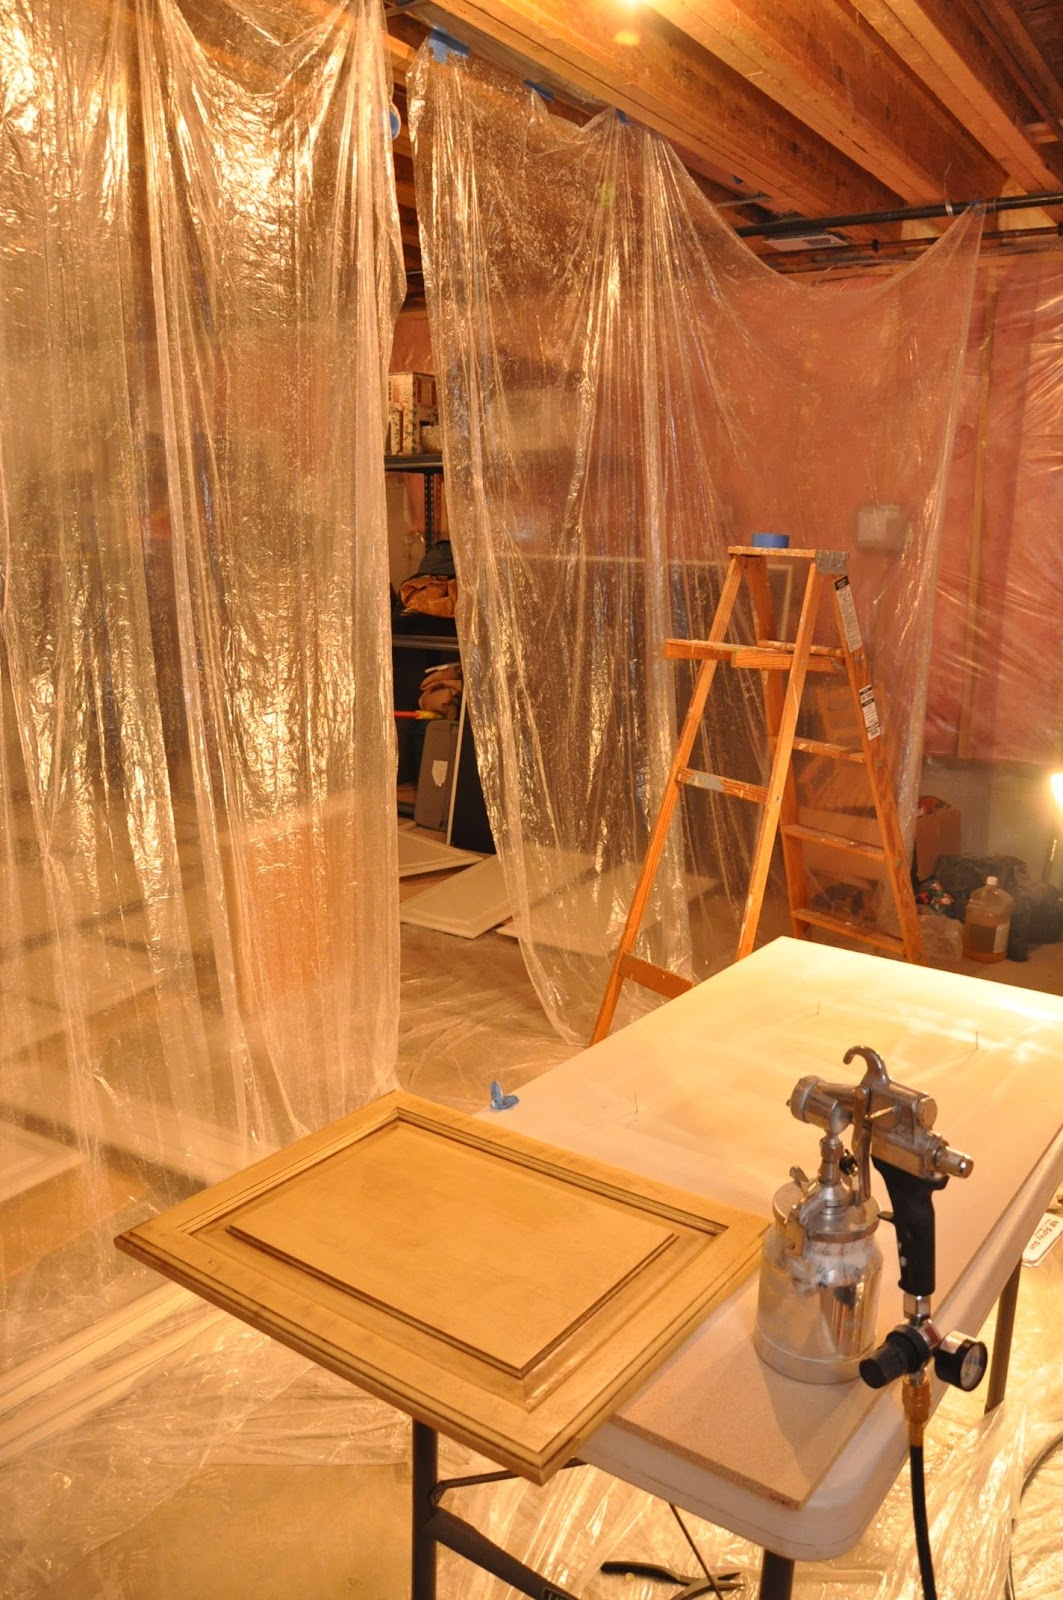

 |
| Note: I don’t flip my cabinets and paint the other side without waiting. I have never been successful in that, and if you are, I’d love to see your technique. But, these are great to use when spraying your cabinets. |
Priming and Painting
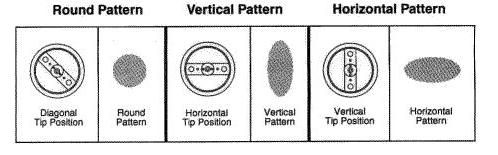 |
Paint pattern size:
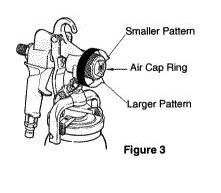 |
Air and paint flow control:
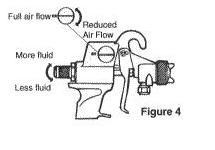 |
Then, fill in the center area, working side to side, ensuring complete coverage.

- Clean and degloss the frame surface with Krud Kutter
-
Lightly sand the frames (I used 220 grit sandpaper)
-
Remove excess dust and wipe clean with tack cloth
-
Prime cabinet frames and allow to dry 24 hours
-
Lightly sand and use tack cloth before painting
-
Paint cabinet frames with 2-3 coats of paint, waiting 24 hours in between coats
-
Wait 2-3 days for paint to cure before rehanging doors


I hope you found this tutorial helpful, and most importantly, I hope you’ll begin to see that you can do this project!
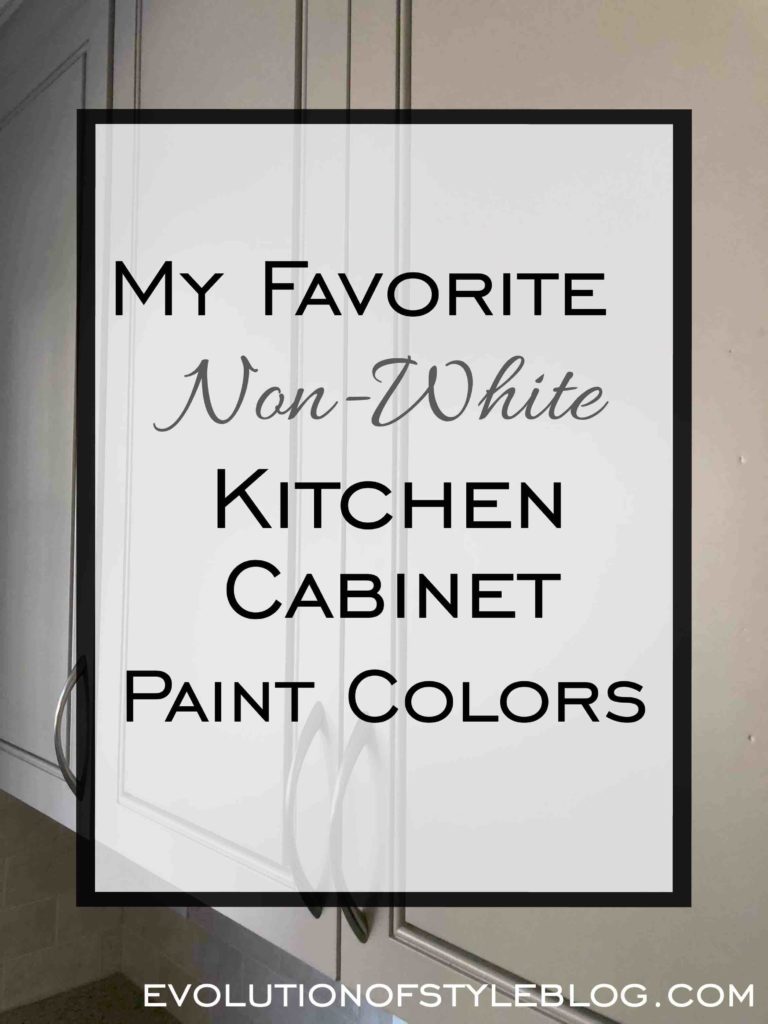
Interested in cabinet paint colors that aren’t white? Check out this post on my Favorite Non-White Kitchen Cabinet Paint Colors.
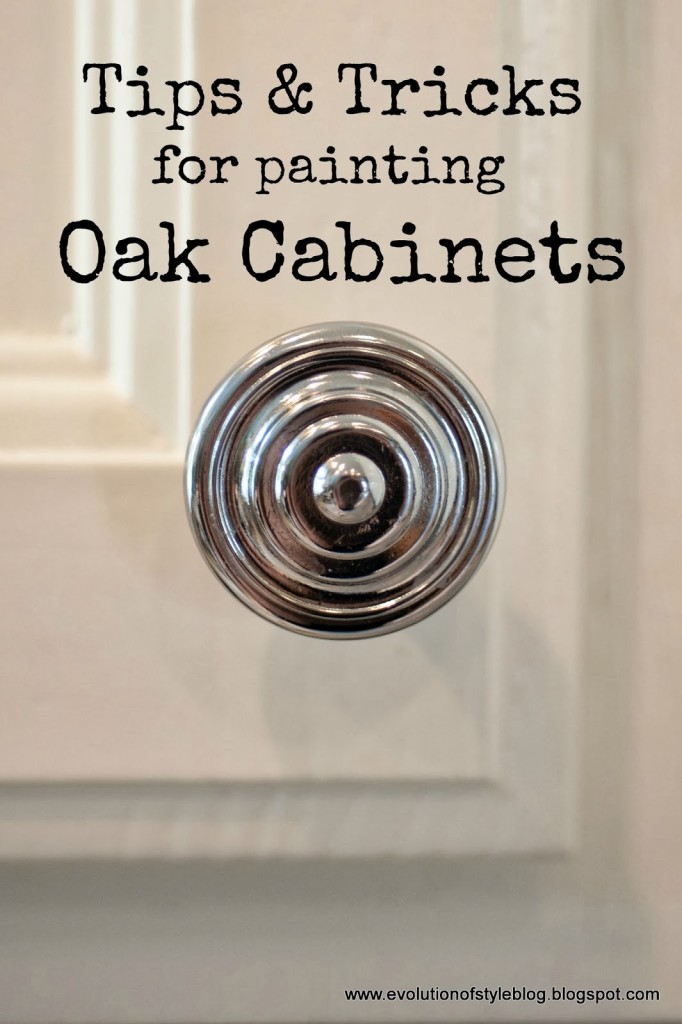
In case you missed it – here is my post with tips and tricks on painting oak cabinets.
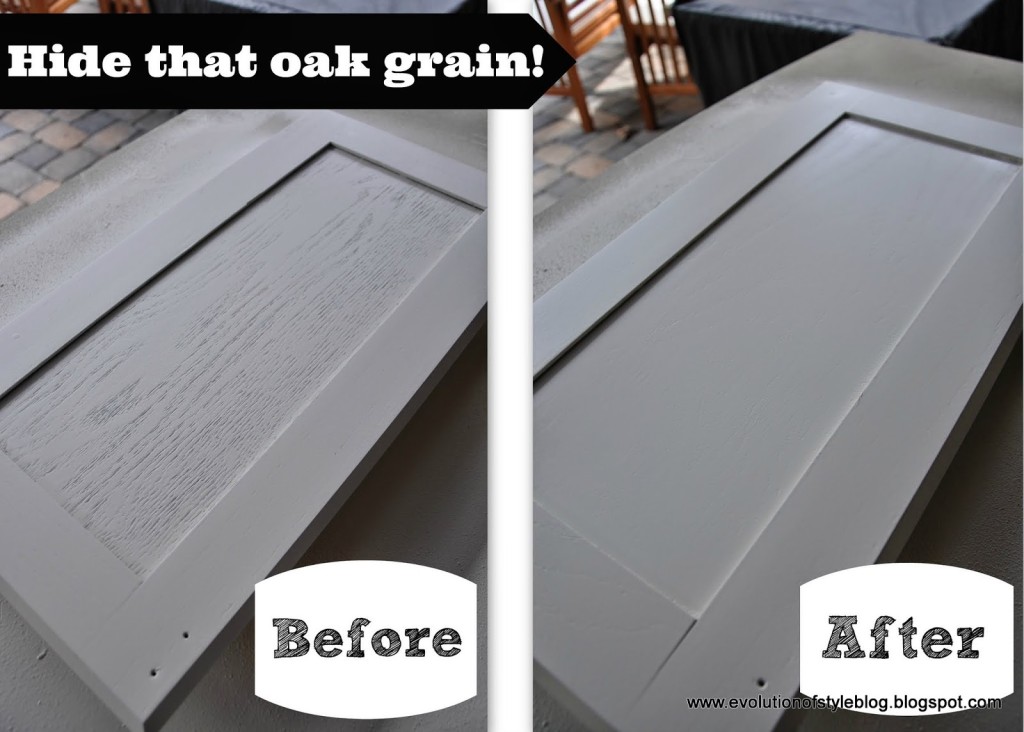
In April 2014, I gave Behlen’s Grain Filler a test drive to get rid of the oak grain on a cabinet project.
Here is a post showing an oak kitchen transformed (by me) for a client.
Before:
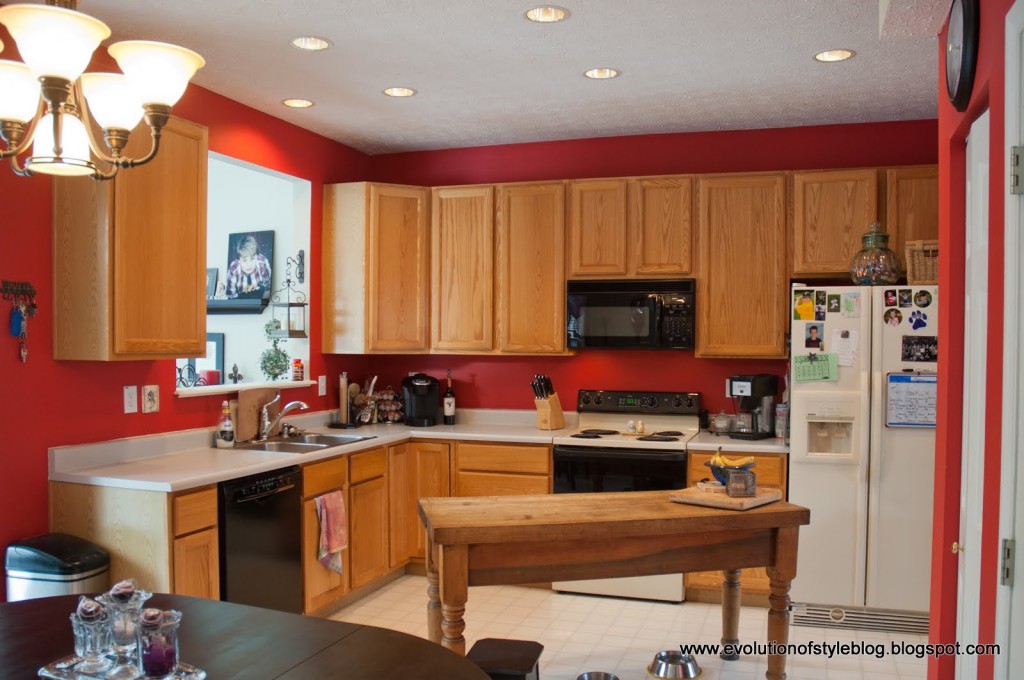
After:

Here are some links to some other resources that might be useful:
Melissa at 320 Sycamore
Traci at Beneath my Heart
Sherry and John at Young House Love
Marian at Miss Mustard Seed
Traditional Painter Hand Painted Kitchens and Furniture – a treasure trove of information from seasoned pros, on materials, supplies, prep and technique, along with loads of photos of kitchen transformations. One of my favorite resources!

264 Comments
Emily Brooklyn
February 9, 2015 at 8:02 pmhow can your kitchen look clean? aw! it's really amazing. I also liked your white kitchen cabinets
Henry Jon
February 12, 2015 at 12:20 pmI generally don’t comment in the Blogs but your blog is the only one that forced me to, amazing work… That Grill Guy
Plastering Pete
February 17, 2015 at 12:06 pmThe kitchen looks great and the color used in kitchen is also looks good .The tips you provided for color is very useful to any one..!!!Nice blog..!!
Julie
February 22, 2015 at 5:50 amYou did a beautiful job. And thank you for taking the time to share your experience and talents. But I don't know if you had addressed this, but how did you handle the drawers? Did you take off the fronts? Something I hate doing because I don't feel I get them back on right. I couldn't tell from the pictures. Anyhow, thanks for sharing.
Mackenzie King
October 7, 2015 at 4:01 amDid you thin the paint before spraying the cabinets or did you simply pour it into the sprayer and go
Kelly Westbrook
October 25, 2015 at 10:11 pmCan you tell me what size or model of air compressor did you use?
Kelly
October 25, 2015 at 11:04 pmAfter reading some of the comments, I see we have the same air compressor. But I am having a hard time find the same paint sprayer to connect to it. Can you point in the right directions?
Jenny
October 26, 2015 at 2:19 amHere is the conversion gun that I used – it should hook up to the hose that connects to your air compressor – http://www.gleempaint.com/hvcongunnew.html. Good luck!
mike stathos
January 5, 2016 at 5:56 amWow ! Nice theme and all kitchen ideas is so amazed. I really like white cabinet, All pictures give us unique ideas. Kitchen remodeling Austin
Christine
January 25, 2016 at 8:32 amThis was extremely reassuring especially the 30 days to cure part. I just completed my kitchen using the same advance paint and the same technique, but I haven’t yet reassembled the doors. I had just put the drawer covers back on and noticed two drawers chipped while adding the hardware. That was after 1 day of waiting. I was debating adding a wax on top and so glad I read your post. I’m waiting another day or two before rehanging and I’ll be cautious for 30 days. Great post!
Laura
February 5, 2016 at 9:24 amHello, I was wondering if you have any suggestion for repainting cabinet that are factory painted to begin with. Mine are Kraft Maid cabs that were peeling and got replaced. However I am using these doors for a basement projects. They are linen coconut glazed but I will not care about the glaze. So a kind of off white. Do I have to sand the previous pant? They are solid maple. Thanks
Jenny
February 7, 2016 at 7:29 pmIf the paint was peeling, I would sand them well to minimize the peeling portions. You might also want to use a bonding primer if the peeling is extensive, in order to keep the peeling from being a problem with the new paint. Prep is going to be key!
Kate
February 12, 2016 at 3:18 pmThat is a very beautiful kitchen makeover. I loved the colors that you used too! Last time I was allowed to paint my rental, I made a big mess and I had to work twice as hard to fix my mess. I definitely did not use any tarp and I had too much confidence in tape!
Amber
March 9, 2016 at 4:27 pmDI’d you use a polyurethane to seal the paint on your cabinets? And/or to give it a hard cued finish? Have you had any troubles with paint being chipped off?
Jenny
March 9, 2016 at 4:29 pmThe great thing about the Advance paint is that you don’t need to put a top coat on it. Once it’s fully cured, it hardens like an oil-based paint. It takes about 30 days to fully cure, but is still usable during that time (just be gentle). The only issues I’ve had is on a couple of cabinets where I used silicone cabinet bumpers – the silicone seems to stick and eventually pulled off some of the paint on a few frames. Use felt bumpers, not silicone ones! Other than that, it’s still in great shape!
Jill Blaylock
April 3, 2016 at 5:24 pmGreat makeover! I have been following your wonderful suggestions!! Thanks so much for putting it all into words for those of us that want to know every little detail! I have Oak cabinets so I followed that plan as well. I religiously used the grain filled that you suggested that is water-based and just love the finish! I accidentally forgot grain filler on some door backs near my hidden hinge holes and you can really tell a difference. I have been religious about using it ever since. (No one will see it since it is inside the cabinets near the hinges on the cabinets above the frig.)
Here is my question – I have been trying to come up with the magic formula for thinning the Advance Benjamin Moore paint that I am using in the exact sprayer that you used. I strained the paint and thinned it a little, but obviously not enough as the first coat on the cabinet backs look like I used a can of spray paint. Not much coming out. So what is the % you use to thin the paint for your sprayer? The paint says no more than 6%, but the spray gun says at least 20%?
Thanks so much!!
Jenny
April 4, 2016 at 7:15 amHi Jill – I’m so glad that you’re having success with my tutorial, and that the grain filler is giving you great results! As for the Advance, here are a few ideas that should help with your issue. One option is to thin it further with water, but I’m thinking you can fiddle with the material flow and air pressure options as well. Take a look at those and do some experimenting with increasing them to see if you get better results. I know that the spray gun gives guidelines on the pressure for the air compressor, but I found that I could push the envelope with it and get better flow as a result. I hope this helps – I’d love to see the finished product!
Louise Elms
April 20, 2016 at 2:55 amHi I have used the Benjamin Moore paint to cover my kitchen cabinets – but I don’t think I have the advanced version. My cabinets were used with a HVLP sprayer and the finish is really great. I did sand lightly prior but I believed the paint I used already had primer built in ( we will see if I have done the right thing ) and I used rever pewter colour which is a grey/ beige and it looks amazing. My question is now I need/ want to coat them with a tough finish and I understand polyurethane is the way to go, but the downside can be this going yellow in time. Do you have any advice you could give me in you’re experience ? Or recommended products? I just want to ensure the finish lasts – my doors are off at the moment so I can also use my compression sprayer. Thanks in advance ( by the way I am in the uk )
Jenny
April 20, 2016 at 7:58 pmThe Benjamin Moore Advance paint is really top notch for cabinets, but it sounds like that paint wasn’t used on your cabinets – I’ve had great success with it! Since you’re in the UK, I’m thinking you have access to some of the same paints that they use at Traditional Painter (traditionalpainter.com). I recommend checking out their site – it is FILLED with great information and detail on how they do their cabinets (and they are the BEST). I would love to work as an apprentice for one of them! 🙂
Karen
June 17, 2016 at 11:44 amThank you so much for this tutorial. I have been helping a friend fix a botched job on her cabinets a so-called professional did. We have the sprayer you suggested but I am getting tiny bubble here and there. Is that something I’m doing? Any ideas how to fix that? Thanks!!
Jenny
June 17, 2016 at 3:40 pmAre you using the Benjamin Moore Advance paint? As for the bubbles – I haven’t really had that issue, but I suspect it’s related to the air flow. Try fiddling around with that setting and see if that helps (I’m thinking lowering the air flow should help). You’re a good friend! 🙂
naomi
July 6, 2016 at 1:39 pmDid you paint the inside of cabinet doors?
Jenny
July 7, 2016 at 11:56 pmI paint both sides of the cabinets, but not the insides of the frames.
Ashley
August 22, 2016 at 10:25 pmDid you spray the entire drawer or just the face of the drawer?
Jenny
August 22, 2016 at 10:30 pmIf the drawer fronts are removable, I spray both sides and then reinstall them. If the door fronts are attached to the drawer, I mask off the drawer portion with tape and masking paper and then spray both sides. Hope this helps!
Jean
August 31, 2016 at 1:06 amWoo beautiful share..!!
My house is under construction and will definitely follow these tips while remodelling kitchen..!!
Beth Johnson
September 12, 2016 at 9:26 pmHow can I contact you?
Jenny
September 12, 2016 at 10:03 pmYou can email me at [email protected]
Susan
January 13, 2017 at 11:58 amCan you please tell me the best med gray you have found to use? I see a picture but it was not mentioned. TY!! Great work.
Jessica Worley
January 25, 2017 at 2:55 pmWhat is the sprayer that you use now on cabinets? Why do you prefer it?
I am about to use your entire tutorial as my guide for my cabinets. They are maple and I am painting and glazing them once I buy a sprayer.
Jenny
January 25, 2017 at 5:09 pmI currently use a Titan Capspray 95 HVLP turbine system. I like it because I don’t have to use my air compressor, and I get a continuous flow of power through the turbine, so it doesn’t have the regulator on it, like the one I used with the air compressor. It’s great, but definitely overkill if you’re not painting regularly. Honestly, the HVLP Conversion gun gives the same result, and the only reason I upgraded is because I started doing cabinets as a business.
Lori B
March 23, 2017 at 6:55 pmThank you so much for posting all this great information! Your kitchen is just gorgeous. That’s amazing you did all that yourself. We are just starting the process of changing our 90’s oak trim to white and I’ll be the one to paint the doors and cabinets in the house. Does your process completely hide the grain? So you can’t tell the cabinets (or doors) are oak? I’d love to see a close up of the painted wood. I’ve been told by painters that grain will show through on trim no matter what. But if there’s a way to hide the grain completely, I’d love to use the process and products. Thanks!
Jenny
March 24, 2017 at 7:33 amThere are ways to minimize the grain, but they’re definitely a lot of additional work. I talk about the specifics of painting oak cabinets in this post here – https://evolutionofstyleblog.com/2014/01/tips-tricks-for-painting-oak-cabinets.html. I hope you find it helpful!
Ian Bridger
May 11, 2017 at 1:47 pmI’ve been looking for a compressor and HVLP gun for my projects, and this is the best summary I’ve come across – thanks, it answers a lot of questions! Do you find your compressor needs to recharge the cylinder while you are spraying? How many seconds would you be able to spray non-stop?
Jenny
May 12, 2017 at 8:45 amIt does need to recharge, but when I was spraying cabinets, it seemed to work in rhythm with my process – doing one door at a time. If you had a larger compressor, I would assume you could get more power/time out of it.
Alex
November 2, 2017 at 11:11 amJenny, do you remember what was the pressure on your gun? How did you set it up? I am reading that you have to get your surface really wet, but what about runs? Did you set your gun to high flow or low (paint mist)? Thank you.
Jenny
November 3, 2017 at 9:01 amYou kind of have to play around with the pressure at the gun and at the air compressor until you find the “sweet spot” for your paint flow. I keep the material flow fairly low, because you don’t want to push out too much paint. If you do, you’ll end up with an orange peel look, and you don’t want that.
Alex
November 5, 2017 at 10:11 amEventually, I have figured out how to setup Wagner HVLP Conversion Gun to produce nice spray pattern using Benjamin Moor Advance paint. The issue was that neither manual nor the instructions sheet from the store don’t tell you how to set the pressure on the gun. The instructions sheet was misleading by suggesting to set the air compressor pressure to 45 psi. The pressure on the gun should be set with trigger depressed half way. That’s very important because you may set the pressure on the gun to 20 psi and air compressor to 40 psi and when you depress the trigger the pressure drops to 10 psi. That’s too low and paint is sprayed in random size droplets leading to all kinds of issues (orange pattern, bubbles, etc). Here is what has to be done: set your air compressor to 40 psi, connect the gun, depress the trigger half way to let only air to blow and turn the knob on air pressure regulator on the gun to set it to 15-18 psi. I my case I had to turn it all the way up and only could reach about 10 psi. If that’s the case, increase the pressure on air compressor from 40 psi up until you can read 15-18 psi on the gun with a trigger depressed half way. In my case I ended up with 80 psi on air compressor. That’s it. Once I did that it made the night and day difference. Turn the air cap in front of the gun all the way in and fluid flow knob on the back should be turned in almost all the way in too. Set the desired fluid flow. The gun should produce nice spray of micro droplets. I hope this information could be helpful to other people trying to use HVLP gun.
Gail
November 7, 2017 at 9:51 pmWhat paint sheen do you use when painting the cabinets white? I have found if you put a polyurethane on top of the white paint, it often willturn yellow. I would love to spray paint my kitchen cabinets white but I am nervous they will yellow over time. Should I use oil paint? Thank you.
Jenny
November 8, 2017 at 8:15 pmI have used Benjamin Moore’s Advance paint as well as PPG’s Breakthrough. Neither one of them require a topcoat, so no yellowing problem. 🙂
Elena
April 5, 2018 at 5:19 pmI love your blog! I check it everyday hoping to see a new posting! I don’t know how you do it all – you make me feel so lazy. Your comments about new books are appreciated; I share them with my reader friends.
Thought you would appreciate this posting I just read on Laurel Bern’s blog. They should have asked you…..
https://laurelberninteriors.com/2018/04/01/durable-painted-kitchen-cabinet-finish/
Keep u[ the good work!
Jenny
April 7, 2018 at 4:49 pmThank you Elena!!
Dawson Burgman
May 29, 2018 at 3:56 pmThis is soo much work! Good job!
Kimberly Walker
July 22, 2018 at 10:43 pmHey Jenny, I found this is so helpful!! Thank you. I’m currently going to be refinishing my mom’s cabinets white. They are oak but alreadybeen painted once. I also went to an actual paint store and got advice, the guy told me shellac primer is not necessary. There are other options such as the porter blankit primer. Do you have any advice on this
Jenny
July 26, 2018 at 9:37 pmI’m a big fan of shellac primers for just about everything these days. I just always err on the side of caution.
duni dake
October 26, 2018 at 11:22 amSuper awesome tutorial! I will be painting my cabinets next week and I would like to know what you advice is for drawers. My cabinets are dark brown so I need to paint the inside of the cabinets as well as the drawers. Do you recommend removing the drawer rails as well? Thank you for all your help!
Jenny
October 29, 2018 at 7:31 amI don’t typically paint the insides of cabinets and drawers, although I always paint the lip of the frames. You can certainly remove the rails of the drawers though to paint the lip of the frames completely.
Cathy Sinor
July 29, 2019 at 1:23 amJenny, I have cleaned, sanded, priming tomorrow my kitchen cabinets. Gonna paint by hand, gonna use blue on my 3 cabinets with plastic colored glass, (1955) and a lighter brown on the rest. My problem is my hardware, want to replace my colonial with a newer look. I’m sorta lost on this part. Large kitchen, originally dark stained cabinets. Any help would be appreciated. Thank you
Jenny
July 29, 2019 at 9:33 pmWhen you say hardware, are you referring to knobs and pulls or hinges? If you’re looking to replace the knobs/pulls, fill the holes with Bondo or Timbermate (a couple of my favorite wood fillers) before you prime. Then you can install new ones with the help of a cabinet hardware installation guide (you can find them at Lowes or Home Depot). As for hinges, that’s a whole can of worms. I would recommend finding ones that match exactly (or as close as you can get) to your existing ones, which, in my experience, can be a challenge with old hinges. Not impossible, but it just takes time.
Cathy sinor
July 29, 2019 at 11:38 pmThank you for your help and time,I feel the hinges are gonna be the hard part, I found the exact ones at home depot but I don’t want to go with the colonial ones I have. I will keep searching, want to make it easy. Hard to work with my husband of 44 years, we keep butting heads. Thanks again, jenny love your site
Cathy Sinor
September 8, 2019 at 10:53 pmHi Jenny, wanted to let you know, we cleaned our old black hinges and ended up with with beautiful copper and they look amazing. We ended up replacing our plastic inserts with beautiful glass.Thanks for all the advice, our cabinets look beautiful. Can’t believe they are the same cabinets after raising 5 children, lots of cousin’s, cats and dogs. I look forward to your help and knowledge. Kurd Mutter was a life saver, highly recommend this product.
Doreen Edwards
September 7, 2019 at 9:58 pmWhat if u have the ugly plastic veneer not real wood… can I pai t those with success?
Jenny
September 8, 2019 at 9:28 pmI’m always leary to paint plastic veneer. You would be better off replacing the doors, in my opinion.
Blanca M
September 18, 2019 at 10:43 amHi! I did every step you explained here to paint my kitchen cabinets. They look beautiful and have a LOT of comments when I have visitors. My question is, which product, if any, I could use to clean them? I do not want to ruin the paint. Thanks for a great blog!!!!
Jenny
September 19, 2019 at 3:41 pmI would use Dawn dish soap and warm water to clean them. That should do the trick! I’m glad you had a great result!!