
I wrote this “How to Paint Your Kitchen Cabinets (like a pro)” tutorial after painting my own kitchen cabinets almost 10 years ago. I have since quit my corporate job and started a small business painting cabinets and furniture, and have painted hundreds of kitchens, so this tutorial has become somewhat of a living document, based upon loads of research, experience and practice. I try to keep it updated with new products, tips and techniques, since I am continuously learning as I continue to grow my business and hone my own skills.
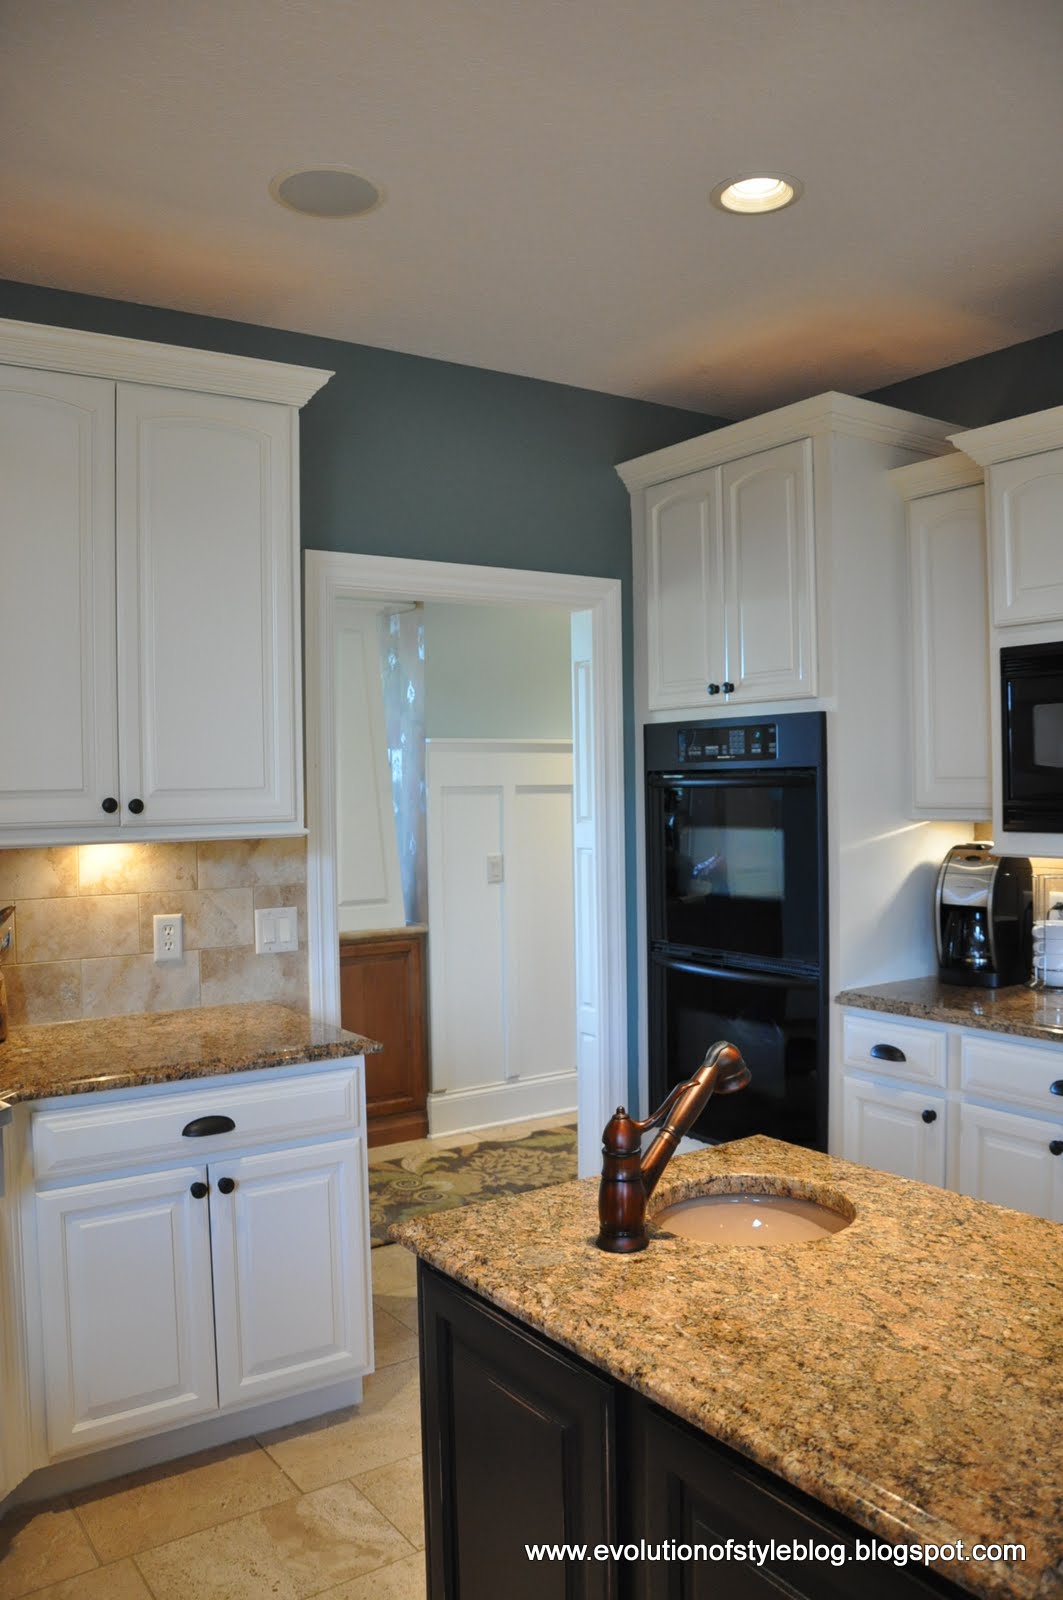
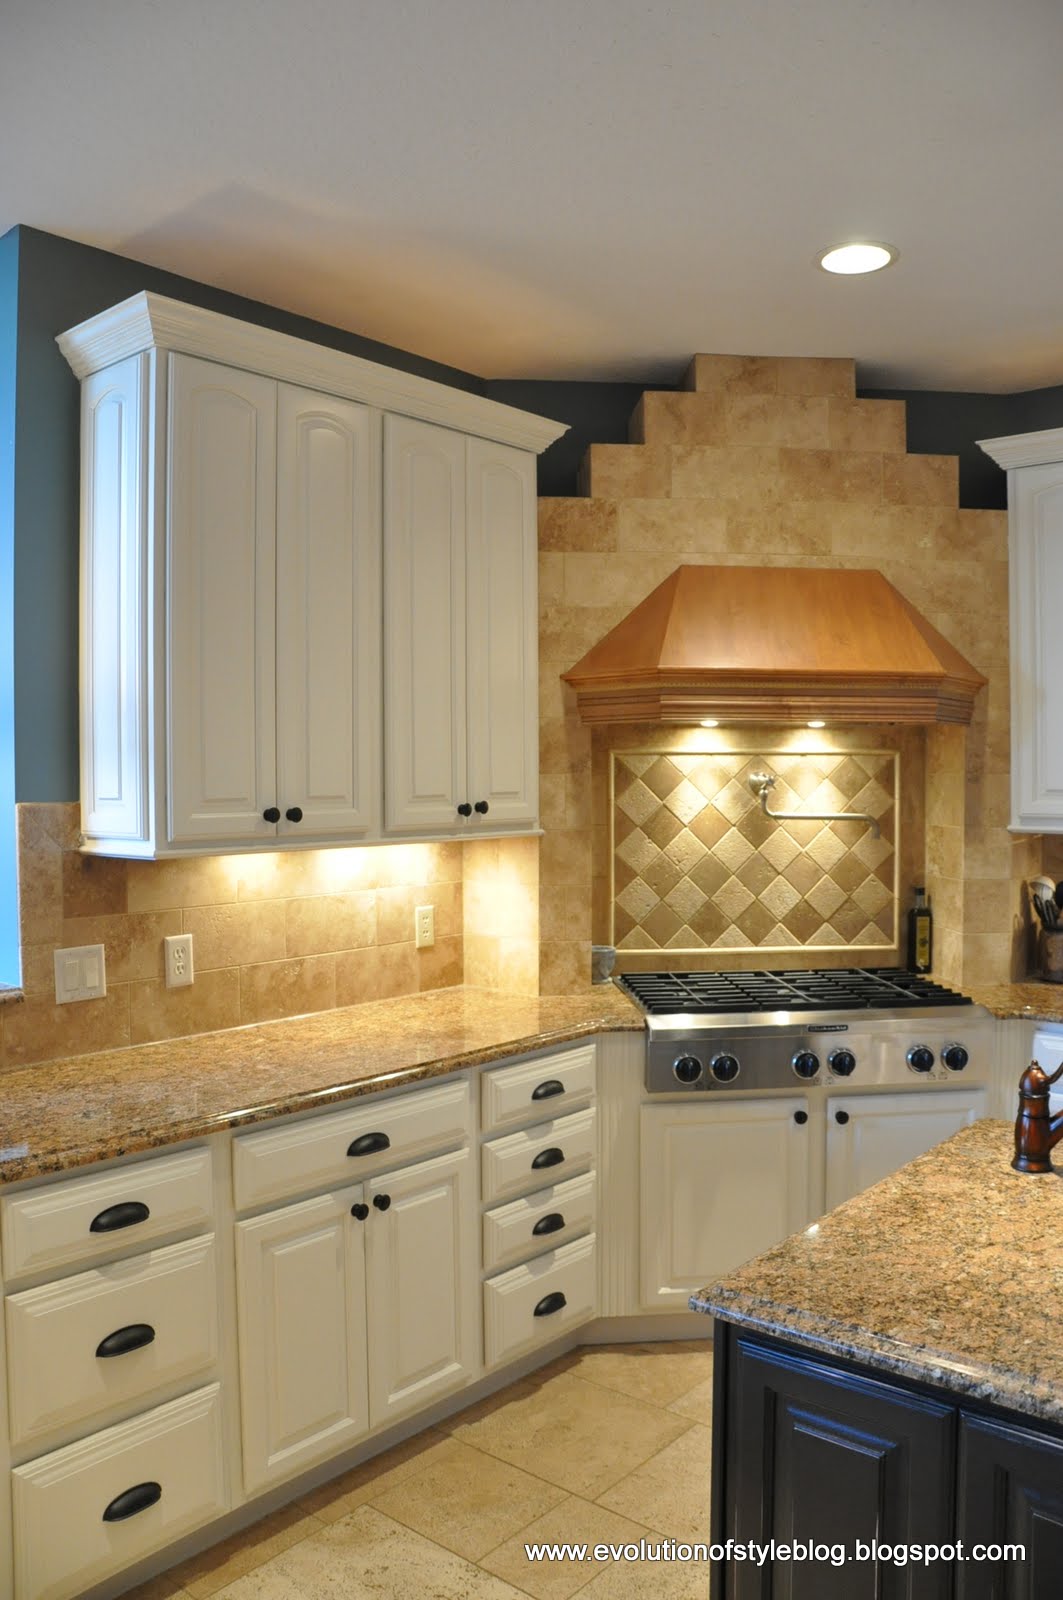
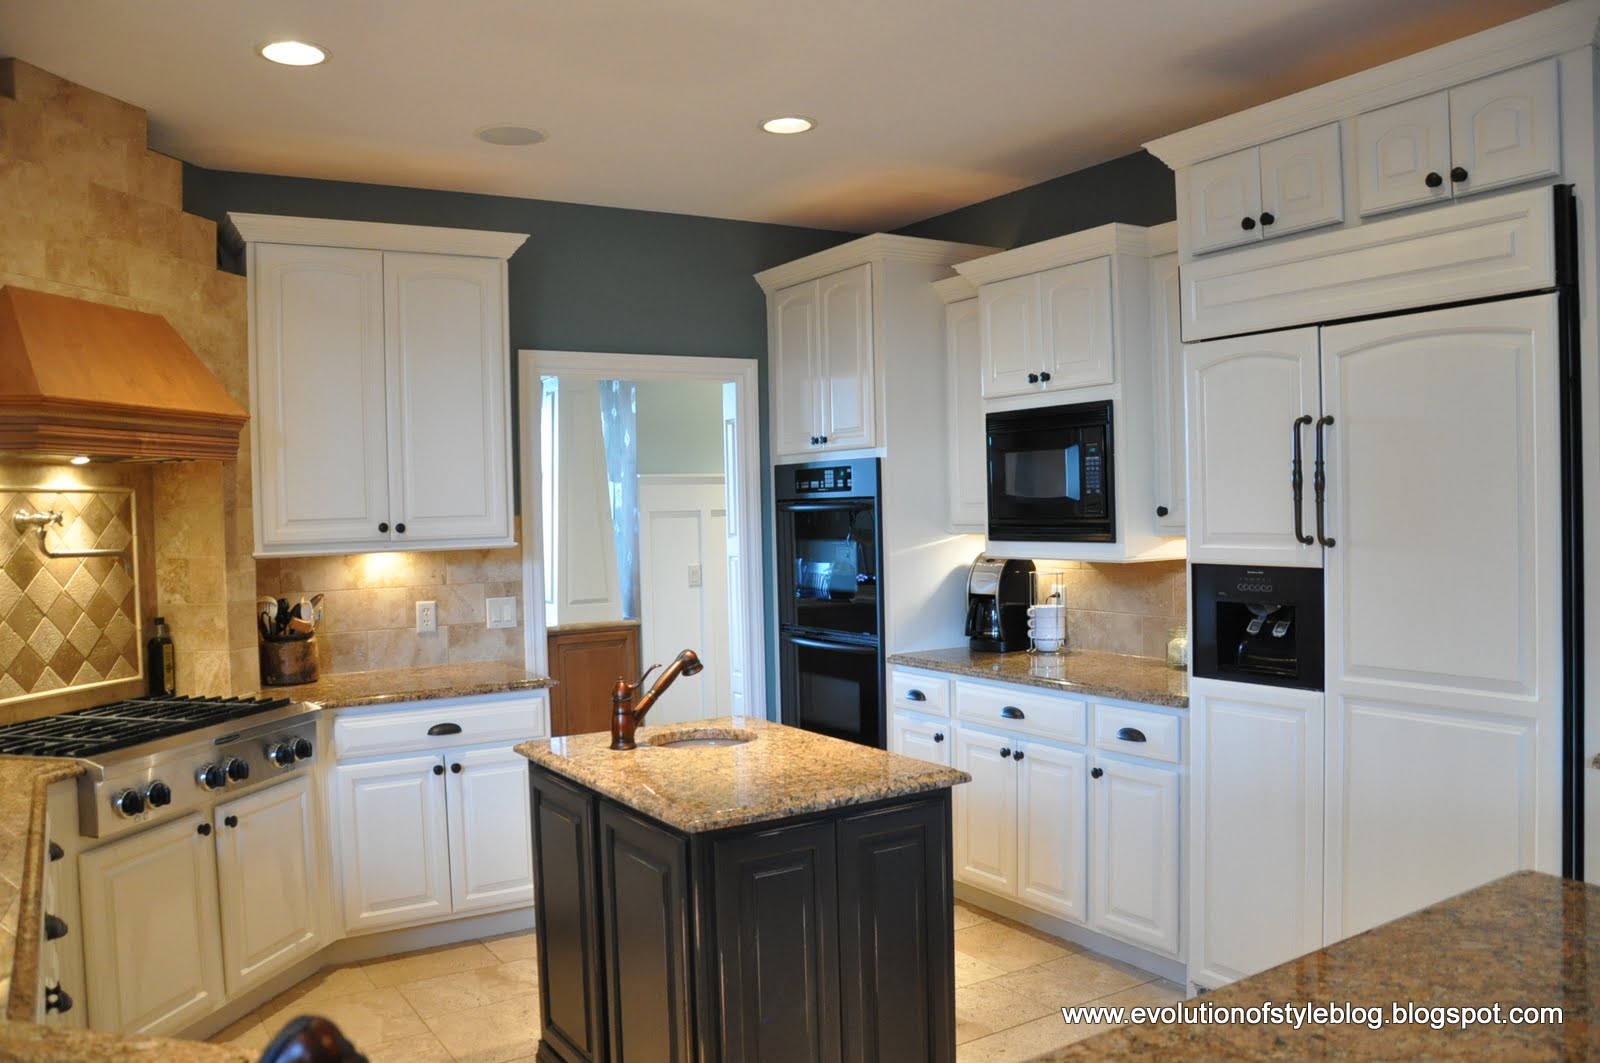
If you’re interested in reading about this project in process, you can read about it here and here. You can see my kitchen reveal here and the full evolution of the kitchen in photos here.
If you’re interested in ONLINE VIDEO TRAINING, and want to take things at your own pace, with a pro at your side through the process, click here.
If you’re in the Dayton/Cincinnati area, and want a quote for painting your cabinets, contact me.
********************************************************
Do you want to know how to paint oak cabinets?
More tips and tricks for tackling oak cabinets, including how to hide the grain, and some great go-to paint colors! Check out my post on how to paint oak cabinets for all of the details! Here are some of my favorite oak cabinet transformations from my portfolio:
- A builder grade kitchen turned custom
- Painted cabinets in an oak kitchen redo
- A client kitchen redo with an island reinvented
Do you have questions about prep?
Are you concerned about prepping your cabinets? Are they unfinished or previously painted? Check out this post on 5 Cabinet Painting Problems Solved.
Are you looking for the right tools to get the job done?
The more projects I do, the more tools and products I find. Here is my latest list of great tools to get the job done more efficiently and with a great finished look. Five Favorite Tools for Painting Cabinets and Furniture.
Do you have questions about using a paint sprayer to paint your cabinets?
Check out this post from my “Painter in Your Pocket” series as your guide.
*********************************************************
*This post contains affiliate links*
I apologize in advance on the length of this post, but I wanted to make sure I covered everything in one fell swoop. That said, I’m sure I forgot something, so feel free to ask any questions you may have.
I have put together a FREE COMPREHENSIVE SUPPLY LIST for you, and you can link to it here, click on the image below, or you can shop here for everything you need.
I did a great deal of planning and research before tackling this project, and continue to develop and learn now that I’m painting cabinets for clients, so I hope you’re able to learn from my obsessive-compulsive tendencies.
First things first. These are some of the most important things to know and consider before taking on a project like this.
1. Unless you have hired help (or a household that will take on all of your responsibilities while working on this), the rest of your house will suffer during this process.
Ok, maybe I’m being a bit dramatic here, but this was my personal experience. However, I should preface this by also mentioning that I worked full-time (outside of the home), when I painted my cabinets, and spent just about every non-working moment on this project in order to get it done. So, for me, this meant that my typical laundry “pile” turned into a laundry “mountain”. The entire house was a wreck, and the hubby and kids had to fend for themselves for the 2-3 weeks that I spent focused on painting. My kids may or may not have eaten cereal out of the box for dinner several nights in a row.
2. Invest in help from the experts.
I had three big questions in researching this project:
- How do I best prep my cabinets for painting?
- What kind of primer should I use when painting my cabinets?
- What kind of paint do I use to paint my cabinets?
- How do a I choose a paint color?
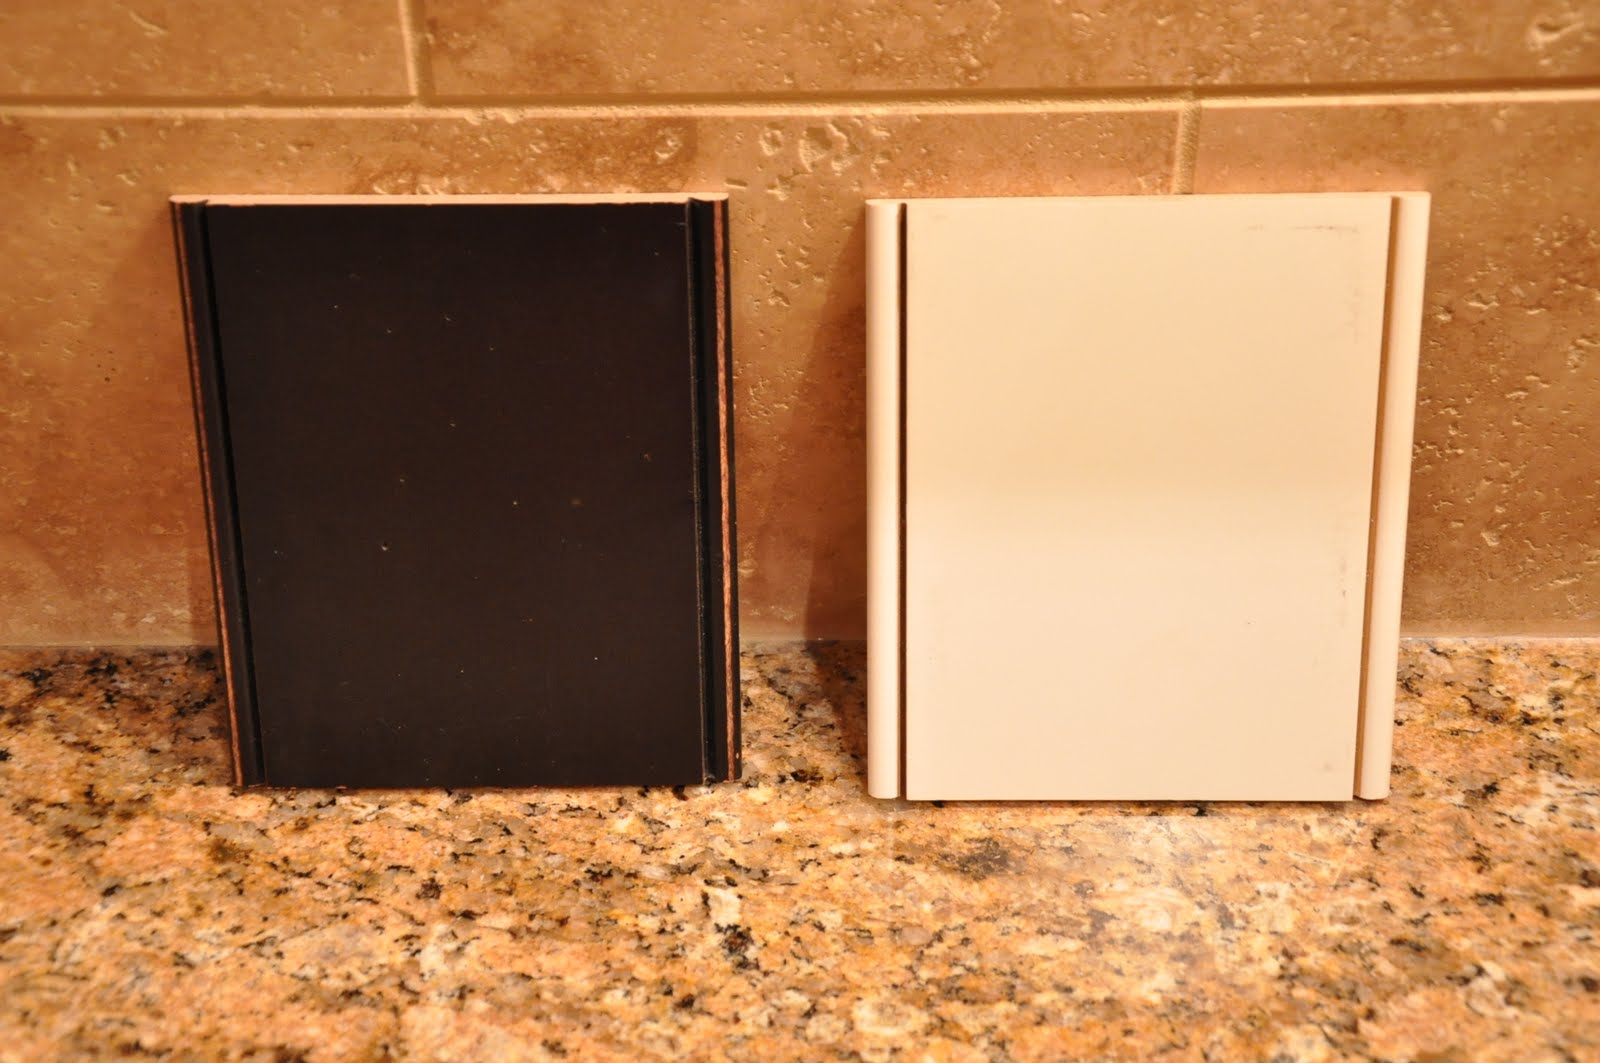
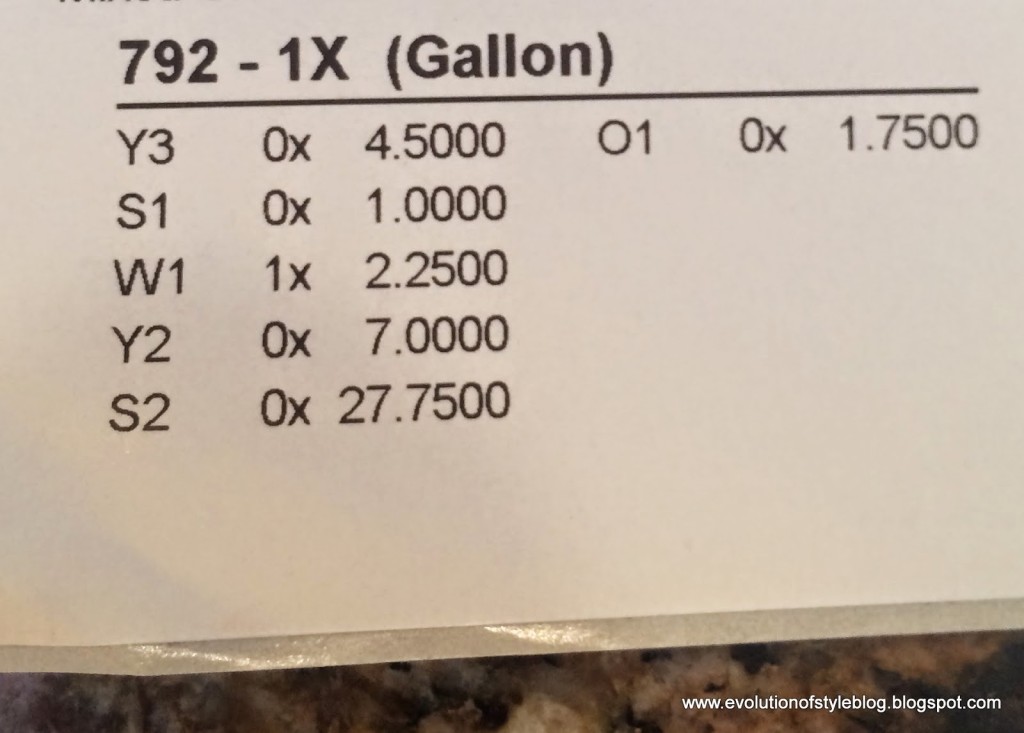
I ended up finding some cabinet door samples that I liked, and had them color matched for my kitchen.
Here are the samples I used and had color matched for the island and the kitchen cabinets.
What color did you paint your cabinets?
I have gotten a lot of questions about the color that I used on my cabinets. As I mention above, I had the cabinet samples above color matched for my kitchen paint colors. Below is the formula for the white I used on a bulk of my cabinets. This is a formula for Benjamin Moore paint, and I used their Advance paint product for my cabinets. Don’t use this formula for other paint manufacturers.
If you are looking for help choosing a white paint color for your cabinets, check out my favorite white cabinet colors here.
3. What is the best method to get the job done and make it look professional?
I know there are a lot of opinions and methods out there, but after painting the kitchen island, (using a sprayer for the doors, and hand painting the frame), I knew that painting the cabinets with a brush would not produce the look that I wanted, since I have a lot of raised panels and detail work.
However, if you don’t have a lot of raised panels on your end cabinets, I say paint your frames with a brush/roller. I still recommend spraying your doors and drawers, but there is some wiggle room with the frames. Just make sure you use a high quality brush like this one, and mohair rollers. Using high quality tools will give you a high quality finish and help to minimize brush strokes.


The clincher for me was seeing a video of someone painting kitchen cabinets with an HVLP sprayer. HVLP = High Volume, Low Pressure. It is a dream for a project like this since you have so much control over the spray in terms of volume and area. You can dial it down to a targeted, narrow spray for corners and small areas, or you can open it up to give you a much broader spray as well.
However, these paint guns can be expensive, since they hook up to a turbine (which I now have and use for client kitchens). But, I did some (more) research, and found one that I could hook up to our air compressor (ours is a 6 gallon 150psi, which was more than enough power) for a fraction of the cost. Enter the Wagner HVLP Conversion Gun. This is the gun that I used when I painted my own cabinets, and the results were nothing less than flawless.

If you don’t have an air compressor, you can go with a gun like this Graco TrueCoat Plus II paint sprayer. Thrifty Decor Chick used this to finish off her cabinets after my house call when I had the opportunity to walk her through the process. She loved this sprayer, and if you saw her kitchen, you’ll see that it got the job done beautifully.

So, let’s get to the details. How did I prep my cabinets? What type of paint did I use? What finish did I choose?
Paint Prep
Before we dive in too deeply on paint prep, let me first say that this is not a step where you want to take short cuts. I know a lot of paints claim that they are “no prep”, but if you’re investing the time to do this kind of DIY project, and you want a professional finish, you need to put in the work. I can’t tell you how many times I’ve cleaned cabinet doors and then sanded them, only to reveal all sorts of gunk that I never would have noticed otherwise. Since my cabinets didn’t have a glossy finish on the to begin with, I cleaned them Krud Kutter Gloss-Off, which is a great all-in-one cleaner AND deglosser and then gave them a light sanding. I have since invested in a nice orbital sander and dust extractor and use it for client jobs, but I will say that my light sanding has held up nicely in my own kitchen.
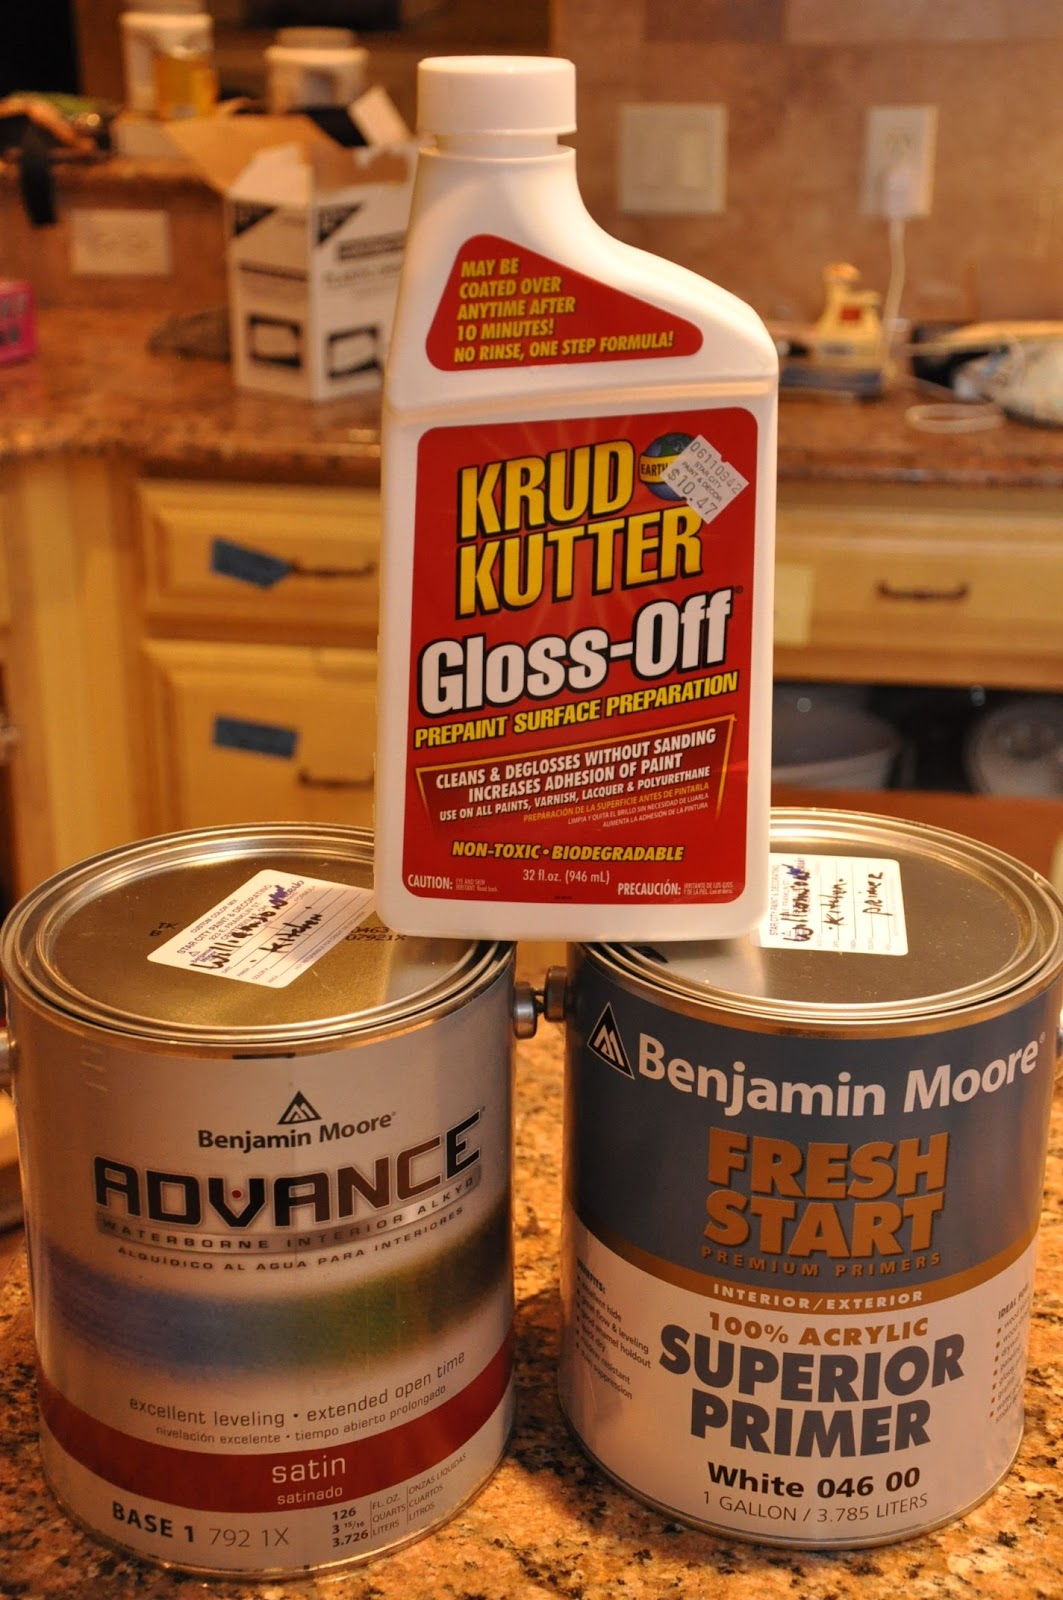
You can see the primer and paint that I used here as well. Benjamin Moore’s Fresh Start Primer and their fantastic Advance paint. Again, I’m going on the advice of the experts here (he recommended a different primer for glossy surfaces, but I can’t remember what). I cannot say enough good things about this Advance paint. Oh. my. goodness. The paint store guy/expert said, “It’s revolutionary.” He said that it’s basically an oil-based paint that acts like a latex (even though it is a latex paint). You get all of the good points of an oil-based paint, with none of the negative. It hardens like an oil, wears like an oil, but cleans up like a latex and it doesn’t smell like an oil! See? Revolutionary.
For a more detailed breakdown on prep, you can check out this post from my “Painter in Your Pocket” series that is exclusively dedicated to prep work.
I have experimented with a multitude of primers over the past few years, and while Fresh Start has held up nicely on my own cabinets, I am also a big fan of SealGrip by Porter Paints. It’s awesome for oak cabinets too, in that it keeps the oak grain from bleeding through the paint, and it’s water-based, which I love. Plus, it really holds up when cabinets need to be transported for clients. But as of lately, I have switched to using Zinsser BIN shellac-based primer. It sticks to EVERYTHING.
If you’d like to look at other paint options, I shared a comparison of two great products that I love. They’re both solid products, with pros and cons associated with each. It all depends upon your priorities and preferences.
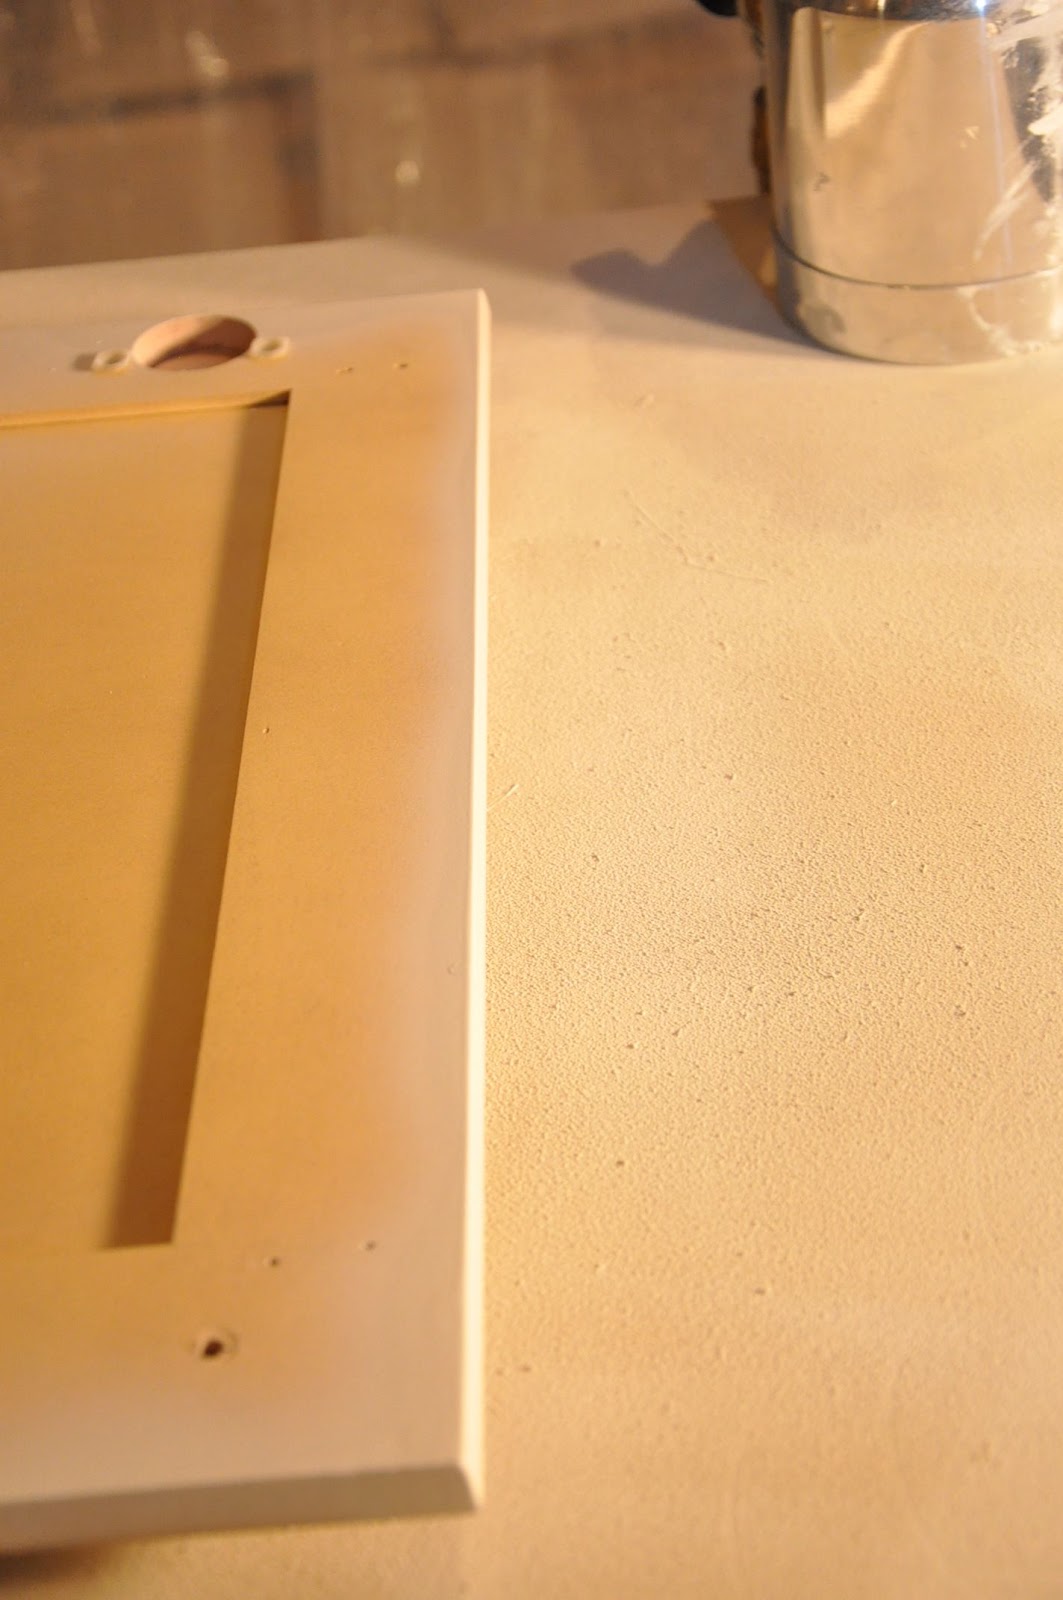
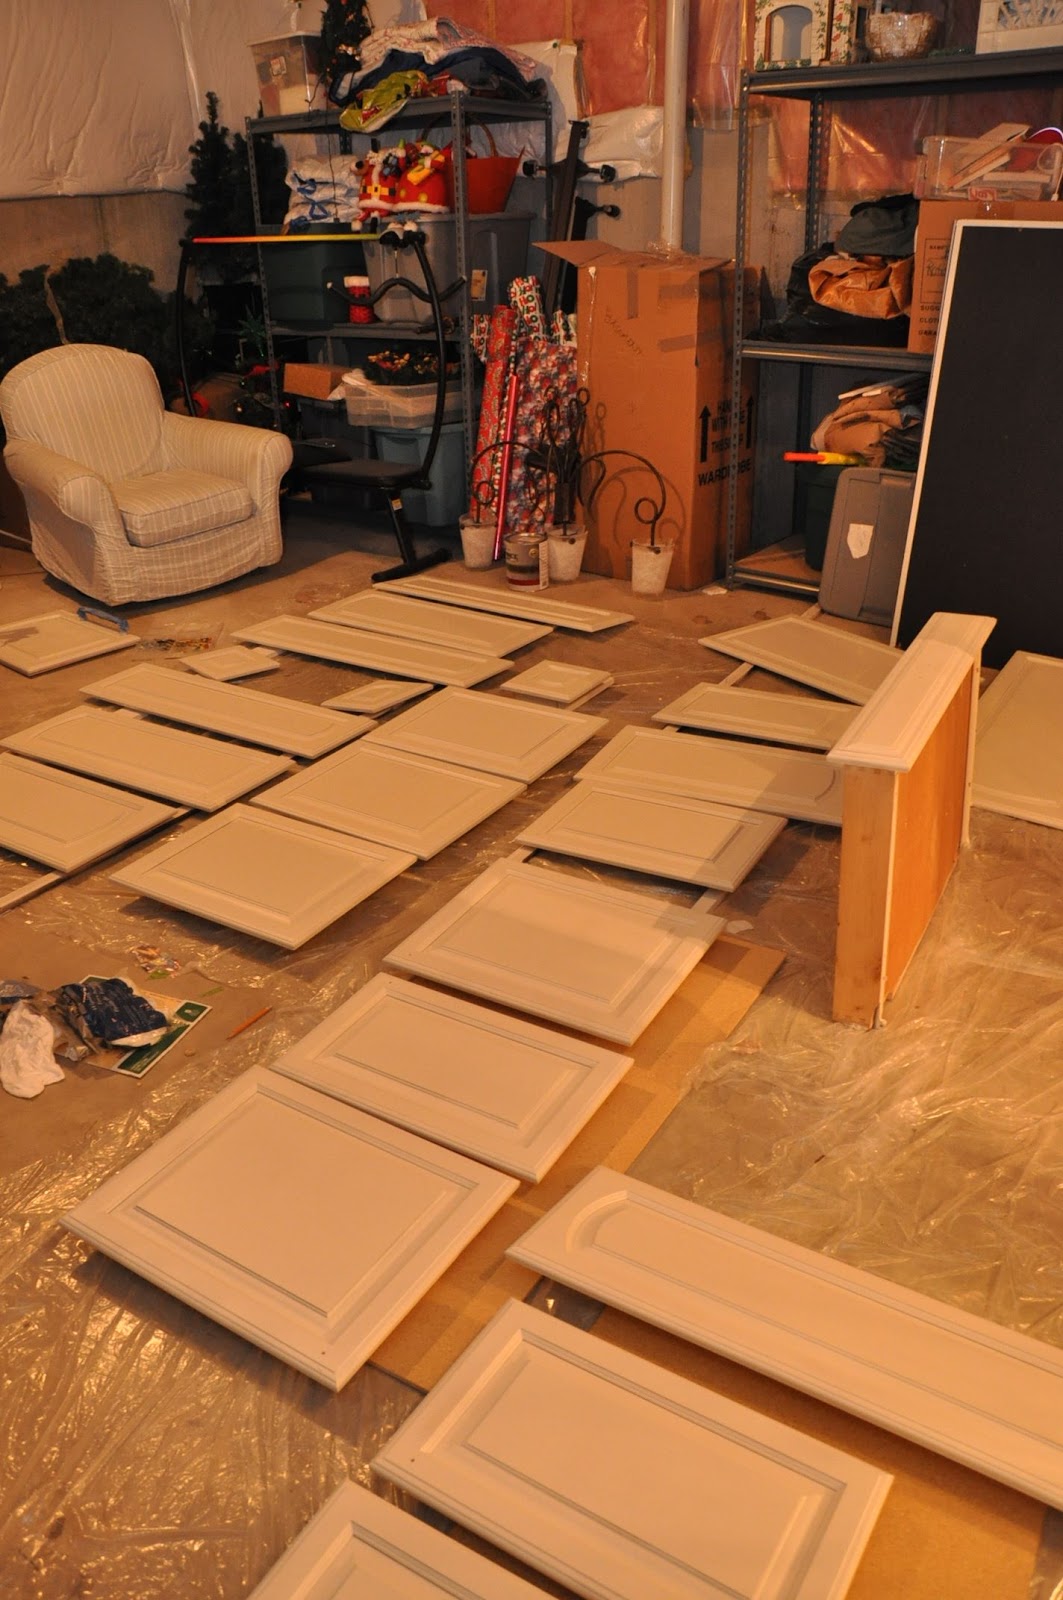
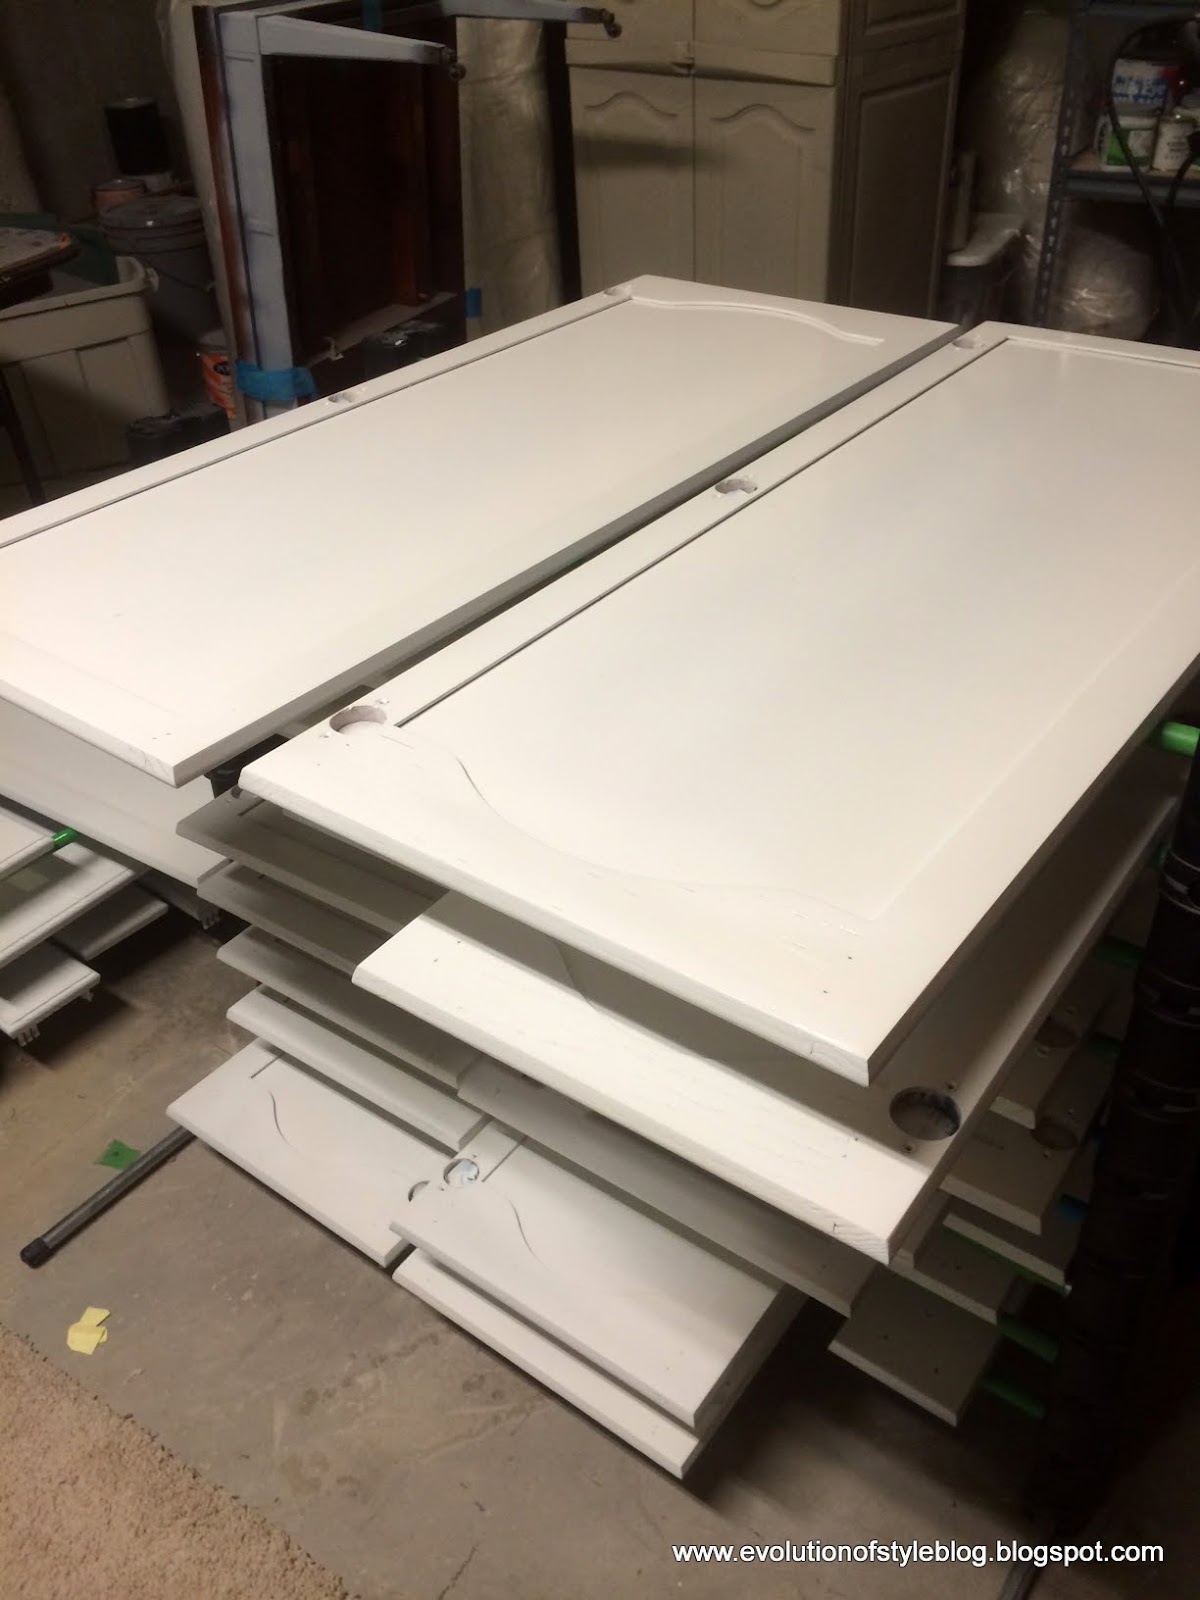
But, before you can get moving with your actual priming/painting, you need to remove your cabinet doors and drawers. I highly recommend putting together some sort of numbering system so that you don’t lose track of what goes where. While it all seems to make sense when you’re planning, trust me that you will be glad you did this when your paint-weary brain goes to put the doors and drawers back.
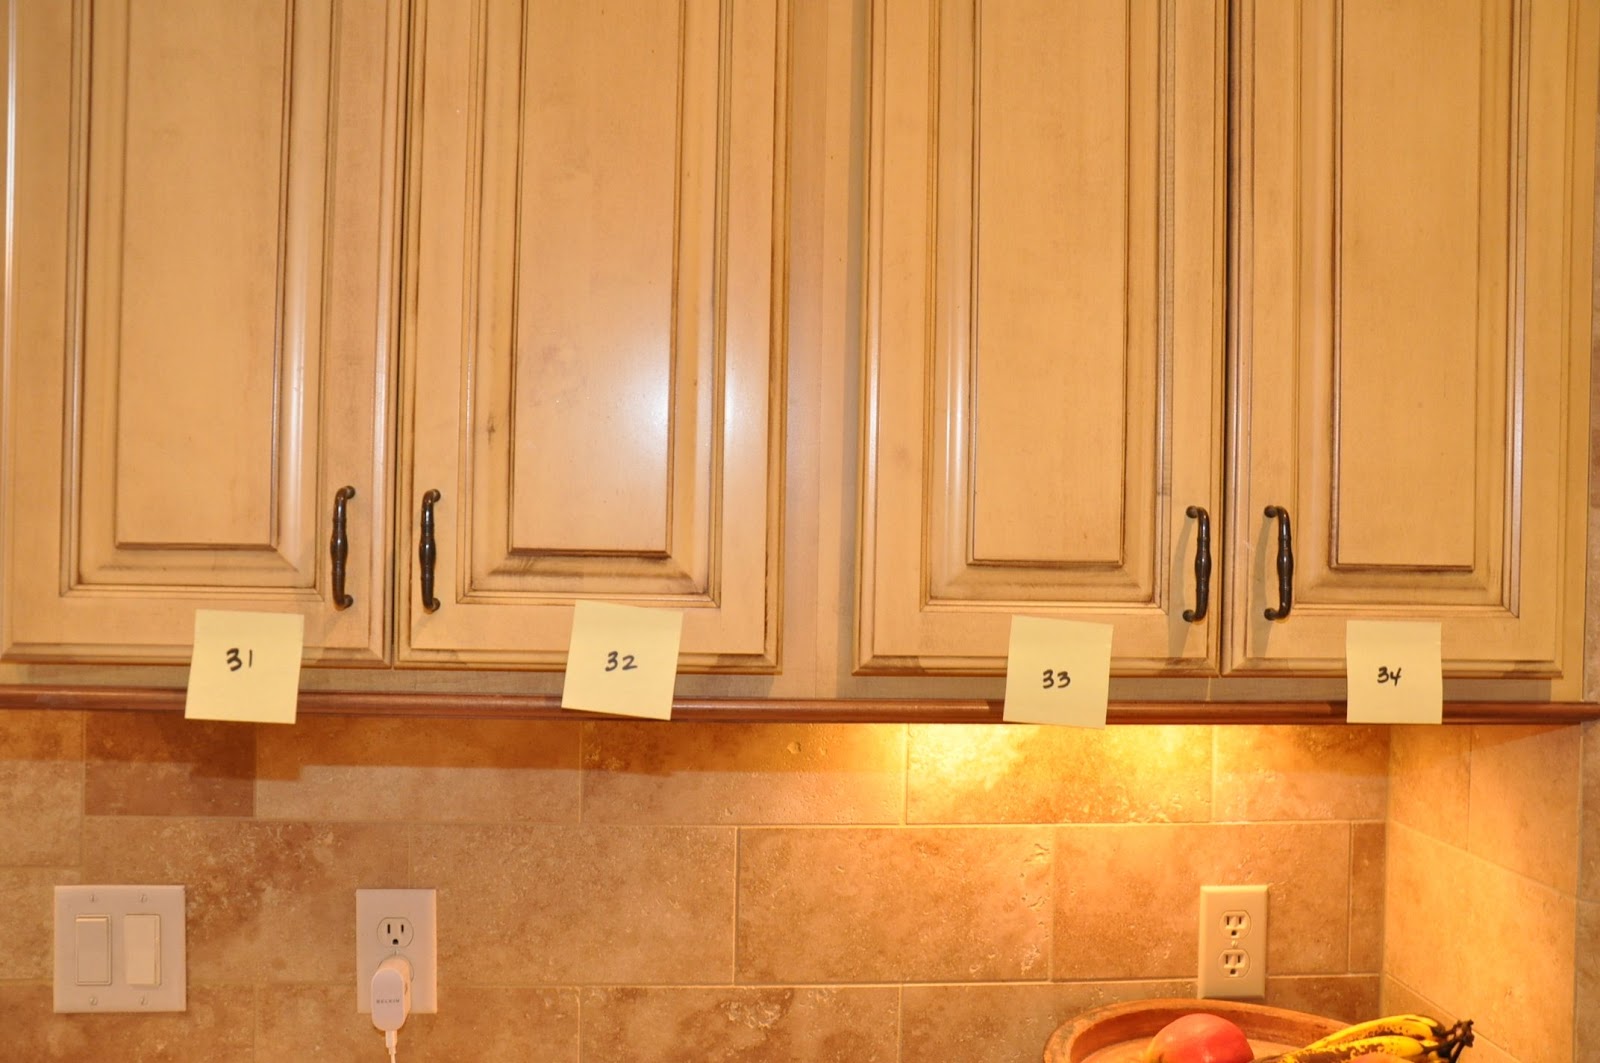
TIP: I started out my labeling like this, but the best way is to take a piece of painter’s tape and number your cabinet doors and the corresponding frame so that it’s easy to match them up when you reinstall. Put the hinges in a Ziplock bag, and store them in the corresponding cabinet/drawer space. Take the time to number your doors and drawers, because things can get ugly really fast when reinstalling your doors/drawers if you don’t.
Below, my cabinet coding translates to – Right of stove, cabinet #28, right bottom (RB). Believe me, when you’re exhausted and swimming in a Sea of Cabinets that need to be put back in their proper place, you’ll be thankful for this little extra help.
This is especially important if you currently don’t have knobs on your doors, and you’re planning on adding them. Label the door so that you know whether it’s a right or left sided cabinet so you make sure to drill your holes in the correct spot. Just trust me on this.

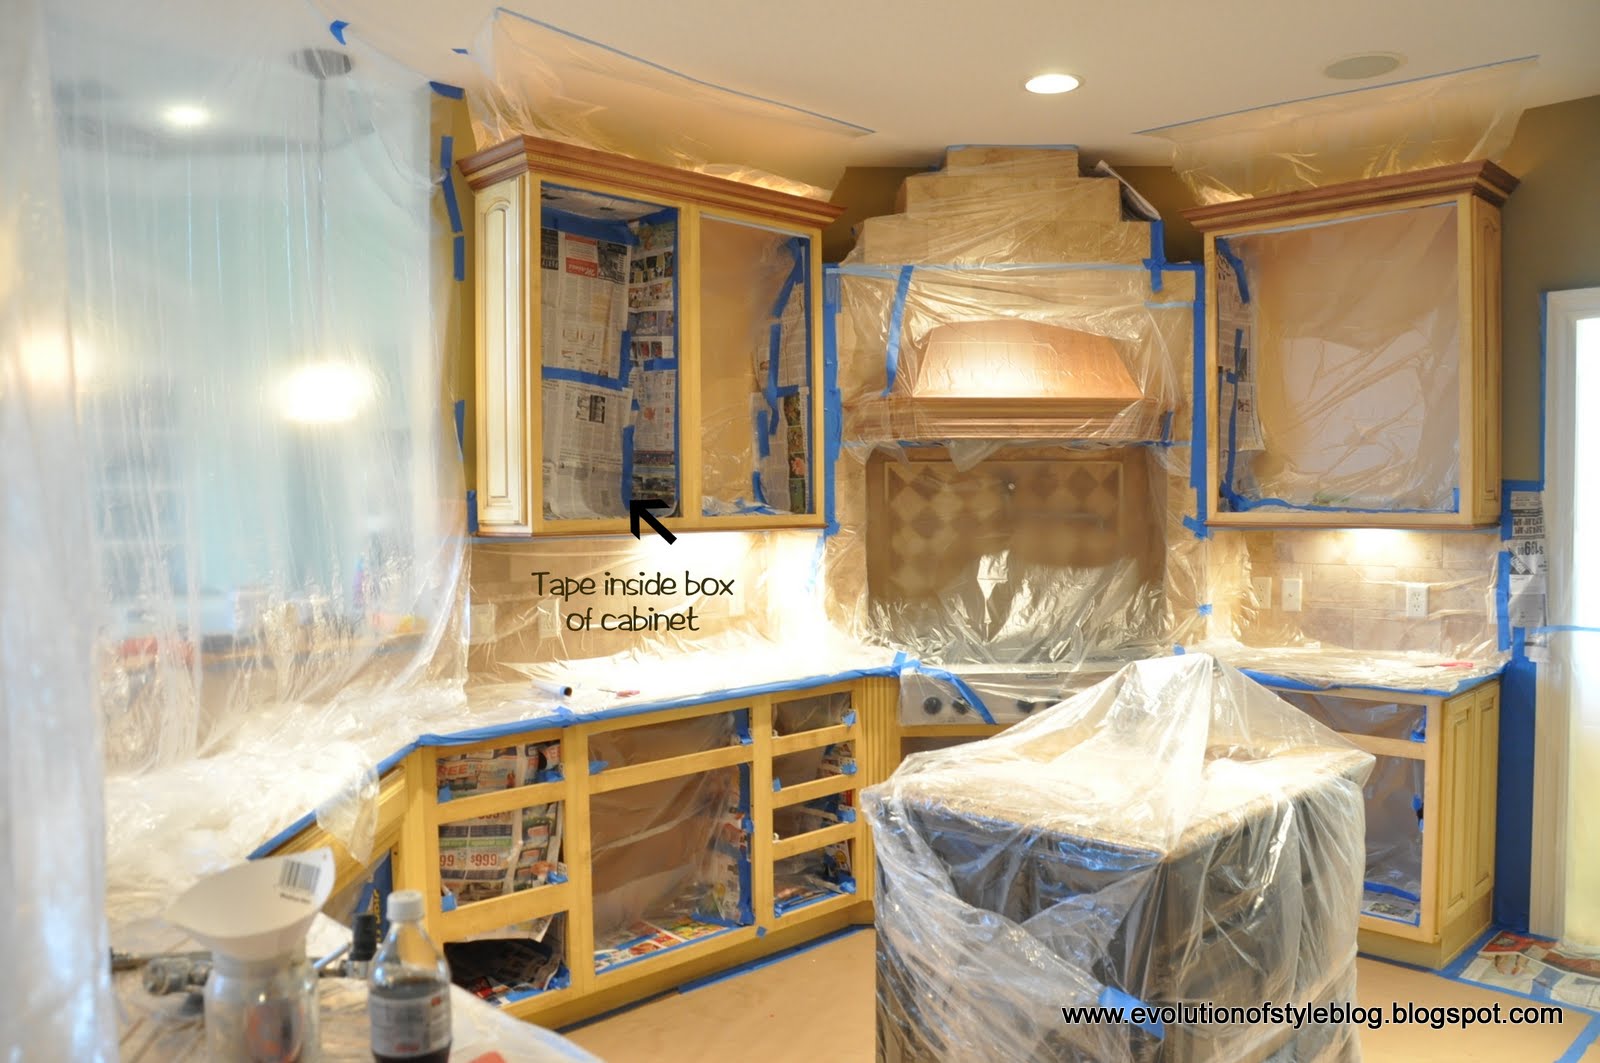
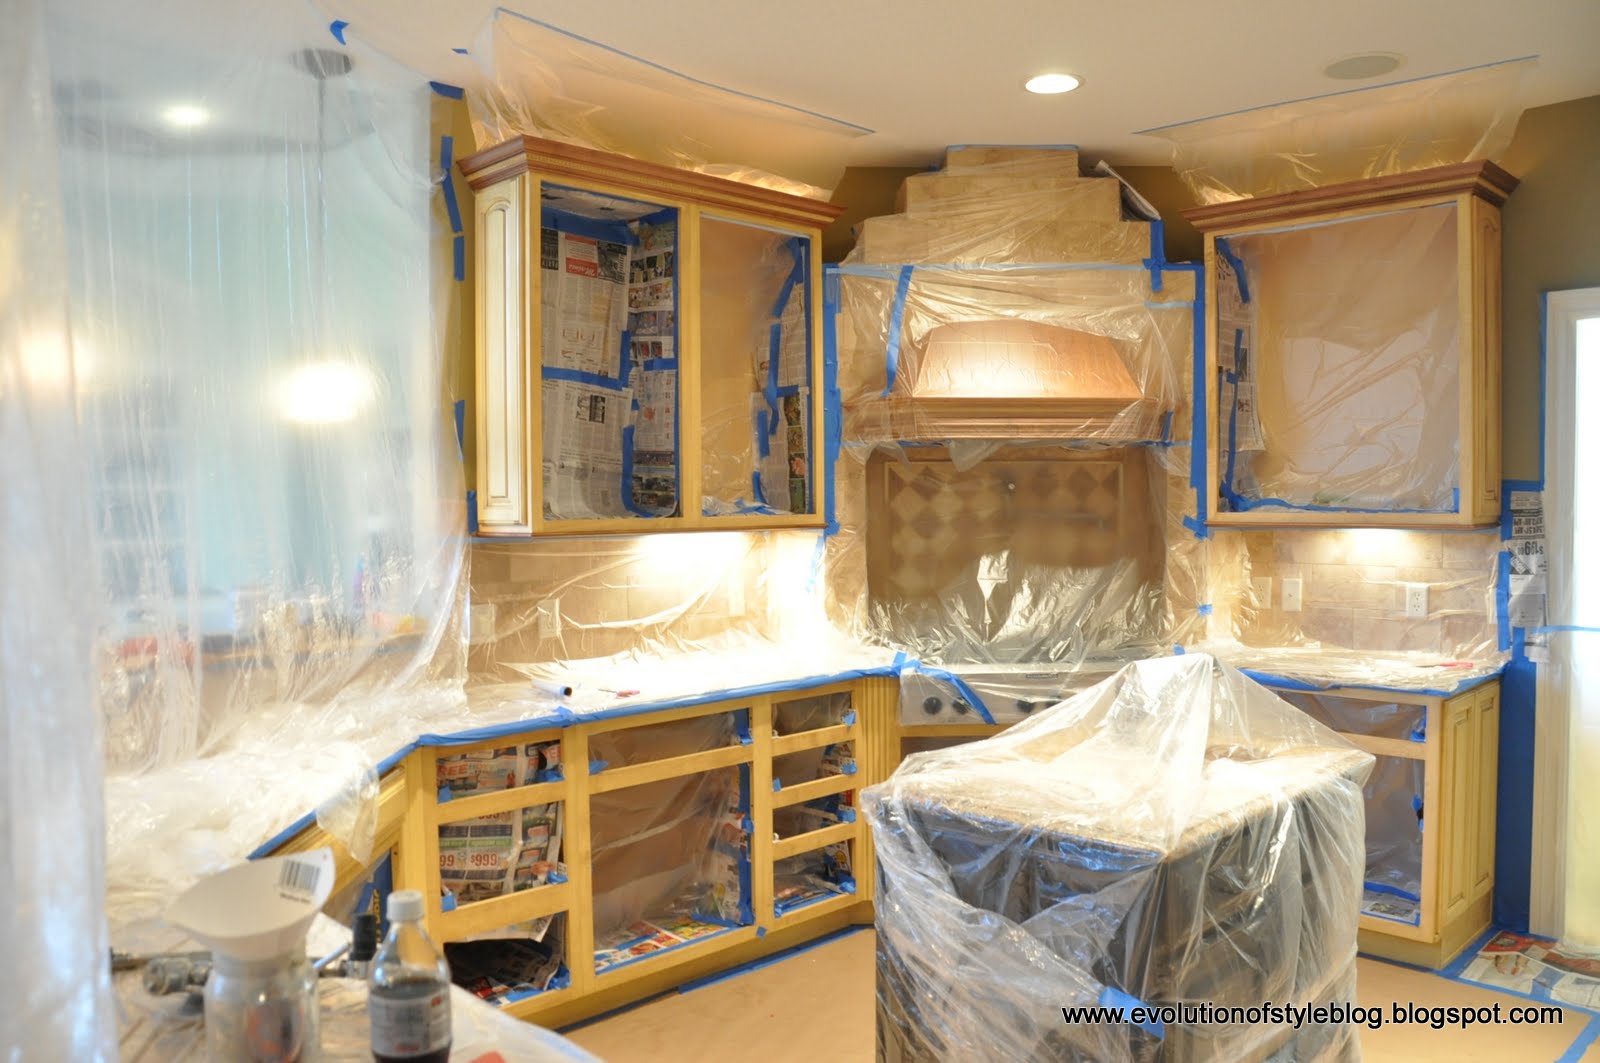
You will also need to tape off the insides of the cabinets, the countertops, floor, even some of the ceiling. If you’re planning on painting the walls, do it after you paint the cabinets – you’ll save some time and trouble in taping off the walls in addition to everything else. This was, by far, my least favorite part of this project. Taping off the insides of cabinet frames is harder than it sounds. But, I can offer you some advice that I learned along the way.
TIP: Tape off the bottom, sides and top of the frame first (newspaper works well for this), and then tape off the back of the inside frame.
You can see what I mean here:
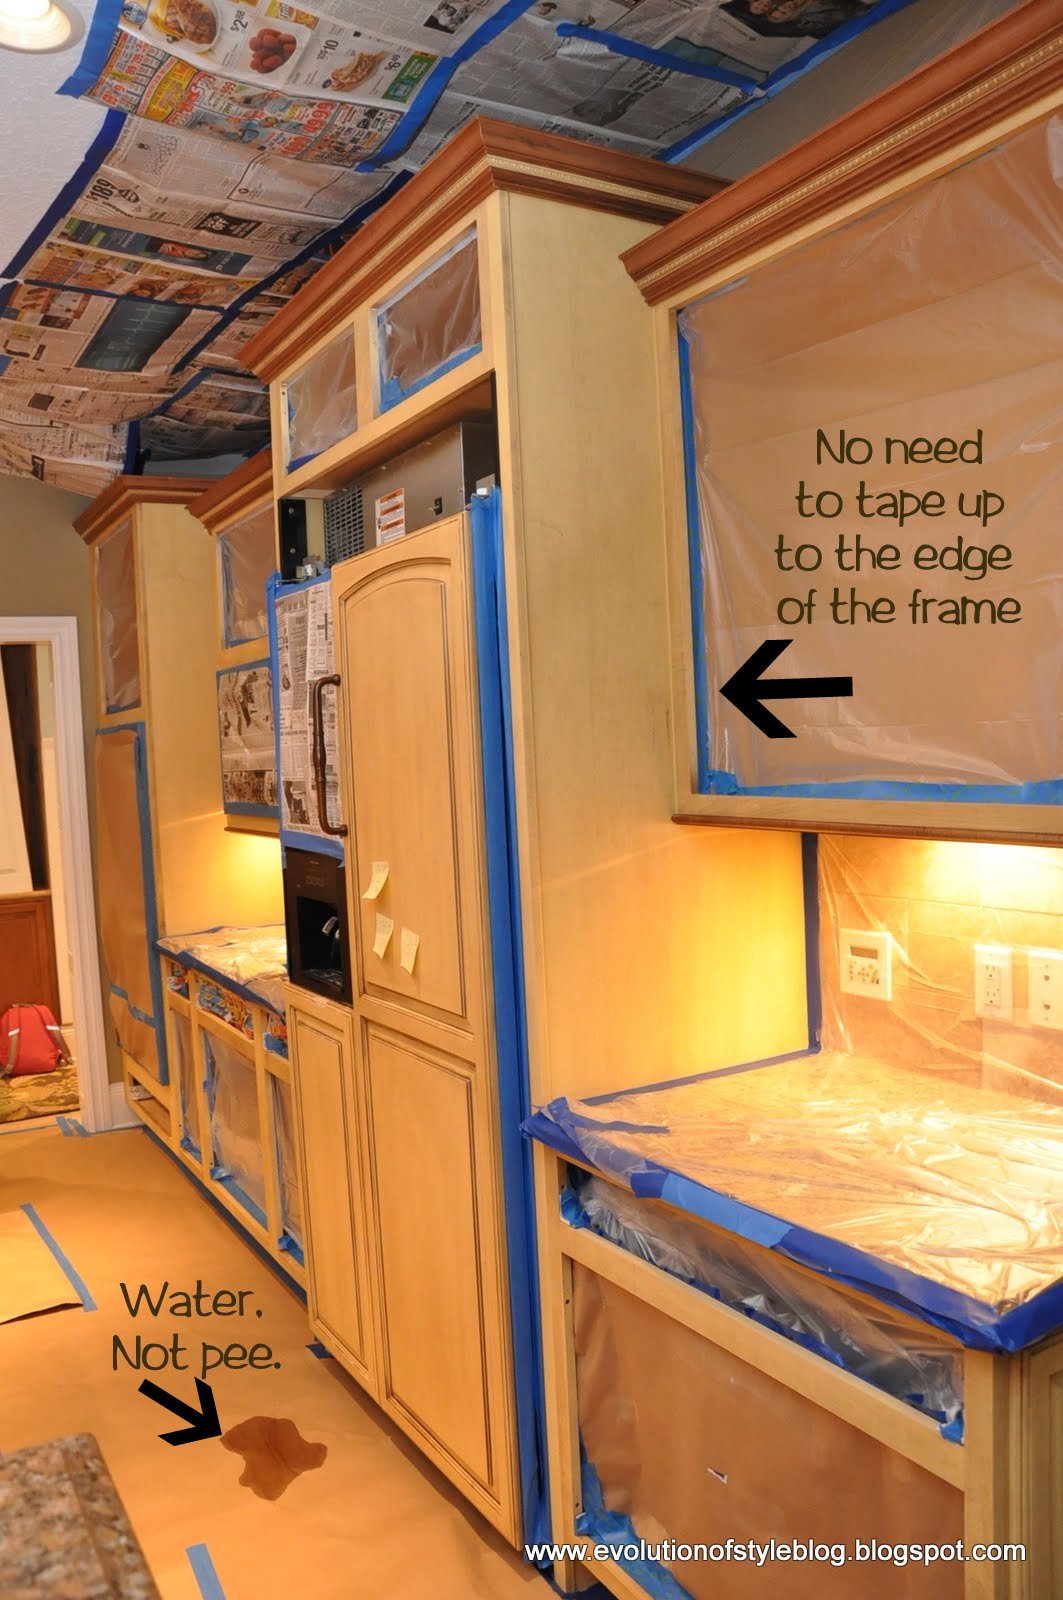
Versus here where I was trying to tape off right at the edge of the inside frames. Don’t ask me why it took me so long to figure this out, but it was a maddening process. (And don’t mind the water spot on the contractor paper – it’s from the water dispenser in the fridge. I swear.)
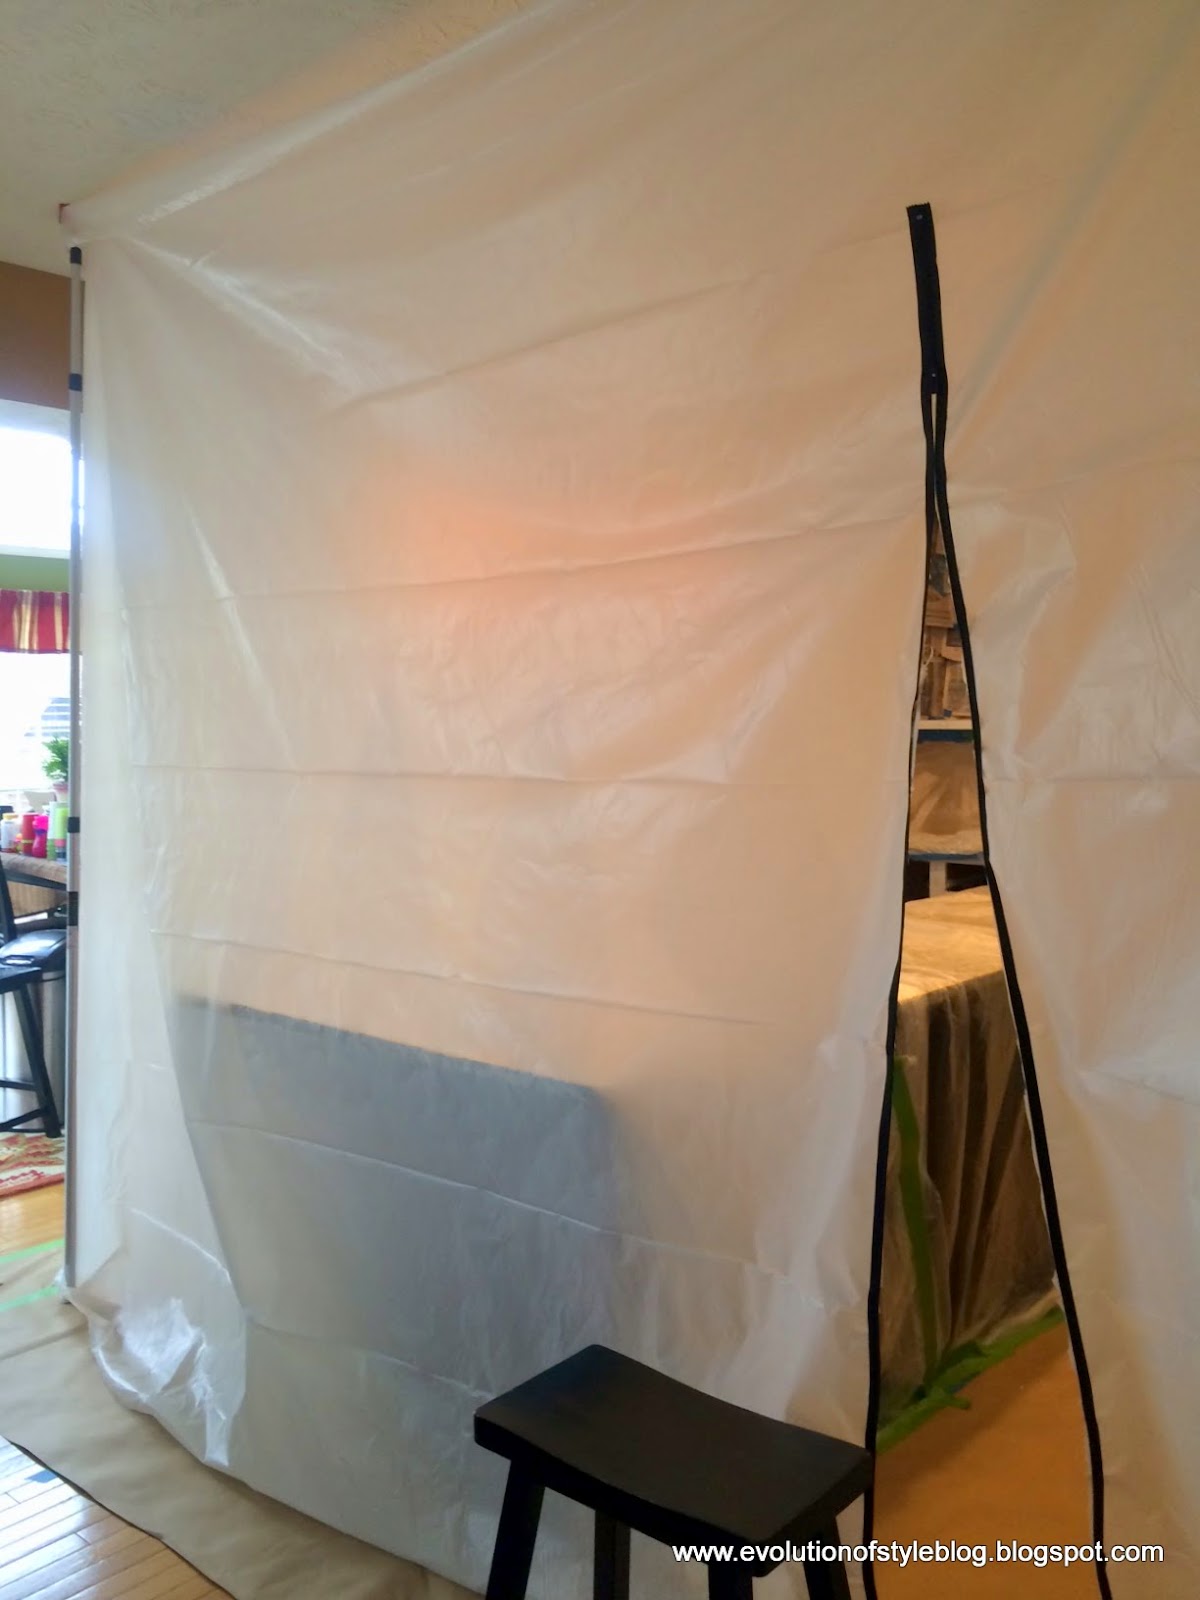
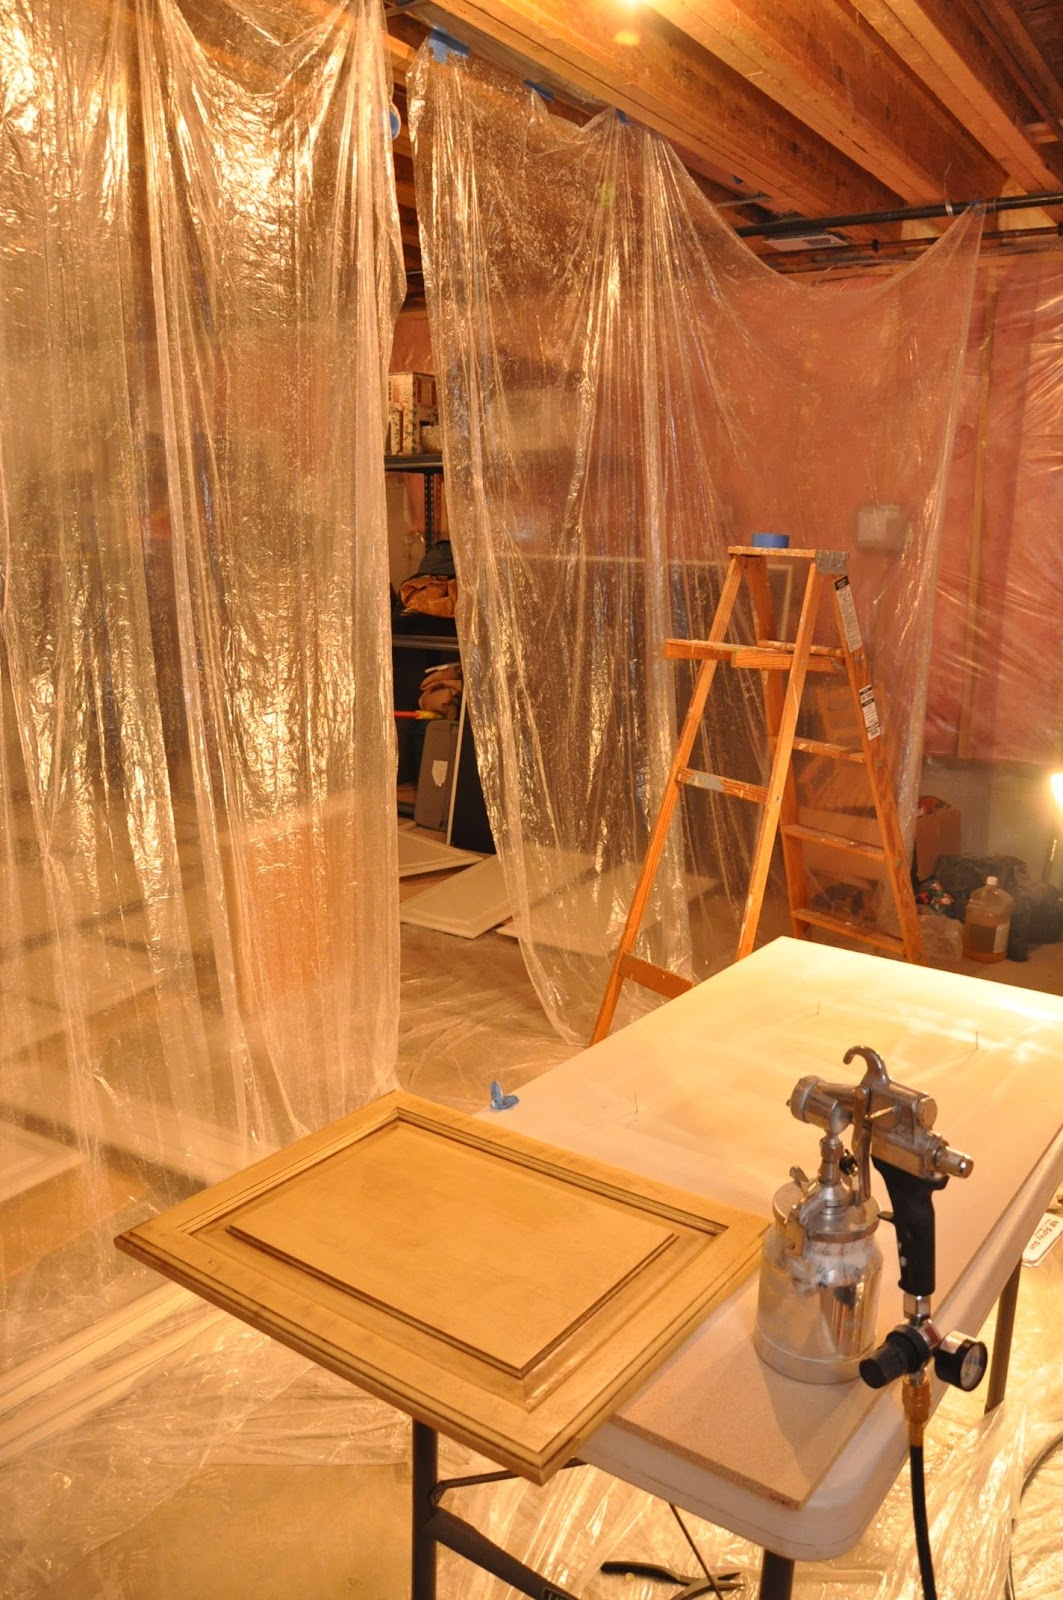
You will need to go all Dexter-like and tape off any open areas in your kitchen to avoid spray particles from floating through your house.

 |
| Note: I don’t flip my cabinets and paint the other side without waiting. I have never been successful in that, and if you are, I’d love to see your technique. But, these are great to use when spraying your cabinets. |
Priming and Painting
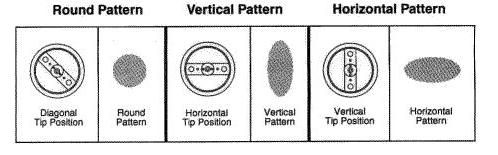 |
Paint pattern size:
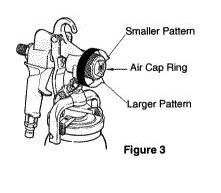 |
Air and paint flow control:
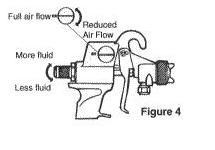 |
Then, fill in the center area, working side to side, ensuring complete coverage.

- Clean and degloss the frame surface with Krud Kutter
-
Lightly sand the frames (I used 220 grit sandpaper)
-
Remove excess dust and wipe clean with tack cloth
-
Prime cabinet frames and allow to dry 24 hours
-
Lightly sand and use tack cloth before painting
-
Paint cabinet frames with 2-3 coats of paint, waiting 24 hours in between coats
-
Wait 2-3 days for paint to cure before rehanging doors


I hope you found this tutorial helpful, and most importantly, I hope you’ll begin to see that you can do this project!
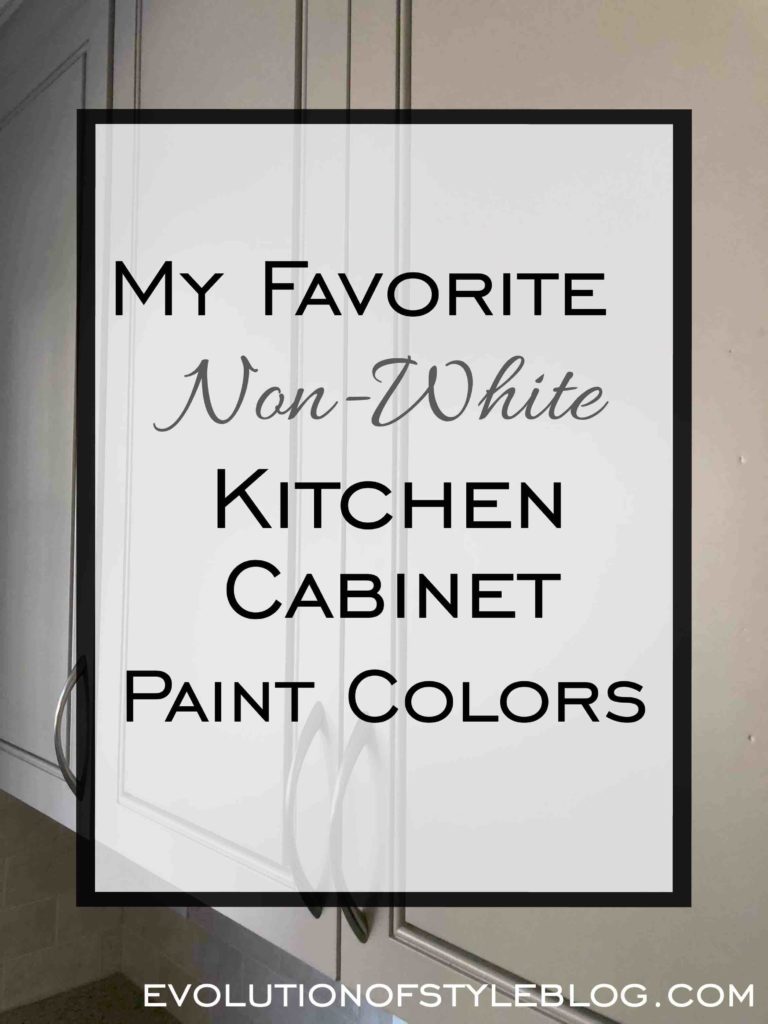
Interested in cabinet paint colors that aren’t white? Check out this post on my Favorite Non-White Kitchen Cabinet Paint Colors.
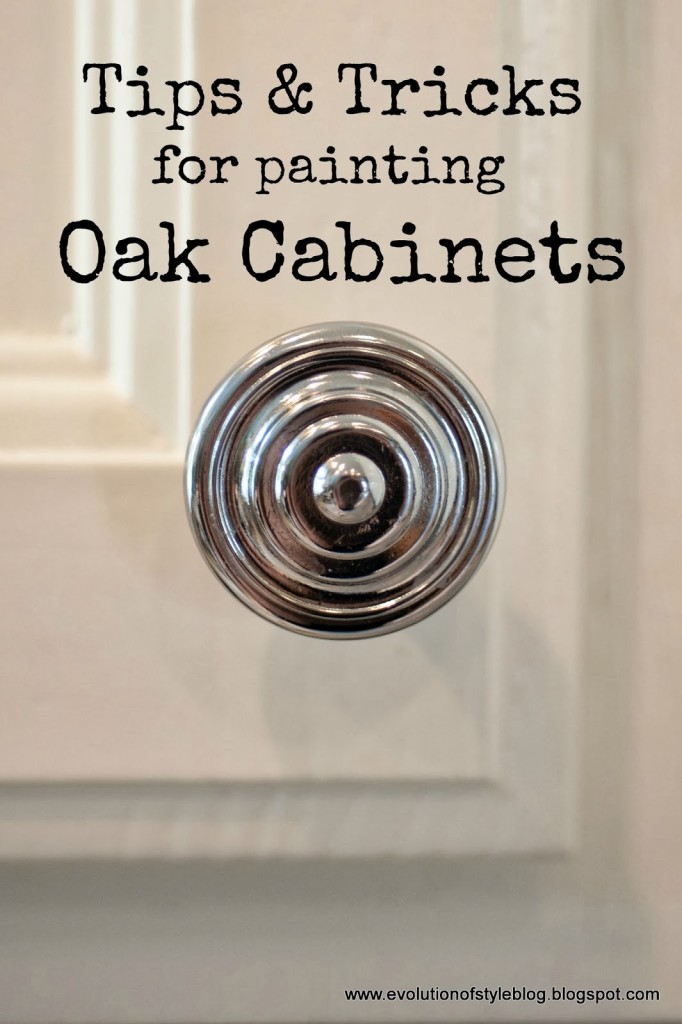
In case you missed it – here is my post with tips and tricks on painting oak cabinets.
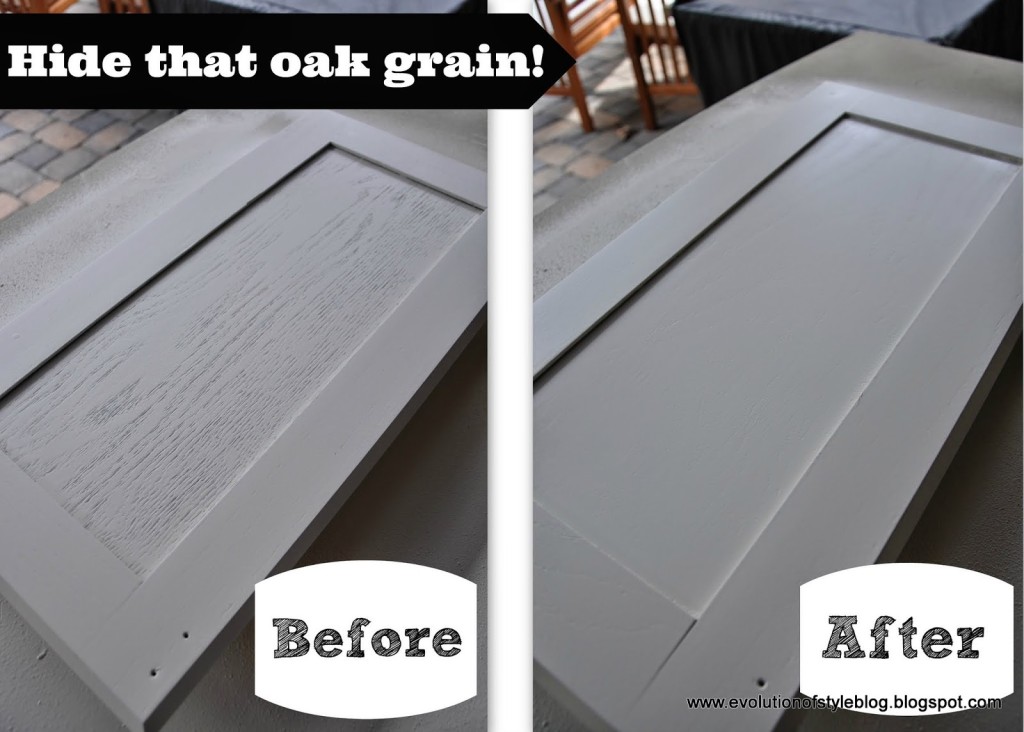
In April 2014, I gave Behlen’s Grain Filler a test drive to get rid of the oak grain on a cabinet project.
Here is a post showing an oak kitchen transformed (by me) for a client.
Before:
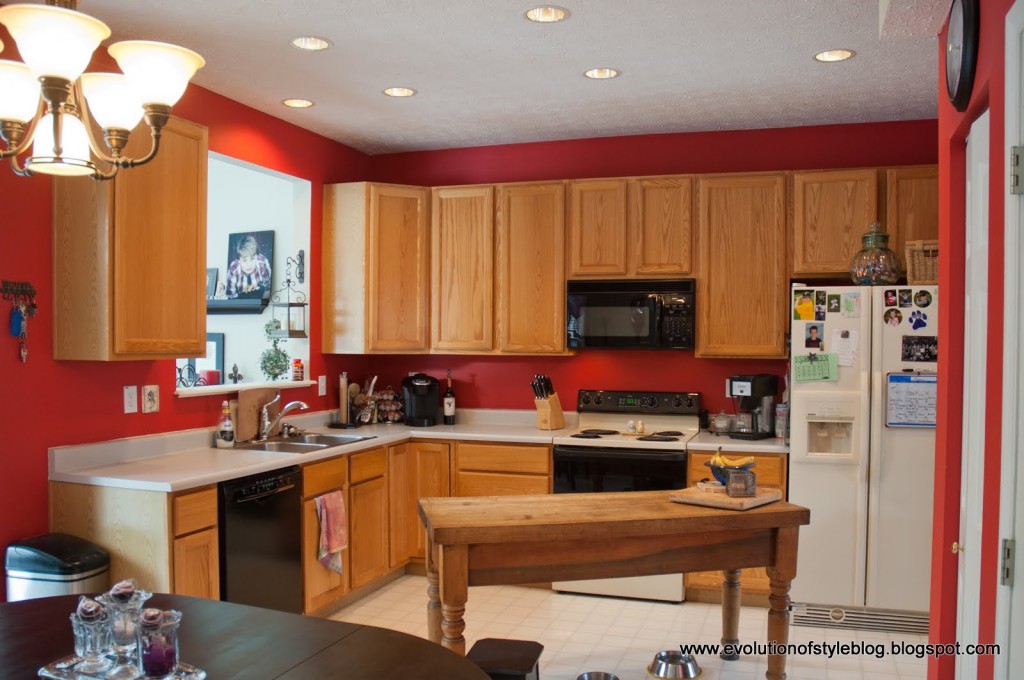
After:

Here are some links to some other resources that might be useful:
Melissa at 320 Sycamore
Traci at Beneath my Heart
Sherry and John at Young House Love
Marian at Miss Mustard Seed
Traditional Painter Hand Painted Kitchens and Furniture – a treasure trove of information from seasoned pros, on materials, supplies, prep and technique, along with loads of photos of kitchen transformations. One of my favorite resources!

264 Comments
Anonymous
February 3, 2012 at 6:06 amWere your kitchen cabinets real wood? Mine are the cheaper kind. They are outdated and need some revamping. Buying new cabinets would be too expensive.
Anonymous
February 3, 2012 at 6:34 pmDid you thin out your paint before you put it in the paint gun?
Anonymous
February 4, 2012 at 6:32 pmYour tutorial was wonderful! I'm in the middle of doing the same thing, except my kitchen is much smaller and I have fewer doors to paint. I too went to the paint store and got the same advise from my BMoore dealer….glad you confirmed. I've done this before only in oil based paint and I hope this will be my last attempt to make my kitchen look great. Thanks for your valued opinion. You did a wonderful job!!!
Michelle
February 5, 2012 at 7:27 pmBeautiful transformation! What was the original paint color on your walls before you repainted them? (if you know!)
Anonymous
February 6, 2012 at 3:16 pmWe were given kitchen cabinets from a friend who was redoing their's. We will be installing them in a kitchen at our cottage. Thanks for the thorough tutorial. I will definately not be so intimidated to go ahead with this project. Well done!
Sall's Country Life
February 10, 2012 at 7:15 pmJust had to let you know this is a remarkably thorough post! I started painting our cupboards 3 years ago, got the bottom ones done and never have mustered up the energy to do the top ones (it took a lot of energy)! Your kitchen looks amazing! Well Done! Want to come over and finish mine now?
gabby
February 10, 2012 at 9:25 pmWell now I REALLY want to paint my cabinets white 😉 You might be hearing some words from my hubby about this post. Hee hee! Great job and a great tutorial! You really gave a good step by step. Also, the end result is PRETTY!! 🙂
Lesli @ BeautifullyCoastal.com
February 18, 2012 at 5:42 pmWhat a beautiful kitchen and a FANTASTIC tutorial! I'm pinning you!
Anonymous
February 20, 2012 at 2:23 amHow did you do the panels on your refrigerator?
Anonymous
February 23, 2012 at 3:39 pmYou have inspired me to tackle my kitchen!
Scott
February 26, 2012 at 3:26 pmHi Jenny
Great job! I am a professional automotive painter but have been a bit reluctant to tackle this project in my home. I too am very picky as to how I do things. This definitely takes time and work to achieve results like yours. I have been doing research for 2 days and like your ideas the best. The prep work is 90% of a successful job but the right materials make all of the hard work come together. Many tutorials are sketchy on the "how – to's" and give no advice about the products used. I have confidence that you have made great suggestions here. THANKS for that.
I will be going to my local Benjamin Moore store this week to select my paint. This has been my major concern. Quality materials that are easy to use. Your colors are very appealing BTW.
For your readers; spraying in my opinion is the best way to achieve a beautiful finish. Do not be hesitant, anyone can do this! As Jenny suggested… just a few minutes of practice on and old board or cardboard will do. Start with a very low volume of paint and slowly work your way up to a comfortable level. You will be thrilled with the end results.
This is an excellent tutorial, Jenny has given you all the info you need for a fantastic transformation!
SusanF.
March 13, 2012 at 3:06 pmThank you for such an incredibly detailed tutorial! I am planning on painting my almost 20 year old golden oak cabinets and your tutorial gives me the confidence to do it!! Awesome job on your kitchen, it is absolutely beautiful.
Jenny
March 13, 2012 at 5:38 pmSusan, I hope you're able to put the tutorial to good use. Like I keep telling people – it's not difficult, it just requires time and patience. You can do it!!
Cathy
March 14, 2012 at 5:35 pmOMG.. THAT is AMAZING!!!! Now.. I just need a house… 🙂 (I bookmarked for when i do!!)
Anonymous
March 18, 2012 at 2:43 amHi, love your kitchen!!!!!!!!! Great job. What color are your walls???!
Jenny
March 18, 2012 at 1:28 pmThank you! The walls are Mountain Laurel by Benjamin Moore. I love this color so much that I used my extra paint to paint my downstairs bathroom. :-).
http://www.evolutionofstyleblog.blogspot.com/2012/01/powder-room-palooza.html
Anonymous
March 27, 2012 at 4:40 amWOW. Did you do this all by yourself? You are truly an admirable woman. I will use this post to help me as I redo my own kitchen cabinets. Thank you!
Anonymous
March 27, 2012 at 6:07 amYour kitchen looks really nice. I was looking at the paint spray gun you used and it reminded me of when I worked at a chocolate factory. We used to use one that we filled with whited chocolate and we would spray the hazelnut seashell molds, then give it a coating of milk chocolate. We would then give it a coating of milk chocolate and then fill with hazelnut filling. The paint gun also came in handy when coating almonds and coffee beans with chocolate, in the big tumbler. Those paint guns are really fun to use and they are easy to clean, but maybe not if all the paint dried overnight in the hoses.
PaulaButts
March 28, 2012 at 5:26 amoh my! I just read yr tutorial and I am not even thinking of doing this! You should be a writer! You must have patience and a lot of energy! Fantastic job! Love the whole look…from "new" cabinets to wall colors, counter tops, pulls, etc.! You definitely have a couple talents!
Anonymous
March 28, 2012 at 6:51 pmI forgot to ask what color you used for the cabinets? Your blog has really helped us. We will be starting our cabinets soon!!!!
Jenny
March 29, 2012 at 2:37 amWe had the paint color matched to the cabinet sample that we liked. Unfortunately, I don't have the "formula", but I highly recommend that approach. I am thrilled with the color.
vignette design
April 3, 2012 at 5:59 pmYour post came at the perfect time for me! First of all, I am so impressed you did this yourself! Second, your kitchen looks absolutely amazing! I hired a painter who specializes in cabinet finishes and will take all the doors and drawer fronts to his shop to spray. But the boxes in the kitchen will have to be taped off and sprayed onsite.
I'm procrastinating! The finish will be a 3 or 4 step finish with glazes etc. The whole process seems daunting, but seeing how you did it and lived to tell has given me courage to bite the bullet and just get it done! Thanks for the tutorial! ~Delores
Anonymous
April 4, 2012 at 7:54 pmAwesome job! We want to paint our cabinets white too. We are going to hire a professional who will spray the cabinets at his shop and spray the frames onsites. I am concerned about the oil paint smell and the final appearance. But I just came across the Benjamin Moore Advance paint which none of the contractors mentioned using.
Couple of questions for you: Did you use the high gloss or satin finish? I'm expecting a smell from the paint but is there truly minimal odor with this paint? How have the cabinets held up? I have relatively new cabinets with raised panels and beading work along the panel.
Jenny
April 5, 2012 at 10:17 pmThanks so much for your kind words. As for the paint finish, I went with a satin, and they have held up beautifully. And the odor? No comparison to an oil based paint! If anything, I think it was even less smelly than some the latex paints I've used to paint my walls. REVOLUTIONARY I tell you! 🙂
Tracey
April 6, 2012 at 2:53 ami actually started by staining mine, what a PITA…besides, the frames are particle board, can't stain that. I'll have to try to start this project over with the paint gun and loads of tape/time/room. Looks time consuming, but much easier than what I tried.
Lisa
April 7, 2012 at 1:40 amBeautiful! Thanks for taking the time to show us how you did it! I was wondering if you sanded the doors after you primed them?
Jenny
April 7, 2012 at 12:29 pmThanks for your comment – yes, I did lightly sand after priming – 220 grit sandpaper – just enough to smooth out any rroughness.
Toni Scott
April 11, 2012 at 3:48 pmThis is awesome, thank you! This is exactly hos the pros painted my kitchen cabs. I want to do my bathroom myself.
Enloops
April 13, 2012 at 1:52 amWhat size tip did you use for the advance paint? And did you use the same size for the primer?
Jenny
April 14, 2012 at 2:38 amI used the standard tip that came with my paint gun – don't quote me, but I think it was a #3?). Used the same tip for both primer and paint.
Enloops
April 15, 2012 at 12:45 pmThanks. According to Gleem's website it does come with #3 (which is a 1.3 mm tip). The Advance paint must be much thinner than ordinary latex paint.
June
April 14, 2012 at 3:58 pmGreat Job! Where can I find the spray gun and how much is it? 🙂
Dee Dee Williams
April 16, 2012 at 2:47 amI'm a professional paint contractor and I think you did a wonderful job! See why we charge so much? It's not easy to spray kitchen cabinets in a finished house! The only thing I can say that may have saved you some time is write the numbers of the cabinets and doors with a marker where the hinges go then cover with a piece of tape. After you finish painting, pull off the tape and reveal the numbers, the hinges will cover them. And it doesn't matter if you mix up the hinges and knobs, just keep them all in a single bowl or bag. I like to wash them before reinstalling them.
Anonymous
April 17, 2012 at 4:00 amWas your 6 gallon pancake compressor able to keep up? I keep reading that a compressor this size would require a lot of waiting for it to refill. What were your pressure settings at the compressor and gun?
Sabrina
April 17, 2012 at 4:24 pmHi,Jenny, I am in the process of repainting my old oak kitchen cabinet. After reading many many tutorials I found yours are the best. I finally decide to spray instead brush paint the doors. Just have a couple questions about the primer, do you use oil based or water based primer in a spray gun? Oil based primer needs mineral spirits to clean. I am not sure if it is easy to clean. Another question is how many gallons of paint did you spray? I probably needs a gallon of paint to paint my kitchen by brush, but by spraying, maybe I should buy 2 gallons? Thanks.
Jenny
April 17, 2012 at 8:29 pmI used the Benjamin Moore Fresh Start Superior Primer (latex), upon the advice of my "paint guy". You can use oil based paint in a spray gun, but like you said, you would have to used mineral spirits to clean.
As for paint – I ended up buying two gallons of paint, but was *this close* to getting the job done with one gallon. And I had nearly 50 cabinet doors and drawers to paint. I think the sprayer saves on paint actually. As for the primer, I used one gallon of primer.
Good luck, and I'm glad you found my tutorial helpful. 🙂
mamamarianne
April 26, 2012 at 1:25 pmSo I did my cupbaords with the advanced and fresh start. Did yours actually dry rock hard. Its been two weeks and I can still scratch paint off…is this normal?
Jenny
April 26, 2012 at 1:42 pmMy paint guy told me that it takes about 30 days for the paint to fully cure. Mine have held up fine – could it be that they haven't fully cured yet?
Kelly Merv
May 2, 2012 at 3:18 pmThank you so much for all the time and effort you put into your post. Wow! I so wanted to do this, but took the 'easy way out' by scrubbing and polishing up my old cabinets and buying all new hardware to bring them into this century. 🙂 I will definitely pin this, should I absolutely get sick of my red oak look. (I brightened up my kitchen by re-doing the floors and counters with a much lighter tone, and painting the walls a light shade of yellow. And now have white appliances, mine were 25 years+) I have done the 'taping up of the whole area' when I did a 'splatter wall' in my son's room. Props to you girlfriend! This is very time consuming and tedious task, especially in a kitchen – and you with an active family. Yikes! Your kitchen looks great! Your whole family should be VERY proud of you!!
dreamcarr
May 3, 2012 at 7:03 pmWas the white a special name or just the standard white? Love the pics!
Jenny
May 5, 2012 at 1:57 pmWe custom matched the color to a cabinet sample that I got from a kitchen design store.
Ponderful
May 10, 2012 at 4:59 pmmy cabinets are actually formica…I wonder if the same technique will work?
Ruth Parks
May 14, 2012 at 5:16 pmThank you for taking time to share your research and hard work!! You did a wonderful job!!
Anonymous
May 23, 2012 at 8:55 pmGreat kitchen! Great Blog! I'm wondering if you wore a mask while spray? safety goggles? Any safety precautions to share?
Jenny
May 24, 2012 at 11:15 amYes, I should have mentioned that in my post. I wore goggles and a mask while painting. 🙂
Devine Salvage
May 28, 2012 at 1:47 pmThat is an amazing tutorial and I found you via Pinterest. Of course I had to post a link to. Thanks for sharing
Jenn
May 28, 2012 at 2:55 pmGreat job. What an awesome tip to bring a cabinet sample to the paint store for color matching. I never thought of that. I'm going to buy the Advance paint too when I start my kitchen remodel this Summer. Can you share where you got your kitchen hardware: bin pulls and knobs? They look fab with your white cabinets.
Nisha @ Healthy Mom's Kitchen
May 28, 2012 at 11:13 pmI would LOVE for you to email me the paint color you have above your cabinets (the blue) as well as the blue you have in your living room. nisha dot riggs at gmail dot com. THANKS!
Living Lakeside
June 4, 2012 at 9:25 pmGreat write up! Wish my "professional" painter had read this before he did my cabinets. I am going to redo them myself and will be sure to prep properly! He didn't even prime first! I went along with it against my better judgement thinking "well he's the professional and knows what he's doing".
Now I have to sand/strip them back down and start over from scratch 🙁
Josh
June 7, 2012 at 6:54 amwhOa! What a terrific post! I can't thank you enough for sharing all of your work. I'm about to use the Wagner sprayer with the Ben Moore paint on our new kitchen cabinets (unfinished oak).
One question…did you spray the primer? Ok, two questions 🙂 …was the paint thin enough to be handled comfortably by the sprayer?
Thanks! You're awesome.
Jenny
June 9, 2012 at 11:28 amThanks so much for your comment. To answer your questions, I did use the spray gun to spray the primer – makes quick work of the process. As for thinning the paint, I didn't have to thin it. I followed the directions and used a paint strainer a few times, but I didn't really notice a difference one way or the other.
Good luck!
YC
June 18, 2012 at 9:30 pmHi Jenny, thanks so much for the post! The guys at Gleem Paint ought to give you a kick back for all the business (mine included). We're painting some new doors, and I'm hoping this will look much better than the somewhat streaky look we got with rollering and laying off with the brush. 🙁 Which sheen did you use with BM Advance?
Jenny
June 18, 2012 at 10:38 pmI used the satin finish in the Benjamin Moore paint. Perfect finish for cabinets if you ask me.
Zettie
June 9, 2012 at 8:07 pmYour kitchen looks fab! I am in the process of painting my cabinets too & I am wondering what to do to prevent chips that I'm sure are inevitable? Did you use any protectant? I really hate chipped cabinets!!
Jenny
June 9, 2012 at 10:11 pmI haven't had any problems with chipping, really. I didn't use any protectant over the top – the paint has hardened really well. I would recommend to prime very thoroughly and take your time during this step. Especially in the areas that get the most wear. The other recommendation I would offer is when you add the little cabinet door bumpers to the insides of the doors, to make sure they're not too sticky, because they can pull at the paint if you're not careful.