
Hello!
I mentioned here that I had the opportunity to visit and meet Amy Howard late last year to learn more about her new line of paint and finishing products, and I’m excited to share my first project with you today. I have been on a big time furniture painting kick lately, and I think you’ll be as amazed as amazed as I am with how this thrift store dresser was transformed with Amy Howard’s One Step Paint. I am in love with the finished look, and find myself always looking for more furniture pieces to restore as a result. This post contains some affiliate links.
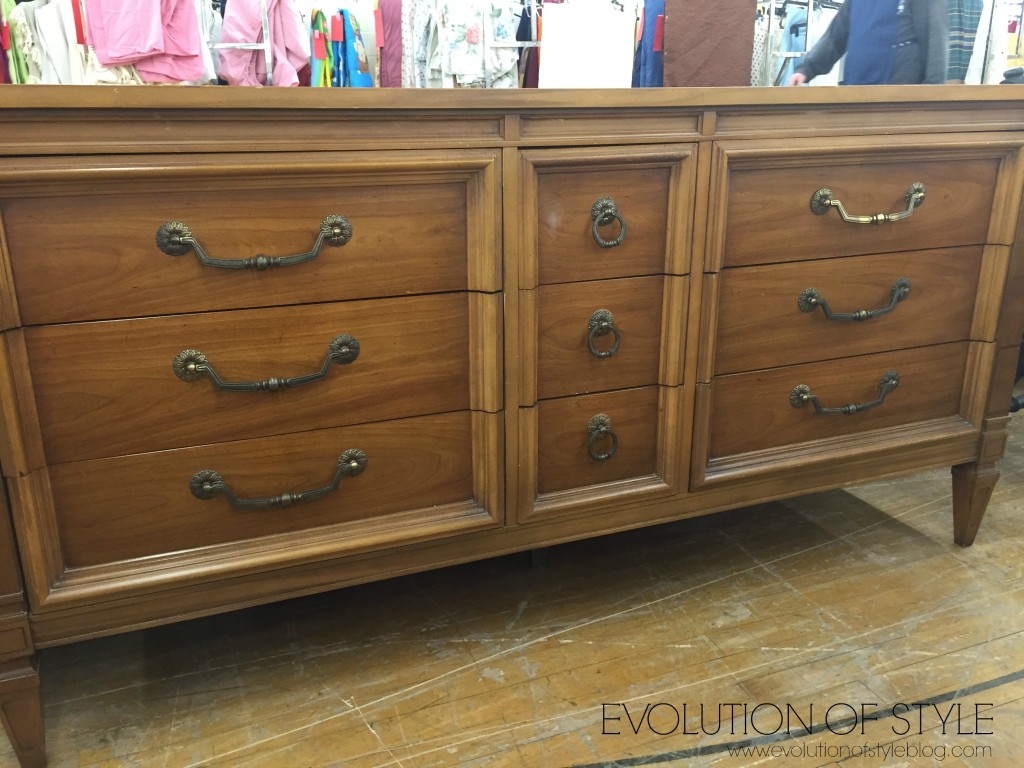
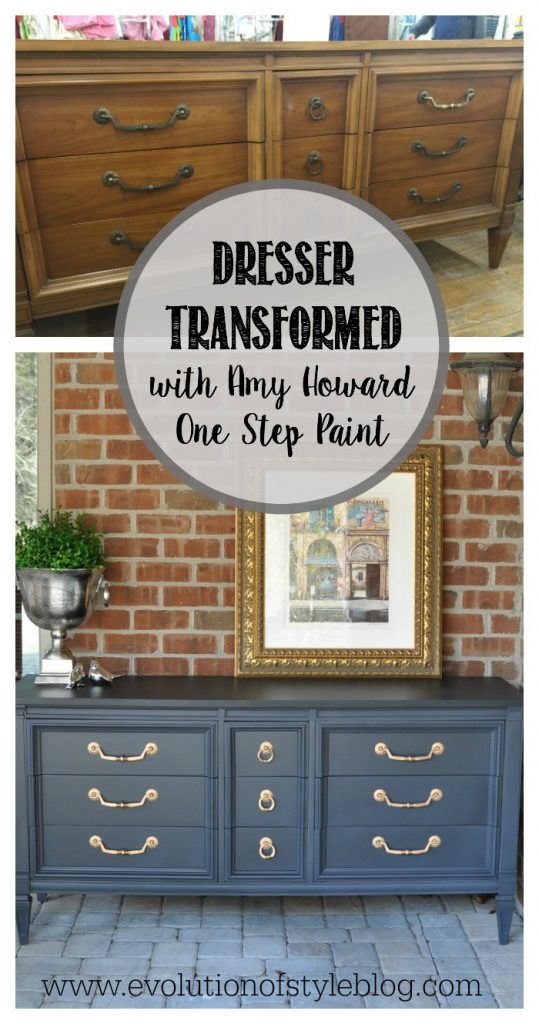
Let’s start with this little lady who is rock solid and just in need of a little TLC. Great bones, solid wood, made by Thomasville. I think my heart skipped a beat when I spotted it.
Choosing a Color
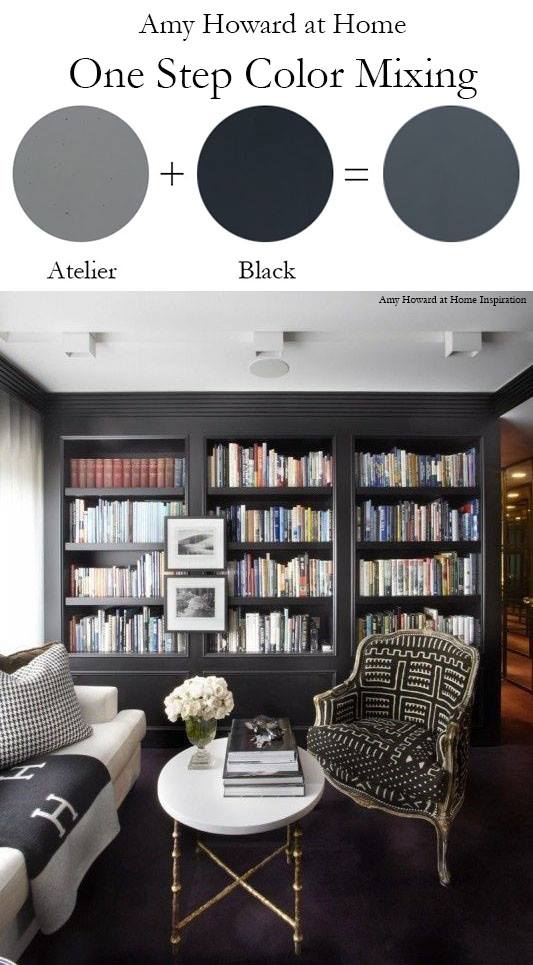
While Amy Howard’s paint line offers a variety of great colors, I stumbled upon this image on Pinterest of a gorgeous bookcase that had been painted in a mix of two of Amy’s paint colors – Black and Atelier. When I saw this, I knew I had found my match. How can you not love this, right?
So, that was my plan. When I attended Amy’s blogger workshop, she showed us a variety of their products and techniques, and I was excited to learn that her paint could be sprayed. You know me, and how much I love the smooth finish of paint when it’s sprayed, and I figured this would be a good way to get my feet wet in using her paint for the first time.
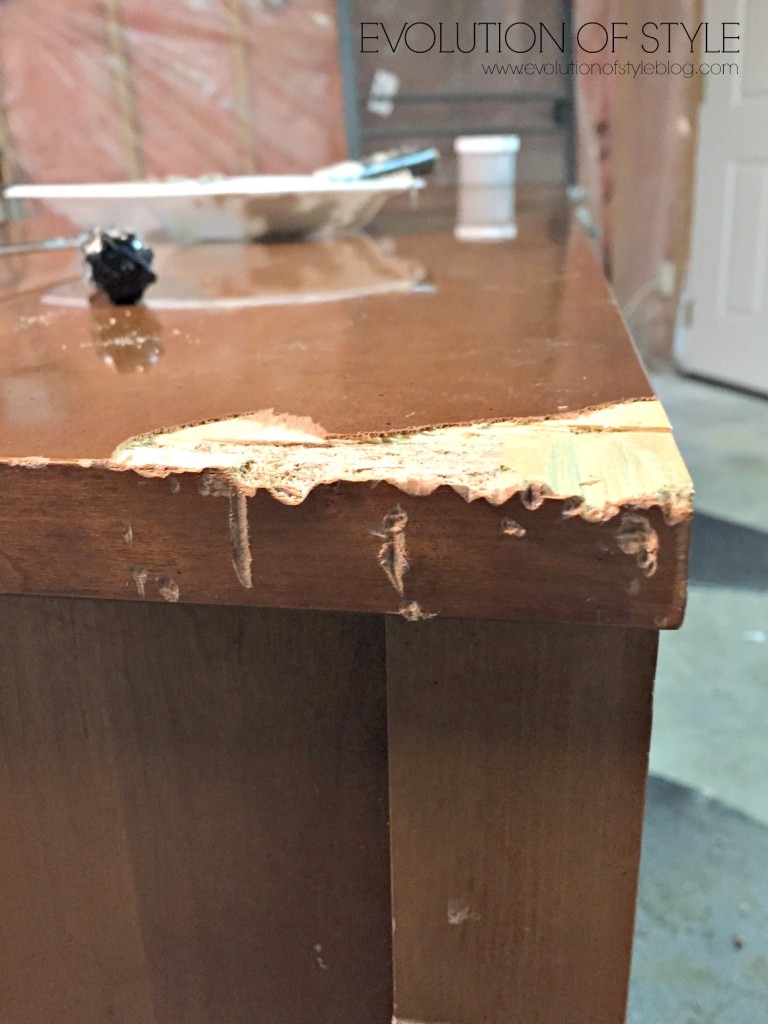
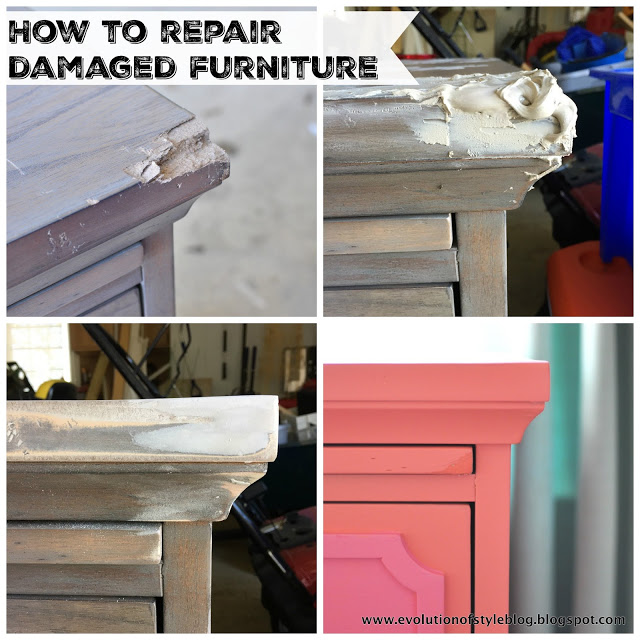
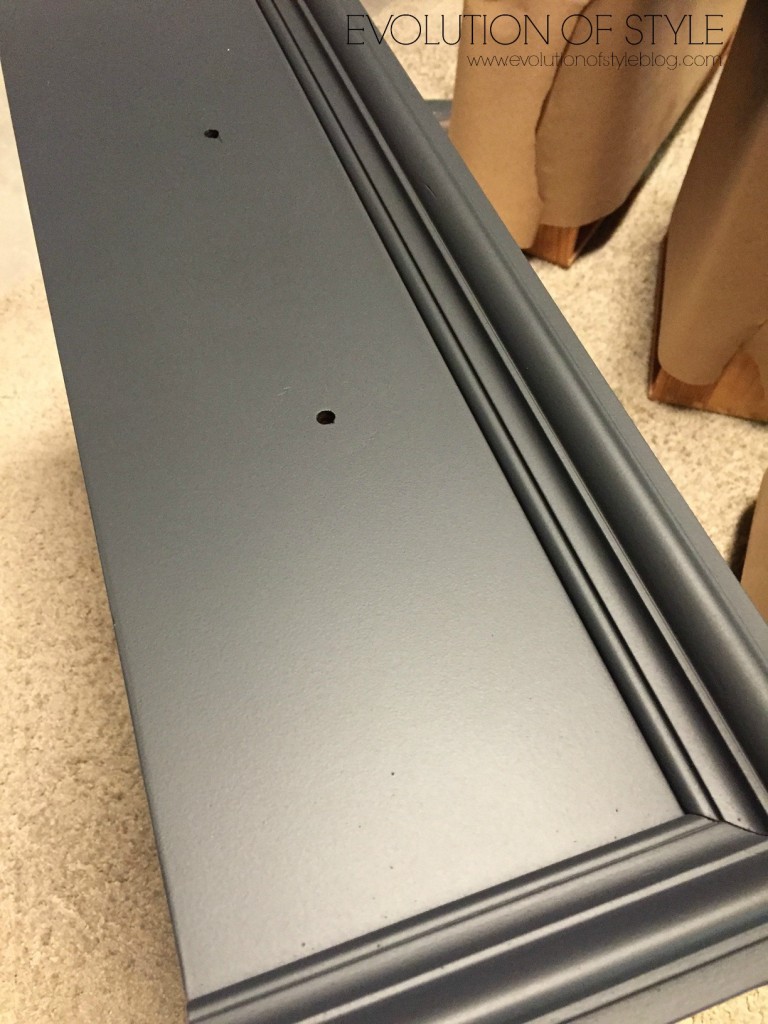
I cleaned the dresser with Krud Kutter and even though Amy’s One Step Paint doesn’t require sanding, I sanded anyway to make sure I didn’t miss any extra dirt or grime. I’ve become a bit of a sanding nut now that I have a great sander. It doesn’t feel like work anymore. Plus, I had to do a little bit of repair work on the top. While it was fine when I bought it, it sustained a little bit of damage somewhere in the transport process. This is where Minwax High Performance Wood Filler is your best friend.
Remember how I repaired my daughter’s nightstand with it? It’s magic when it comes to furniture repair.
Painting + Topcoat
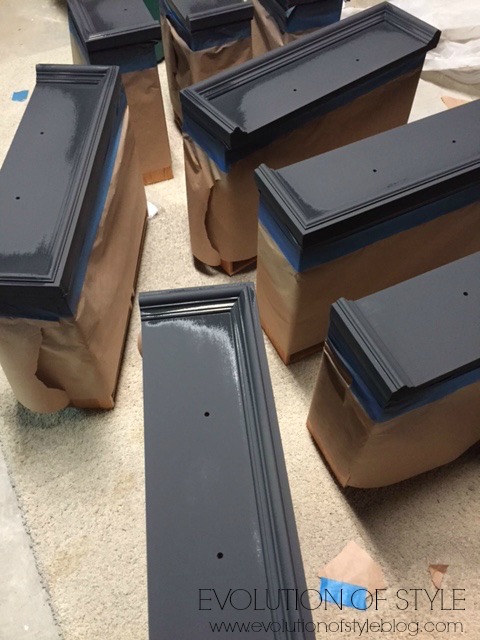
As for the paint, I mixed the two colors and then thinned them with water so that the consistency would work well for spraying. Here is a shot of the drawers. Let me tell you, this paint dries crazy fast, which is nice, because you can get work done quickly, rather than sitting around watching it dry. If you look closely, you can see that when it’s dry, it has a chalky finish to it.
For the top coat on this piece, I decided to try General Finishes Flat Out Flat, as the guys at the Woodcraft store said it’s flatter than the “matte” finish of other polycrylics out there.
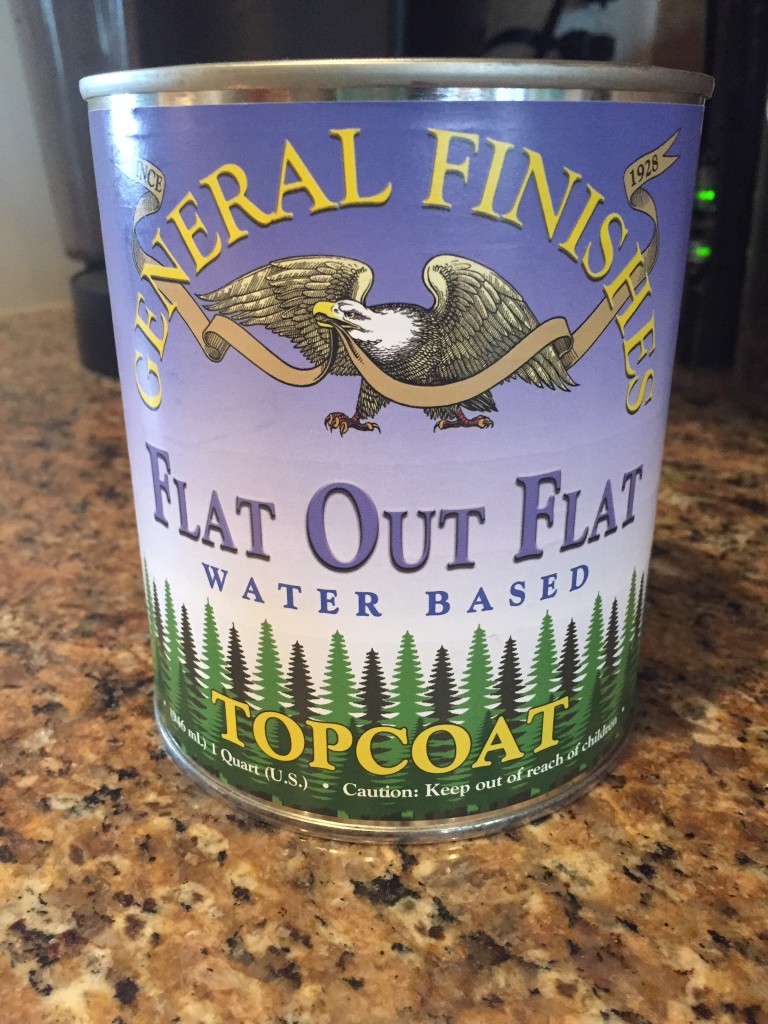
Oh. my. goodness. I absolutely love the finish it gives. It looks like it’s been buffed and polished, but I can spray it (which is a win-win) for me.
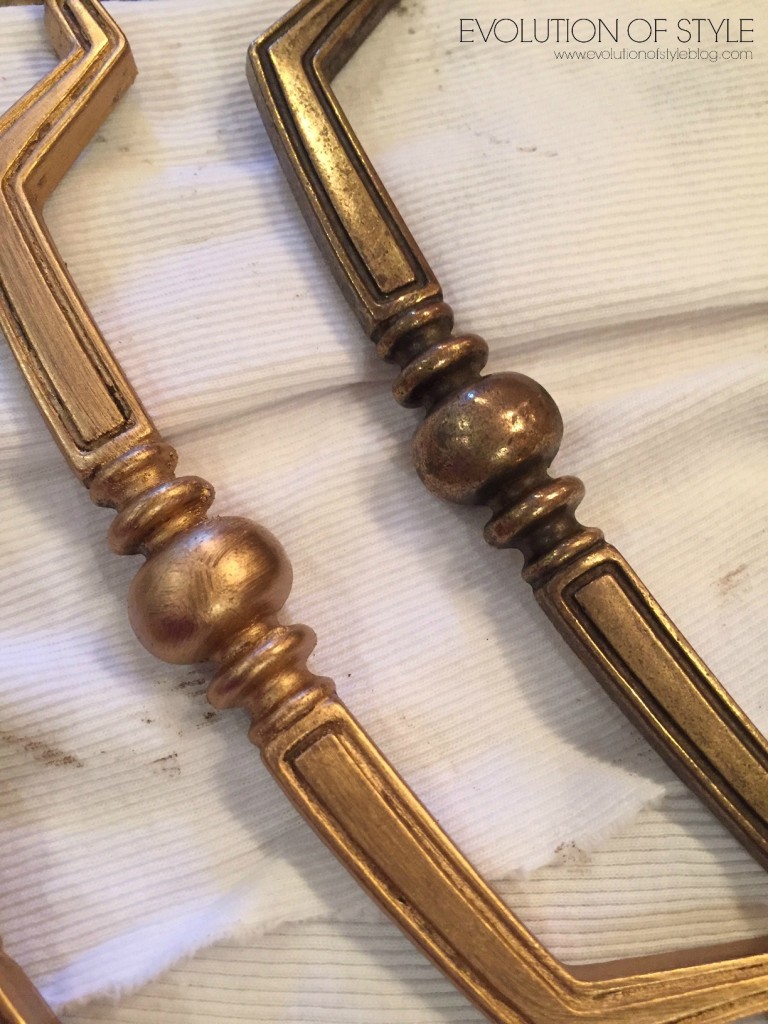
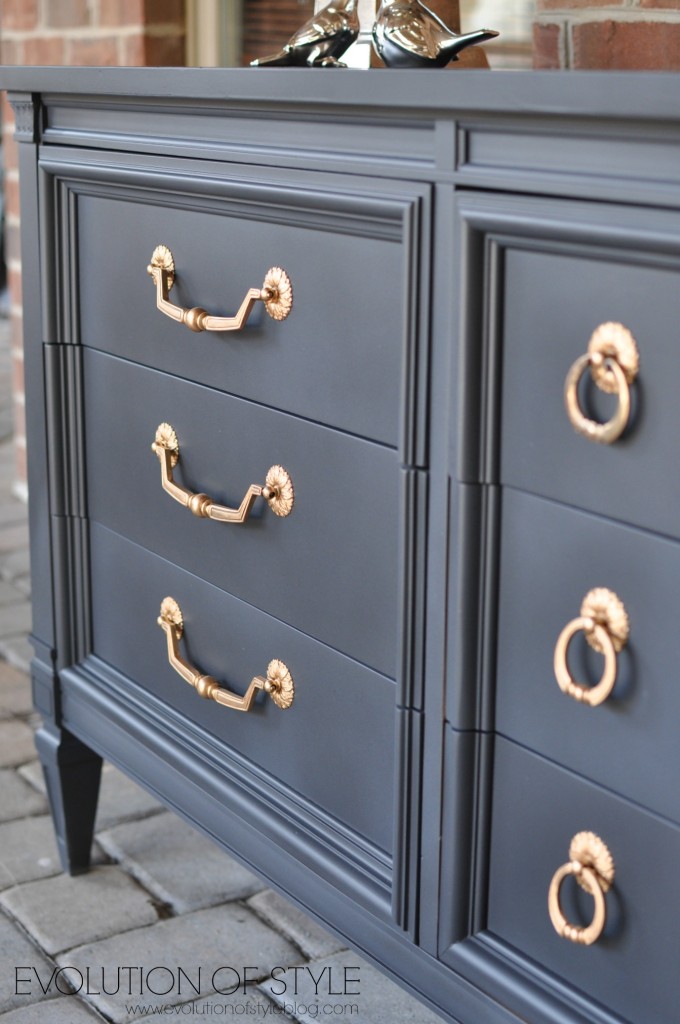
I gave the hardware a refresh with the help of some Rub ‘n Buff – love this stuff. It seemed wrong to replace it with all new hardware, since it just needed a little love.
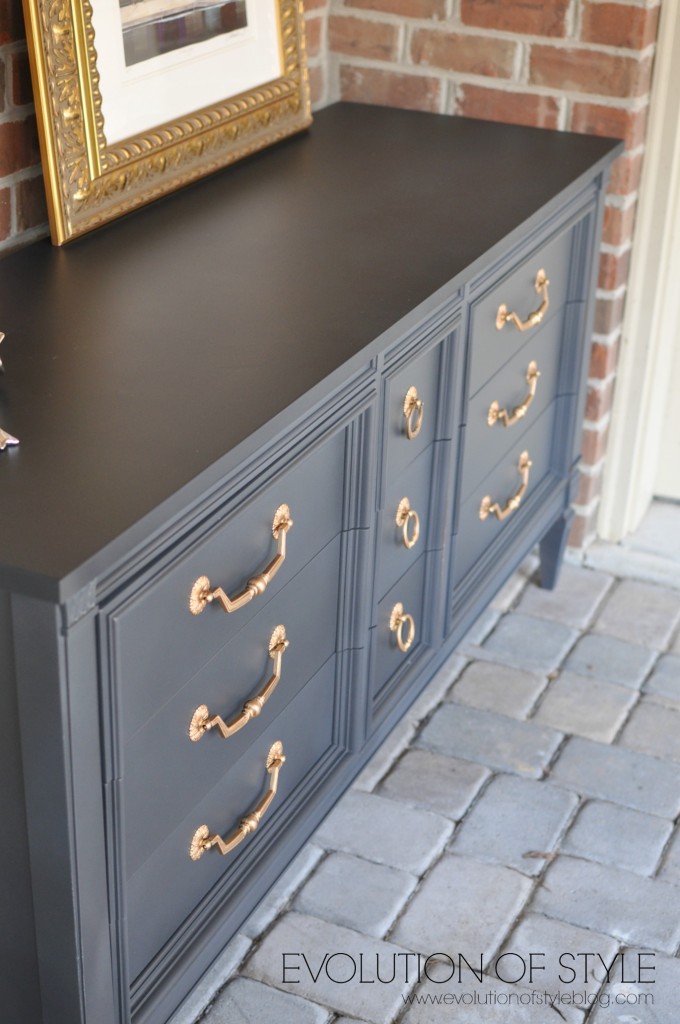
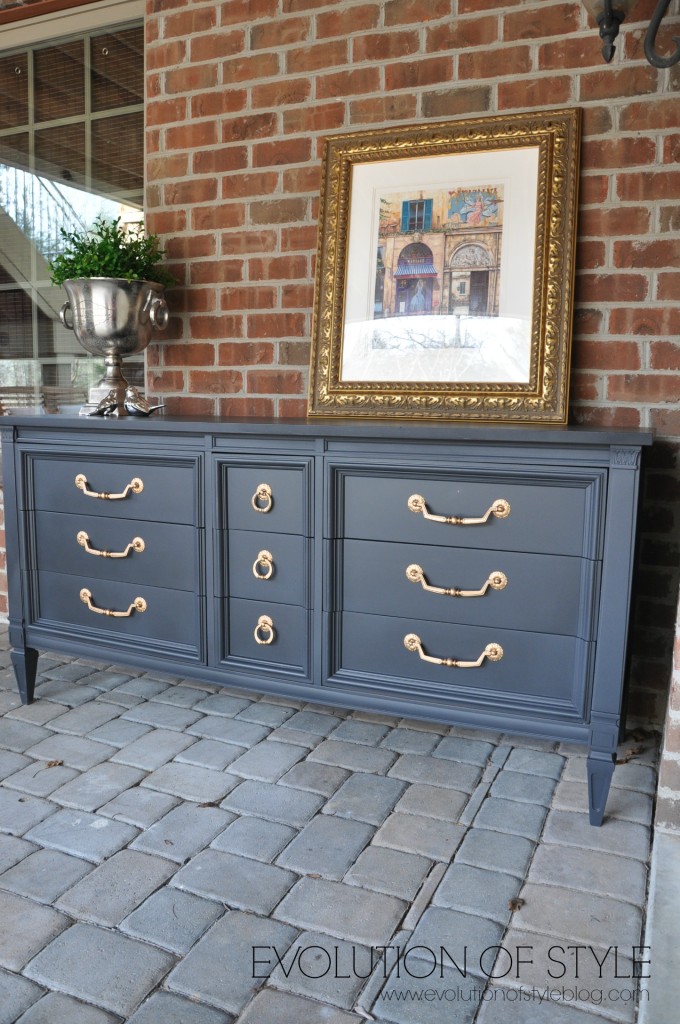
The Result
And here is the final finished look – I love it!
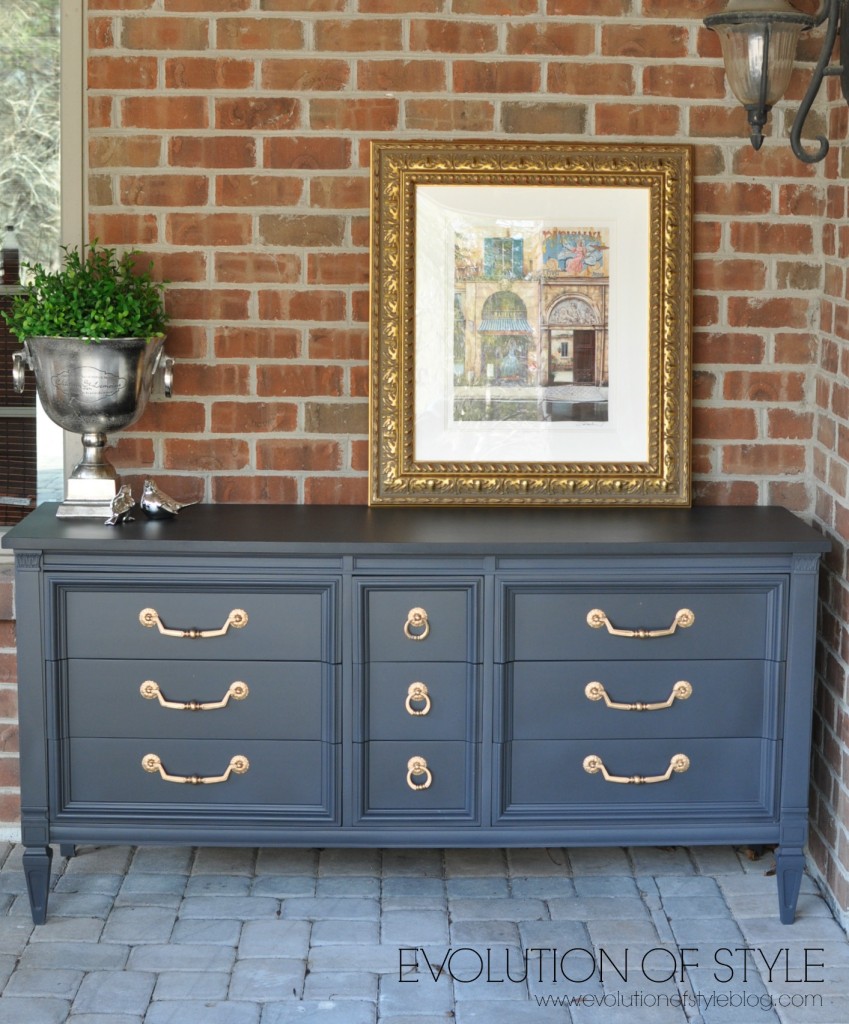
I ended up painting the top of this piece black, which gives it a bit of contrast. And you can’t even see where the piece was repaired, can you?
Here you can see the process in motion – I’m thrilled with how this piece turned out and will be on the lookout for more pieces to transform!
Have a great day!
Jenny

109 Comments
Brenda
August 28, 2019 at 3:54 pmThis is gorrrgeous! Great choice to put the warm coloured hardware on it. I painted a china cabinet that I couldn’t seem to sell a dark warm grey (BM Iron Mountain), and split it up into two separate pieces. Ha – now I’d never sell it! 😉
Emily
September 10, 2019 at 11:38 amDoes the flat out top coat make the paint lighter? Just curious because I’m wanting to refurbish an antique dresser with black paint and I want to maintain the dark color.
Jenny
September 19, 2019 at 3:44 pmNo – it maintained the color really nicely in my experience.
Laurie Anderson
October 28, 2019 at 5:08 pmWhen you say you sprayed it – how? Is the paint available in a sprayer or you put the paint in one?
Jenny
October 29, 2019 at 7:10 pmI have a commercial paint sprayer that I use, but I have used lots of other sprayers over the years as well. There are many out there that will do the job!
Deborah
November 3, 2019 at 7:27 amWhat brand sprayer and sander do you use? This piece is gorgeous!
Jenny
November 5, 2019 at 9:52 pmI have a professional grade HVLP paint sprayer (but I started with an HVLP conversion sprayer that I hooked up to my air compressor). I have a few sanders now, but am a big fan of Festool’s sanders. They’re a bit more expensive, but worth every penny!
Danielle
January 12, 2020 at 1:24 pmThe dresser looks amazing! Can you explain how much water you needed to add to think the paint for the sprayer? Also, did you mix equal parts of each paint color to make the dark charcoal color?
Jenny
January 12, 2020 at 7:20 pmI usually try to thin it to the point of heavy cream for spraying this paint – and I used a 50/50 mix for the paint color that you see here.
Haley
February 23, 2020 at 10:41 pmWhich size of product did you use of each color? 8, 16, or 32 oz?
Jenny
February 27, 2020 at 8:10 pmI think I got the larger sizes of the paint because I can always use extra paint for something!
D. Moore
March 14, 2020 at 7:38 pmBeautiful piece!!! Do you have a paint booth? Or where do you spray your pieces?
Jenny
March 20, 2020 at 8:43 amI have a workshop now where I spray my pieces with a booth that I’ve set up. 🙂
zest4travel
April 9, 2020 at 3:26 pmCan this be accomplished easily without a sprayer? I have only used chalk paint.
Jenny
April 15, 2020 at 11:47 amA sprayer is really key to minimizing brush marks, and chalk paint doesn’t lend itself to a smooth finish in general. If you had good brushes/rollers and a good self-leveling paint, it would be possible, but it takes practice.
Derek
April 25, 2020 at 12:55 pmHey Jenny! Few questions!
What sander do you use?
How much of each paint did you mix together?
How much water was added?
And lastly what machine did you use to pray the paint?
Thank you so much!
Jenny
April 26, 2020 at 3:09 pmI have a few different sanders – two Festool sanders and now a Surfprep sander. I used one of my Festool sanders for this piece. As for the paint, I did a 50/50 mix of the two paint colors, and only thinned it a little bit so that it would flow smoothly through my sprayer. I have a Titan Capspray HVLP sprayer, but I started out with an HVLP conversion gun that is very similar to what I used now, only you connect it to your air compressor. Here is a link (affiliate) to the conversion gun that I used when I first started spraying. It served me well! https://amzn.to/3eOOljc
Judy
June 26, 2020 at 1:13 pmHi, I just found you by accident! I love what you did with this dresser! I just did my bdrm suite in gray and painted the old hardware in a shiny black and I love it!
Carrie Malone
July 9, 2020 at 12:50 pmWhere did you get the hardware?
Jenny
July 23, 2020 at 4:16 pmThe hardware is original to the dresser.
Maddie
July 23, 2020 at 7:20 pmWhat color rub n buff did you use?
Jenny
July 31, 2020 at 11:53 pmI’m not sure – I have all of them!
Lori
July 29, 2020 at 5:32 pmWhat colours did you mix? Looks bluer than the atelier & black.sorry if I missed you saying it.
Jenny
July 31, 2020 at 11:51 pmI did a 50/50 mix of Atelier and Black.
Cinthya
February 24, 2021 at 3:27 amThis is gorgeous! It’s the perfect shade too.
Jan Lockhart
June 19, 2021 at 9:16 amThis is beautiful. I do have one question: it looks like you used a top coat finish instead of a wax, right? If so, what was the reasoning? I am wanting to add a dresser to a bathroom we’re remodeling and I like the idea of having a top coat instead of the regular wax finish but I wasn’t aware that you could do that. Any info or suggestions you can give would be greatly appreciated. Thanks!
Jenny
June 23, 2021 at 9:33 amI’m just a fan of top coating with some sort of clear coat vs. wax because I like the sprayed finish.
Carol
July 5, 2021 at 11:23 pmIt has been my understanding that brush marks are a good thing. Hand painted equals high quality. People pay more for that look. The sprayed finish is just a bit too perfect for me.
Jenny
July 19, 2021 at 5:30 pmIn some cases that’s true – it’s more of an individual taste, really.
kelly f
December 27, 2021 at 11:35 amI love this dresser! I have an old armour that has been in the basement collecting dust. This colour would be incredible for a refresh and moved to a bedroom. Thank you for all the details. This will be my first project! You have inspired me.